How to Mix Floor Leveler Without Getting Those Annoying White Clumps
Most guys skip the leveling compound. They think the underlayment will hide the dip. It won’t. I spent three days grinding concrete on a job last month just so the floor wouldn’t click like a castanet. That job was supposed to be a simple laminate install. Instead, it became a battle against a slab that looked like the surface of the moon. I have spent 25 years on my knees with a moisture meter and a straightedge. I smell like WD-40 and oak dust. I have seen every shortcut in the book and I am here to tell you that a floor is only as good as the subfloor beneath it. If you mess up the mix, you are dead in the water. Those annoying white clumps are not just an eyesore. They are unhydrated polymer pockets that represent a structural failure in your floor leveling project.
The chemical betrayal inside the bucket
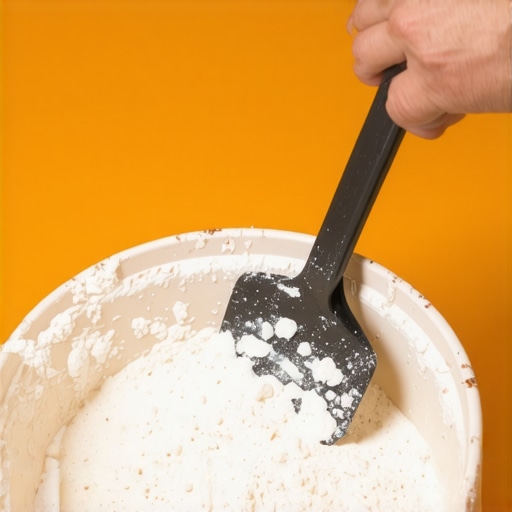
To prevent white clumps in floor leveler, you must prioritize the sequence of addition and the shear force of the mix. Always add the powder to the water, never the water to the powder. Use a high-torque, low-RPM drill with a specialized eggbeater paddle to ensure the polymer-modified cementitious particles are fully hydrated. This process is about chemistry, not just stirring. When you see white clumps, you are looking at dry centers where the water failed to penetrate the surface tension of the powder. This happens because the outer layer of the powder particles hydrates too quickly, forming a protective shell that keeps the inside dry. In a professional laminate or carpet install, these clumps create high spots. Under a thin-set bed for showers, they create points of failure. The chemistry of self-leveling underlayment (SLU) relies on calcium aluminate cement. This is not your standard bag of Quikrete. It is a high-tech slurry designed to flow. When clumps persist, the flow rate is compromised. The specific gravity of the mix changes. You end up with a floor that is neither level nor flat. It is a mess. I have seen $15,000 wide-plank floors ruined because of subfloor neglect. Do not let your floor be the next casualty. You need to understand the molecular reality of the bucket. Every clump is a tiny bomb waiting to crack under the pressure of foot traffic.
“A floor is only as good as the subfloor beneath it; deflection is the enemy of every joint.” – Master Flooring Axiom
The RPM threshold for structural integrity
The ideal drill speed for mixing floor leveler is between 600 and 900 RPM to avoid air entrainment while ensuring total hydration. Excessive speed introduces pinholes into the cured surface by whipping air into the polymer chain. Low speed fails to break down the surface tension of the cementitious powder. If you use a standard high-speed construction drill, you are asking for trouble. You will get bubbles. You will get clumps. I use a dedicated mixing station. The mechanical shear must be consistent. The paddle should be a dual-vane or eggbeater style that pulls the bottom material upward. If the paddle just spins the liquid, the heavy aggregates settle. This leads to a weak, dusty surface once the floor dries. A weak surface will not hold the adhesive for a carpet install. It will definitely not support the locking mechanisms of a heavy laminate plank. I have seen guys try to use a cordless drill for this. It is a joke. The battery dies halfway through the second bag and the mix starts to set up in the bucket. Now you have a bucket of expensive rocks. You need constant power and constant torque. This is about mechanical advantage. The vortex created by the paddle must be deep enough to suck the powder into the eye of the storm but not so violent that it creates a foam. Foam is the enemy. Foam is just air masquerading as floor.
Water ratios and the death of the binder
Strict adherence to the manufacturer water ratio is the most important factor in avoiding clumps and ensuring a high-strength bond. Even an extra half-pint of water can cause the polymers to separate from the sand, leading to a chalky finish. Use a calibrated measuring bucket for every single bag poured. Many installers think they can eyeball the consistency. They are wrong. Self-leveling compounds are engineered with a specific water-to-powder ratio to achieve their rated compressive strength. If you add too much water, the mix becomes “over-watered” and the sand settles to the bottom while the white polymers float to the top. This creates a brittle, white crust that will delaminate under a laminate floor. If you add too little, the clumps are inevitable because there is not enough solvent to wet the entire surface area of the powder. I keep a dedicated water bucket that is marked with a permanent marker for the exact line. No guessing. No “looks good to me.” The physics of the bond depend on this. In showers, where moisture is a constant threat, an over-watered leveler will eventually turn back into mush. It is a disaster waiting to happen. The chemical bond requires every molecule of water to be consumed by the hydration of the cement.
| Compound Type | Janka Compatibility | Water Ratio (Quarts) | Cure Time |
|---|---|---|---|
| Standard SLU | High | 5.5 – 6.0 | 24 Hours |
| Fiber Reinforced | Medium | 5.0 – 5.5 | 16 Hours |
| Fast Setting | Extreme | 4.5 – 5.0 | 4 Hours |
The 1/8 inch that ruins everything
Surface preparation is the hidden step that prevents leveler clumps from failing to bond to the substrate. You must prime the subfloor with a high-solids acrylic primer to seal the pores of the concrete or wood. Unprimed substrates suck the water out of the leveler too fast. This flash-drying causes the mix to stiffen before the clumps can be worked out. I have seen installers pour leveler onto dry plywood. The plywood acts like a sponge. It robs the leveler of its lifeblood. The result is a floor that looks like a dried-out lake bed. Cracks everywhere. When you prime, you create a controlled environment. The leveler stays fluid longer. This gives you time to use a spike roller. A spike roller is the secret weapon for a clump-free floor. It pops the bubbles and breaks down any remaining micro-clumps. If you are doing a carpet install, you might think a little bump doesn’t matter. You are wrong. Every bump is a wear point. Over time, the carpet backing will rub against that clump and wear through. It starts with a click. Then a crunch. Then a hole. I don’t play that game. I prep until the floor is a mirror.
- Vacuum the entire subfloor to remove every grain of dust
- Apply primer with a 3/8 inch nap roller for even coverage
- Seal all perimeter gaps with spray foam or caulking to prevent leaks
- Measure water to the exact milliliter before opening the bag
- Mix for a full two to three minutes until the slurry is silky
The ghost in the expansion gap
Expansion gaps at the perimeter are mandatory to allow the leveled floor to move independently of the wall structure. If you pour leveler flush against the studs, the floor will eventually buckle or crack as the house settles and shifts. Use foam expansion strips to maintain a 1/4 inch boundary. People forget that buildings are living things. They breathe. They move with the seasons. If you lock your leveler to the walls, you are creating a rigid plate that has nowhere to go. When the humidity hits, the floor will heave. I have seen laminate floors pop up two inches off the ground because the installer didn’t leave a gap. The leveler is the foundation of that movement. It must be free. This is especially true in showers where thermal expansion is a daily occurrence. The heat from the water expands the tile and the substrate. Without a gap, the grout lines will crack first. Then the tiles will tent. It is an expensive mistake. I always use a foam sill sealer around the edges. It keeps the leveler in the room and out of the wall cavities. It also prevents the leveler from leaking down into the basement or crawlspace. I once saw a guy lose ten bags of leveler down a hole in the corner of a closet. He didn’t even notice until he went downstairs and saw his furnace covered in grey sludge.
“Substrate preparation is 90 percent of the job; the finish flooring is just the victory lap.” – TCNA Handbook Refrain
Why your subfloor is lying to you
A subfloor might look flat to the naked eye but a ten-foot straightedge will always reveal the truth of the dips and crowns. Never trust your eyes when a laser level or a professional string line can provide the actual elevation data. Floor leveling is a game of precision measurement. I have had homeowners tell me their floor is “perfectly flat.” I pull out my Bosch laser and show them a half-inch dip in the center of the room. Their jaws drop. If you try to install laminate over that dip, the tongues and grooves will snap within six months. The floor will feel like a trampoline. That is why we level. But if your leveling mix is full of clumps, you are just replacing a large dip with several small bumps. It is a lateral move at best. You need that mix to be a liquid mirror. It should flow like heavy cream. If it looks like oatmeal, you have failed. Start over. Clean the bucket. Check your water. The chemistry doesn’t lie. Only people do. When I mix, I look for a specific sheen on the surface. That sheen tells me the polymers are correctly suspended. It tells me the floor will hold. It tells me I can sleep at night knowing that floor will still be flat when I am long gone.