How to Level a Floor That Slopes in Two Different Directions
The reality of a floor that moves in two directions
Leveling a floor that slopes in two different directions requires mapping the convergence of two distinct planes to find the lowest common point of the room. This process involves using a self-leveling underlayment or a series of structural shims to create a single, unified horizontal plane that meets industry standards. Most guys skip the leveling compound. They think the underlayment will hide the dip. It won’t. I spent three days grinding concrete on a job last month just so the floor wouldn’t click like a castanet. I have spent twenty five years on my knees with a moisture meter and a level, and I can tell you that a compound slope is the ultimate test of an installer. You are not just dealing with a tilt. You are dealing with the physics of a house settling, joists fatiguing, or a foundation that was poured by someone who was in too much of a hurry to get home. When you walk into a room and the floor drops toward the north wall and simultaneously dives toward the west corner, you have a compound slope. This is where most DIY projects fail. You cannot just throw laminate over this and hope for the best. The locking mechanisms will snap within six months because the floor is constantly flexing into those voids. I smell like WD-40 and oak dust right now because I just finished fixing a mess where someone tried to hide a two inch drop with three layers of carpet padding. It was a disaster.
The structural science of the compound slope
A compound slope represents a three dimensional geometric challenge where the subfloor surface exists on multiple axes of deflection simultaneously. To fix this, you must identify the highest point in the entire room and use it as your benchmark for every other measurement across the joist spans. When you have two slopes, you have a valley. That valley is often the result of a load bearing wall pushing down or a crawlspace pier that has sunk into the mud. You have to think about the physics of the load. If you are preparing for a tile job in showers, the slope is intentional for drainage, but in a living room, it is a structural failure. The National Wood Flooring Association is very clear about this. If your floor varies by more than 3/16 of an inch over a ten foot radius, you are out of spec.
“A floor is only as good as the subfloor beneath it; deflection is the enemy of every joint.” – Master Flooring Axiom
This is not just a suggestion. It is the difference between a floor that lasts fifty years and one that fails in five. I have seen fifteen thousand dollar wide plank walnut floors cupping like potato chips because the installer did not check the humidity and the levelness of the subfloor. It is heartbreaking to see good wood ruined by bad preparation.
Mapping the topography of a failing room
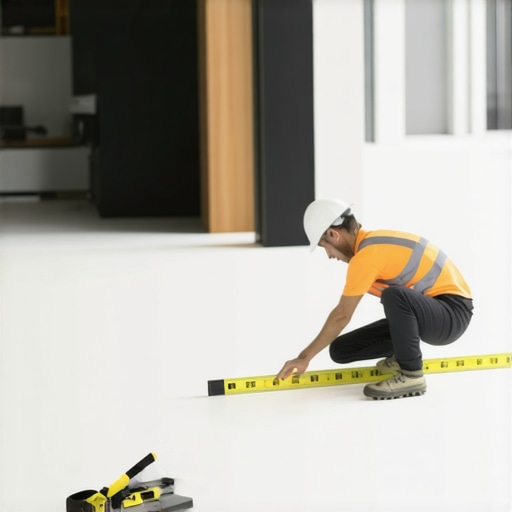
Mapping a compound slope involves using a rotary laser level to project a perfectly horizontal line across all four walls, allowing you to measure the distance from that line to the floor at one foot intervals. This grid creates a topographical map of the subfloor’s high and low spots. You cannot trust a six foot level for this. You need a laser. I set mine up in the center of the room and mark the height on the baseboards or the studs. Then I take a tape measure and start recording the depth. If the high point is at zero, and the corner is at negative two inches, you know exactly how much volume of material you need. This is where the chemistry comes in. If you are pouring a self leveling underlayment, you need to understand the hydrostatic pressure of the wet material. It wants to go to the lowest point. If you have a compound slope, the material will flow into the corner. If you do not have enough, you will just end up with a slightly less deep hole. You need to calculate the cubic footage of the voids perfectly. I always overbuy by twenty percent because running out of leveler in the middle of a pour is a nightmare that results in cold joints.
The chemistry of high performance leveling compounds
Self leveling underlayments are polymer modified cements designed to have high flowability and rapid strength gain, often reaching 5000 PSI within twenty four hours. These products rely on cross linking polymers to maintain structural integrity even when poured at thin transitions. You aren’t just pouring wet concrete. You are pouring a highly engineered chemical soup. The water to powder ratio must be exact. If you add too much water, the polymers separate and you get a chalky, weak surface that will crumble under the weight of your furniture. If you add too little, it won’t flow, and you will be left with ridges that you have to grind down later. I prefer to use a high torque drill and a specialized mixing paddle to ensure no dry clumps remain. When you are dealing with a floor that slopes in two directions, you often have to do the pour in stages or use a damming material to keep the leveler from escaping into other rooms. This is especially important in older homes with balloon framing where the floor might actually be open to the wall cavities. You do not want five gallons of expensive leveler disappearing into your basement.
Why thinset and underlayment cannot hide a slope
Thinset and foam underlayments are designed for bonding and cushion, not for structural leveling or filling significant voids in a sloped subfloor. Attempting to use these materials to level a floor leads to compression failure and the eventual snapping of flooring tongues and grooves. Many homeowners think they can just double up on the foam pad for their laminate. That is a lie. Too much cushion actually causes the locking mechanisms on LVP or laminate to snap under pressure because the floor is bouncing too much. It is like trying to build a house on a sponge. You need a dead flat surface. I tell people that flat is more important than level. A floor can be slightly out of level and still function perfectly as long as it is flat. But a compound slope is neither level nor flat. It creates a twisting force on the planks. If you are doing a carpet install, you have more leeway, but even then, a major slope will be felt underfoot and will cause uneven wear patterns on the carpet fibers over time. You will see the path where people walk because the pile will crush differently on the incline.
| Method | Max Depth | Cure Time | Flexural Strength |
|---|---|---|---|
| Self-Leveling Underlayment | 5 inches | 4-24 hours | 5000 PSI |
| Patching Compound | 1/2 inch | 1-2 hours | 3500 PSI |
| Plywood Shimming | Variable | Immediate | Structural |
| Sand and Cement Mortar | 2 inches | 28 days | 3000 PSI |
Precision grinding for a flat surface
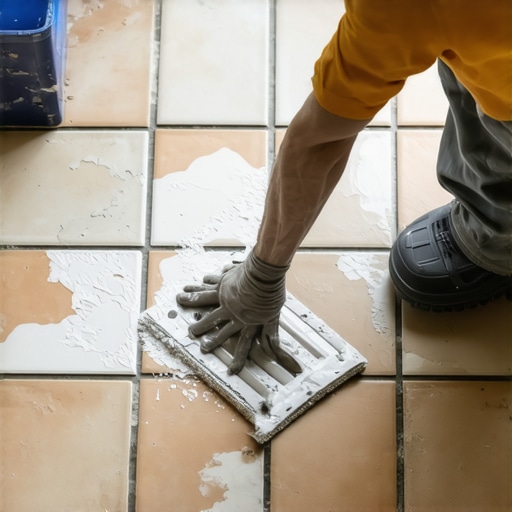
Grinding high spots in a subfloor requires a diamond cup wheel and a high volume vacuum system to manage the silica dust generated during the process. This is the necessary first step before applying any leveling compounds to ensure a clean, bondable surface. Sometimes the slope isn’t just a dip. Sometimes the middle of the room is high. If you have a humped subfloor, you have to take the mountain down before you fill the valleys. I wear a respirator and ear protection for this. It is loud, it is dirty, and it is the most important part of the job. You have to get through the laitance of the concrete or the wax on the plywood to get to the good stuff. If you don’t, your leveler won’t stick. It will de-bond, and then you have a floating sheet of concrete under your floor that will crack and crunch every time you step on it. I have spent whole days just grinding. It is the part of the job that separates the pros from the hacks. The hacks just pour over the dust. The pros know that a clean surface is the only way to get a permanent bond.
Preparing for laminate and carpet install over uneven ground
Laminate and carpet installations have different subfloor requirements, with laminate requiring a much tighter tolerance of 1/8 inch over six feet to prevent joint separation. Carpet can tolerate larger slopes but still requires the removal of sharp transitions to prevent premature wear. If you are putting in laminate, you need to be a perfectionist. The compound slope will kill a laminate floor in a year. The constant clicking noise of the planks hitting the subfloor will drive you crazy. For carpet, you can get away with more, but if you have a steep slope in two directions, the carpet will actually want to pull away from the tack strips on the high side. You need to smooth out the transitions. I often use a feather finish compound to ramp the slopes so the change in elevation is gradual. This prevents the tripping hazards that occur when a floor suddenly drops off. In areas like the Pacific Northwest, where the humidity is high, you also need to worry about how that subfloor prep interacts with moisture. You need a vapor barrier that is rated for the specific conditions of your slab.
The 1/8 inch that ruins everything
The industry standard for floor flatness is typically 1/8 inch variation over a six foot span, a measurement that must be strictly maintained to ensure the longevity of modern floating floor systems. Even a minor deviation beyond this can lead to catastrophic failure of the locking system. It sounds like a small amount, but 1/8 of an inch is a massive gap in the world of flooring. When a 200 pound person walks across a plank that is bridging an 1/8 inch gap, that plank flexes. It does that thousands of times a year. Eventually, the tongue made of HDF or plastic just gives up. It snaps. Now you have a gap that opens up every time you walk by. It catches dirt. It lets moisture in. It ruins the floor.
“Subfloor preparation is the foundation of every successful installation; ignore the level at your own peril.” – TCNA Handbook Reference
I tell my apprentices that if they don’t spend more time on the subfloor than the actual flooring, they aren’t doing it right. The floor is just the skin. The subfloor is the skeleton. If the skeleton is crooked, the body won’t work.
- Inspect for subfloor rot and structural integrity.
- Measure moisture content using a pin or pinless meter.
- Vacuum every speck of dust and debris from the surface.
- Prime the surface twice with a high quality acrylic primer.
- Mix the leveling compound with a high torque drill.
- Use a gauge rake to spread the material at the correct depth.
- Finish with a spiked roller to release trapped air bubbles.
Moisture barriers and the coastal humidity factor
Moisture vapor transmission through a concrete slab can delaminate leveling compounds and cause organic flooring materials to swell or rot if a proper vapor barrier is not installed. In humid climates, this risk is amplified by the constant pressure of ground moisture. If you are in a place like Florida or Houston, the humidity is your constant enemy. You can’t just pour leveler on a slab and call it a day. You need to test the calcium chloride emissions or use an electronic probe. If the moisture is too high, you need a topical moisture vapor barrier. This is a thick, epoxy based coating that seals the concrete. You apply it before the leveler. If you skip this, the moisture will eventually turn your leveler back into mush or grow mold under your laminate. I have seen floors where the leveler just lifted off in giant sheets because the moisture underneath was so high it broke the bond. It is a expensive mistake to fix. You have to rip everything out, grind it all back down, and start over. Do it right the first time so you don’t have to do it twice.
The final walk of a level floor
When the leveler has cured and you walk across that room, it should feel like walking on a sheet of glass. No dips. No rises. No slopes. Just a solid, flat plane. That is the goal of every master installer. It takes patience and a lot of technical knowledge to handle a compound slope, but the result is a floor that will last a lifetime. You won’t hear any creaks. You won’t see any gaps. You will just have a perfect surface. I take pride in that. I might have sawdust under my nails and my knees might ache, but when I see a perfectly level floor in a room that used to look like a funhouse, I know I’ve done my job. Don’t let a salesperson tell you that a thick pad will fix your problems. It won’t. Get a laser, get some leveler, and do the work. Your floor deserves a solid foundation. Any architect will tell you that the beauty of the design is only as strong as the engineering beneath it. Flooring is no different. It is a structural challenge that requires a structural solution. {“@context”: “https://schema.org”, “@type”: “HowTo”, “name”: “How to Level a Floor That Slopes in Two Different Directions”, “step”: [{“@type”: “HowToStep”, “text”: “Map the floor topography using a rotary laser level and grid system.”}, {“@type”: “HowToStep”, “text”: “Grind down any high spots and vacuum the surface thoroughly.”}, {“@type”: “HowToStep”, “text”: “Apply a dedicated primer to the subfloor to ensure chemical bonding.”}, {“@type”: “HowToStep”, “text”: “Mix and pour self-leveling underlayment to the highest marked point.”}, {“@type”: “HowToStep”, “text”: “Allow to cure for 24 hours before installing the final floor covering.”}]}