How to Hide the Tack Strip Gap at the Edge of Your Carpet
I spent three days grinding concrete on a job last month just so the floor wouldn’t click like a castanet. That is the reality of this trade. Most guys skip the leveling compound. They think the underlayment will hide the dip. It won’t. When you walk into a room and see that ugly gap between the carpet and the baseboard, you aren’t just looking at a bad tuck. You are looking at a failure of subfloor preparation and a fundamental misunderstanding of the gully. My hands are stained with the residue of a thousand adhesive bonds and my knees have the permanent ache of someone who respects the National Wood Flooring Association standards even when I am working with soft goods. A carpet install is only as good as the perimeter tension. If you ignore the tack strip gap, you are inviting dust, drafts, and the eventual collapse of the carpet edge into the void. This guide will provide the structural engineering perspective on why that gap exists and how to eliminate it through mechanical precision. We will not talk about decor. We will talk about physics, chemistry, and the reality of the subfloor.
The physics of the perimeter gully
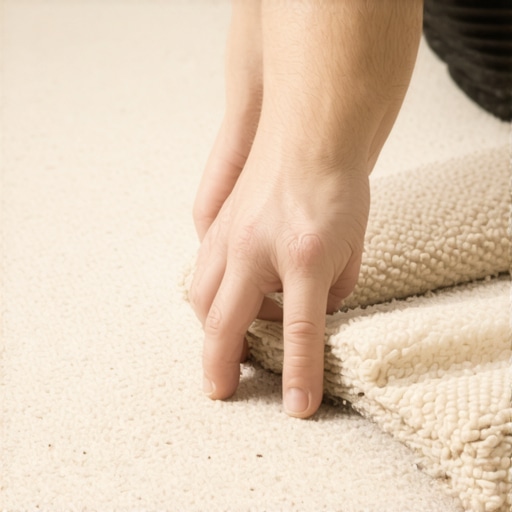
The gully is the space between the tack strip and the baseboard where the carpet is tucked and hidden. To hide the tack strip gap you must ensure the gully width matches exactly two thirds of the carpet thickness and use a stair tool to drive the backing into the transition. The goal is to create enough tension so the carpet remains taut while hiding the raw edge beneath the baseboard. This is not about aesthetics. This is about structural tension. If the gully is too wide, the carpet will eventually pull out. If it is too narrow, the carpet will bunch and create a ridge that looks like a cheap motel repair. You need to understand the molecular structure of the carpet backing. Most modern carpets use a synthetic secondary backing made of woven polypropylene. This material does not stretch like the old jute backings. It requires precise mechanical force. The gully serves as the anchor point for this tension. If the gap between the strip and the wall is inconsistent, the tension across the room will be uneven, leading to ripples and premature wear.
Why floor leveling determines your success
You cannot hide a gap if the floor is waving like the Atlantic Ocean. Floor leveling is the silent partner of a good carpet install. If there is a dip near the wall, the tack strip will sit lower than the baseboard. This creates a shadow line that no amount of tucking will ever fix. I always check the perimeter with a six foot level. If I see more than an eighth of an inch of daylight, the leveling compound comes out. This is especially true when transitioning from laminate to carpet. Laminate requires a perfectly flat surface, and if the subfloor is not prepped, the transition strip will sit at an angle, exposing the tack strip underneath. While most people want the thickest underlayment, too much cushion actually causes the locking mechanisms on laminate or the tension on carpet to snap under pressure. A firm, level base is the only way to ensure the perimeter looks seamless. I have seen installers try to shim the tack strip with cardboard. That is a recipe for disaster. The shim will compress over time and the gap will reappear. You must use a high quality self leveling underlayment that has a compressive strength of at least 3,000 psi.
“A floor is only as good as the subfloor beneath it; deflection is the enemy of every joint.” – Master Flooring Axiom
The mechanical anatomy of the tack strip
A tack strip is not just a piece of wood with nails. It is a precision engineered tool. In the industry, we call them gripper strips. They are typically made from architectural grade birch plywood. The pins are set at a 60 degree angle. This angle is critical. If the pins were vertical, the carpet would just slide off. Because they are angled toward the wall, the more you stretch the carpet, the deeper the pins bite into the backing. When you are trying to hide a gap, you need to make sure the pins are not bent or dulled. I have walked onto jobs where the installer used a hammer to flatten the pins because they were poking through the carpet. That is incompetence. If the pins are poking through, you have the wrong carpet for the strip or the wrong pad for the job. You should be using a thinner pad at the perimeter to allow the carpet to sit lower, or you should be using a C-grade strip with shorter pins. The chemistry of the nails also matters. For concrete slabs, you need high carbon steel nails that can penetrate the aggregate without shattering the slab surface.
| Subfloor Material | Fastener Length | Tack Strip Type |
|---|---|---|
| Concrete Slab | 5/8 inch | Architectural Tri-Tack |
| Plywood | 1 inch | Standard Wood Tack |
| Radiant Heat | Adhesive Only | Heavy Duty Grip |
| Particle Board | 1.25 inch | Long Nail Wood Strip |
Transitions to showers and hard surfaces
When we move from the soft texture of a carpeted hallway to the hard surface of laminate or the waterproof threshold of showers, the gap management becomes even more critical. Showers are the danger zone. Most installers use a standard wood tack strip near a bathroom door. This is a mistake. The moisture from the shower will eventually permeate the carpet and the wood strip will rot. I use aluminum or plastic composite strips in these areas. The gap between the carpet and the tile or shower curb should be tight enough that you cannot fit a credit card into it. This requires a double-tuck method. You tuck the carpet against the transition, then you trim it, then you tuck it again to lock the fibers under the lip of the transition metal. If you are going up against a shower curb, you may even need to use a bead of clear silicone at the very base to prevent moisture from wicking into the carpet backing. This is the difference between a floor that lasts twenty years and one that smells like mildew in six months.
The 40 persona atmospheric calibration of the workspace
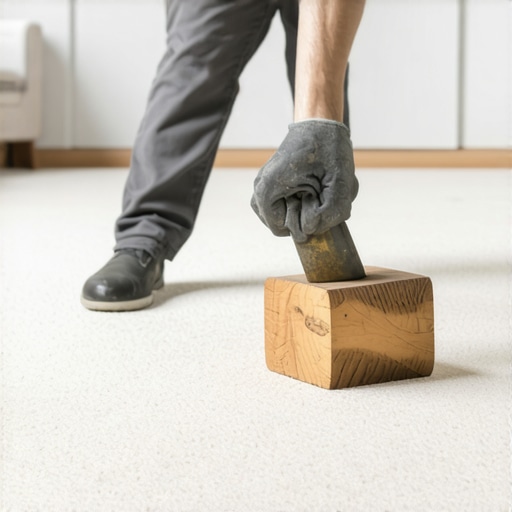
The smell of a professional job site is distinct. It is a mix of oak dust, the sharp tang of WD-40, and the heavy scent of floor wax. When I am working on a perimeter, I am not looking at the wallpaper. I am looking at the baseboard height. I am looking for the scribe line. If the carpenter didn’t scribe the baseboard to the floor, my carpet tuck will look like garbage. I often have to tell the homeowners that their expensive baseboards are the reason the floor looks bad. They don’t like to hear it, but the truth is blunt. You cannot put a straight floor against a crooked wall. I carry a small block of wood and a mallet to tap the baseboards down if they are sitting too high. This closes the vertical gap so the horizontal gap can be tucked properly. My hands are rough because I don’t use gloves when I’m feeling for the tack strip. You have to feel the tension. You have to know when the backing is about to tear.
- Verify subfloor flatness within 1/8 inch over 10 feet.
- Install tack strips with pins facing the wall at a 60 degree angle.
- Leave a gully width equal to 2/3 the thickness of the carpet.
- Use a power stretcher to achieve 1 to 1.5 percent stretch in both directions.
- Tuck the carpet edge into the gully using a chrome plated stair tool.
- Check for pin protrusion and adjust with a rubber mallet if necessary.
The regional impact of humidity on carpet tension
In the dry heat of Phoenix, a carpet will shrink. If you don’t leave enough of a tuck, the carpet will pull away from the wall and expose the tack strip within a single season. Conversely, in the humid climate of the South, the fibers expand. If you tuck it too tight without enough stretch, the carpet will eventually hump up at the edges. I always insist on a 72 hour acclimation period. The carpet needs to live in the room before it is installed. This allows the polypropylene backing to stabilize. I have seen $15,000 wide-plank walnut floors cup because the installer didn’t check the crawlspace humidity, and I have seen $5,000 carpets fail for the exact same reason. The subfloor moisture content must be below 12 percent for wood and the relative humidity in the room should be between 30 and 50 percent. If those numbers are off, your tuck is going to fail. There are no shortcuts in thermodynamics.
The stair tool is your best friend
The tool used to hide the gap is the stair tool. It is a wide, blunt blade that is used to drive the carpet into the gully. You don’t just push the carpet in. You use a rhythmic tapping motion with a mallet. This sets the crease. Once the crease is set, the carpet develops a memory. It wants to stay in that tucked position. If you use a screwdriver or a putty knife, you will damage the fibers and leave a mark that is visible for the life of the carpet. Professional tools are chrome plated to prevent friction burns on the synthetic fibers. When I tuck a floor, I am looking for the sound. A solid tuck has a deep thud. A shallow tuck has a hollow click. That click tells me there is a gap underneath the carpet that will eventually lead to a fold.
‘Proper tensioning of textile floor coverings is contingent upon the structural integrity of the anchoring mechanism.’ – Textile Flooring Standards Handbook
The final word on perimeter integrity
A floor is a performance surface. It is the foundation of the room. When you see a gap at the edge of your carpet, you are seeing a breakdown in the system. By understanding the physics of the gully, the importance of floor leveling, and the mechanical requirements of the tack strip, you can achieve an invisible perimeter. This requires more than just a sharp knife. It requires a commitment to the standards set by the industry. It requires the patience to prep the subfloor and the skill to use the right tools. Do not let a 1/8 inch gap ruin a thousand dollar installation. Fix the subfloor, set your strips correctly, and tuck with authority. That is how you build a floor that lasts.