The Carpet Kicker Mistake That Damages Your Baseboards
I spent three days grinding concrete on a job last month just so the floor would not click like a castanet. Most guys skip the leveling compound. They think the underlayment will hide the dip. It won’t. I was out there with a diamond cup wheel and a HEPA vacuum because the slab looked like the rolling hills of Kentucky. If I had just thrown the laminate down, the locking tracks would have snapped within six months. This same lack of precision is what leads to the most common carpet install failure. Most homeowners and even some green installers do not realize that the carpet kicker is a tool of surgical tension, not a sledgehammer. When that tool is mismanaged, the baseboard is the first thing to die.
The brutal physics of a knee kicker strike
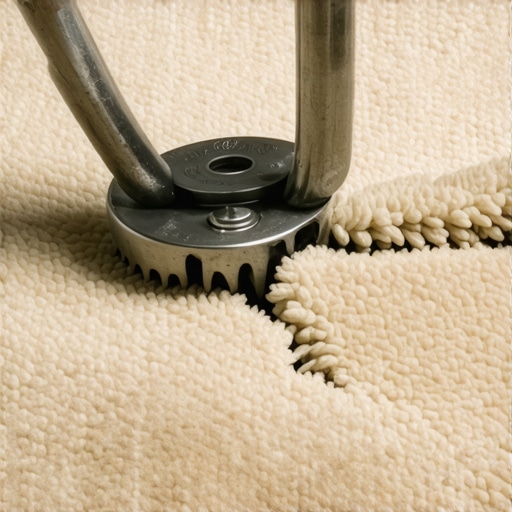
A carpet kicker mistake occurs when the installer uses the tool to propel the carpet forward without a secondary power stretcher, causing the head of the kicker to slam into the baseboard or the drywall. This kinetic energy transfer results in crushed wood fibers, cracked paint, and structural loosening of the trim. The tool is designed to engage the teeth of the tack strip, not to serve as a battering ram. When you look at the mechanics of a carpet install, you are dealing with significant force. A standard knee strike can generate hundreds of pounds of pressure per square inch. If the head of the kicker is not angled correctly, that pressure is redirected from the carpet backing into the vertical surface of the baseboard. This is especially true with MDF baseboards, which have almost zero impact resistance. The microscopic wood fibers in MDF are held together by resin. A single misplaced blow from a kicker head compresses these fibers beyond their elastic limit. You are left with a permanent indentation that no amount of wood filler can truly hide. It is a structural failure of the material surface.
Why your subfloor is lying to you
Floor leveling is the foundational requirement for any successful flooring project because an uneven subfloor creates voids that allow the carpet or laminate to flex vertically. This vertical movement places undue stress on the perimeter fasteners and the baseboards themselves. Most people think carpet is forgiving. They think they can hide a quarter inch dip in the plywood or concrete. They are wrong. When the carpet spans a low spot, it creates a trampoline effect. Every time you walk near the wall, the carpet pulls away from the tack strip. The installer tries to fix this by over-kicking the perimeter. They beat the kicker harder to get the carpet to stay down in the dip. That is when the baseboard gets hammered. I have seen guys try to install carpet over old adhesive ridges from a previous vinyl floor. Those ridges create high spots that make the kicker skip. You have to scrape that slab clean. You have to use a high-quality leveling compound like a polymer-modified gypsum or a rapid-setting cementitious underlayment. If the subfloor is not within one eighth of an inch over a ten foot radius, you are asking for trouble. The physics of the installation will eventually catch up to you.
“A floor is only as good as the subfloor beneath it; deflection is the enemy of every joint.” – Master Flooring Axiom
The chemistry of the tack strip bond
The tack strip is the only thing holding that carpet under tension. It is a thin strip of Douglas fir or birch plywood with angled steel pins. The mistake most installers make is placing the strip too close or too far from the baseboard. There should be a gap exactly two thirds the thickness of the carpet. If that gap is too tight, the installer has to force the carpet down with a stair tool and a kicker. This creates a leverage point against the baseboard. We also have to consider the adhesive chemistry. In many modern homes, these strips are glued down to concrete using high-strength construction adhesives. If the slab is off-gassing moisture, that bond fails. I always use a calcium chloride test or an in-situ RH probe to check the slab. If the humidity is over 75 percent, your tack strip will pop. When the strip pops, the tension is lost, and the carpet starts to ripple. Then the homeowner calls me to fix it, and I find the baseboards are already shredded from the original installer trying to kick the carpet back into place on a failing strip.
The ghost in the expansion gap
Laminate flooring requires a perimeter expansion gap of at least one quarter inch to allow for the natural movement of the material during seasonal humidity changes. If the laminate is installed too tight against the baseboard, it will buckle and lift the trim right off the wall. People think laminate is plastic so it does not move. That is a lie. The core of laminate is usually HDF or high density fiberboard. This material is incredibly thirsty. In a high-humidity environment, those boards will swell. If they have nowhere to go, they will push against the baseboard with enough force to pull the finish nails through the studs. This is why I always remove the baseboards before a laminate install. Never use quarter round as a shortcut. It looks cheap and it hides poor craftsmanship. Take the time to pull the trim. It gives you the chance to check the drywall for moisture and ensure your floor has the room it needs to breathe. If you are in a region with high humidity like the coast, this gap is even more vital. You are not just laying a floor. You are managing a dynamic system of wood and air.
| Material Type | Impact Resistance | Moisture Tolerance | Repair Difficulty |
|---|---|---|---|
| MDF Fiberboard | Very Low | Very Low | High |
| Finger Jointed Pine | Moderate | Moderate | Low |
| Solid White Oak | High | Moderate | Medium |
| Cellular PVC | High | High | Very High |
How moisture in showers migrates to your carpet
Showers and wet areas must be properly tanked with a waterproof membrane like Kerdi or a liquid-applied guard to prevent moisture from migrating through the wall studs into the adjacent carpeted rooms. This moisture migration causes the tack strips to rot and the baseboards to swell. I have walked into bedrooms where the carpet smells like a swamp near the bathroom wall. It is almost always a failure of the shower pan or the lack of a vapor barrier. The moisture travels through the capillary action of the wood plates. Once it hits the carpeted side, it saturates the padding. The padding acts like a sponge. The installer comes in to restretch the carpet because it is bubbling, and they start kicking against baseboards that are already soft from rot. The wood just disintegrates under the tool. You cannot fix a flooring problem until you fix the plumbing and the waterproofing. If you are doing a renovation, check the moisture levels in the bottom plate of the wall before you ever let a carpet guy near it with a kicker.
“Moisture vapor emission rate must not exceed three pounds per one thousand square feet in twenty four hours.” – TCNA Standard
The mechanical failure of builder grade trim
The quality of the trim determines how much abuse it can take. Builder grade MDF is the enemy of the professional installer. It is essentially compressed paper. When the teeth of a carpet kicker or the blade of a stair tool hit it, the surface tension is broken. Once that factory primer is breached, the material absorbs ambient humidity and begins to flake. If you want a floor that lasts, invest in solid wood trim. Even a soft wood like pine is better than MDF. It has a cellular structure that can rebound from minor impacts. When I am doing a high-end carpet install, I tell the client that their baseboards are at risk if they stay with the cheap stuff. I prefer to install the carpet first and then the baseboards on top, but that is not always possible in a remodel. If the trim is already there, I use a protective shim or a wide-blade bolster to distribute the force. It takes longer, but it keeps the paint from cracking.
Essential checklist for a damage free installation
- Inspect subfloor for high spots and grinding requirements before the carpet arrives.
- Verify that all baseboards are nailed into studs and not just the drywall.
- Confirm the moisture content of the concrete slab is below 4 percent using a reliable meter.
- Use a power stretcher for the main tensioning and reserve the kicker for the final tuck.
- Check that the tack strip gap is consistent and appropriate for the carpet pile height.
- Ensure that transitions to laminate or tile are secure and do not rely on the baseboard for pressure.
The reality of flooring is that it is a trade of margins. One eighth of an inch is the difference between a floor that lasts thirty years and one that fails in three. When you see an installer relying solely on a knee kicker, you are watching someone take a shortcut. The power stretcher is a heavy, awkward tool. It requires setup and bracing. But it pulls the carpet from wall to wall using mechanical leverage rather than blunt force. It protects the baseboards because it does not require the same violent impact. If your installer does not bring a power stretcher into the house, they are not a flooring architect. They are a carpet flipper. You deserve better than someone who treats your home like a demolition site. Protect your trim. Demand a level subfloor. Understand that the floor is a structural system that starts at the joists and ends at the finish. Anything less is just a temporary covering that will eventually cost you more in repairs than you saved on the install.