Stop Carpet Bubbles with a Simple Power Stretcher Move
The physics of the permanent carpet stretch
Most guys skip the leveling compound. They think the underlayment will hide the dip. It won’t. I spent three days grinding concrete on a job last month just so the floor wouldn’t click like a castanet. That same philosophy applies to a carpet install. If you do not prep the foundation and use the right mechanical force, the textile will fail. A carpet bubble is not just an eyesore. It is a sign of structural neglect where the primary and secondary backings have lost their shared tension. To fix this, you must look past the surface and understand the mechanical bond between the tack strip and the power stretcher head. While I often handle floor leveling for laminate or waterproofing for showers, the grit of a proper carpet stretch is where a true installer proves his worth. You cannot rely on a knee kicker for a whole room. You need the leverage of a power stretcher to lock the weave into a state of permanent tension.
The mechanical failure of the knee kicker
A knee kicker is only a positioning tool and should never be the primary source of tension for a full room carpet install. Real tension requires a power stretcher to exert enough force to expand the carpet backing by one percent of its total length. Anything less allows the carpet to relax over time and form ripples. The knee kicker is a blunt instrument. It relies on the impact of the installer’s patella to shove a few inches of carpet forward. This creates localized tension. It does not create uniform tension across the entire span of the room. When you see a bubble in the middle of a hallway or a living room, it is usually because the installer got lazy and used a kicker instead of hauling the power stretcher out of the van. The secondary backing of a modern carpet is often made of a stiff synthetic material. This material has a memory. If you do not stretch it past its point of elastic deformation, it will simply shrink back to its original shape the first time a heavy sofa is dragged across it.
The power stretcher protocol
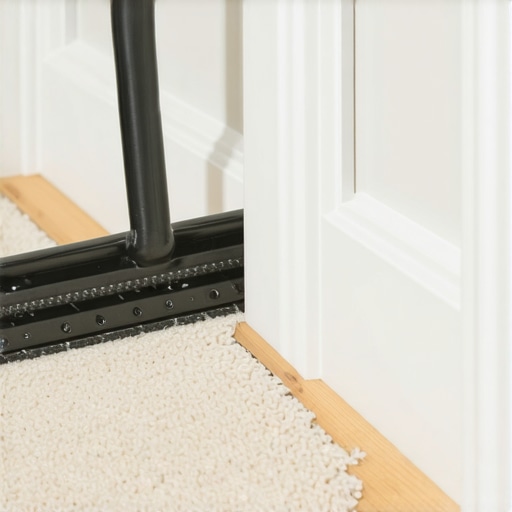
The power stretcher utilizes a long pole assembly to push against one wall while the head grips the carpet at the opposite wall. This allows for a controlled and massive amount of leverage that a human knee can never replicate. Professional standards dictate that carpet must be stretched between one and one and a half percent in both directions. You start by anchoring the carpet on two adjacent walls. Then you use the stretcher to pull toward the opposite corners. The pins on the stretcher head must penetrate the primary backing without shredding the yarn. You are looking for a specific feel in the handle. If it snaps down too easy, you have no tension. If you have to jump on it, you are going to rip the carpet off the tack strip or bow the baseboard. It is a game of precision. I have seen guys blow out a bottom plate on a partition wall because they didn’t understand the physics of the leverage they were applying. You have to find the sweet spot where the carpet is taut like a drum skin.
| Feature | Knee Kicker | Power Stretcher |
|---|---|---|
| Primary Purpose | Positioning and tucking | Full room tensioning |
| Mechanical Advantage | Manual impact | Leverage and pole extension |
| Stretch Percentage | Less than 0.5 percent | 1 to 1.5 percent |
| Risk of Ripples | Very High | Negligible |
| Physical Strain | High (Knee damage) | Moderate (Setup time) |
The 1/4 inch rule for tack strips
Tack strips must be installed exactly one quarter of an inch away from the baseboard to create a gully for the carpet to be tucked into. This gap is the anchor point for your entire stretch and must be consistent across the perimeter. If the gap is too wide the carpet will pull off; if it is too narrow you cannot tuck the excess. Most builders use cheap, narrow tack strips. I prefer the wide architectural strips with three rows of pins. The pins are slanted toward the wall. When the power stretcher pulls the carpet, it hooks onto these pins. The tension of the stretch actually pulls the carpet deeper onto the pins. It is a self-reinforcing system. If your subfloor is concrete, you need to use high-carbon masonry nails or a specialized epoxy to keep those strips down. If the strip pops, the stretch is dead. This is why floor leveling and subfloor integrity are so vital even under a soft surface like carpet.
“A floor is only as good as the subfloor beneath it; deflection is the enemy of every joint.” – Master Flooring Axiom
The chemistry of carpet backing
The secondary backing of a carpet is held to the primary weave by a layer of SBR latex. This latex is sensitive to heat, moisture, and age. If a carpet has been sitting in a humid warehouse or if a homeowner uses a steam cleaner too aggressively, the latex can break down. This is called delamination. Once the two layers of backing separate, no amount of power stretching will fix the bubbles. You are essentially trying to stretch a wet noodle. This is why I always check the moisture levels in the room before I even bring the roll inside. If the humidity is over sixty percent, the latex softens. You might get a good stretch that day, but as soon as the house dries out, the carpet will shift. I tell people that carpet is a living thing. It breathes and reacts to the environment just like a solid oak plank does. You have to treat the installation like a chemical and physical equation.
The subfloor foundation for a perfect stretch
A successful carpet install requires a subfloor that is flat to within 3/16 of an inch over a ten foot radius. While carpet is more forgiving than laminate, any major dips will cause the backing to bridge over the low spot. This creates a pocket of air that eventually turns into a ripple as the carpet settles. If I walk into a room and feel a bounce, I know the subfloor is the problem. Sometimes I have to go down to the joists. I have spent countless hours with a grinder or a bag of self-leveling compound making sure the deck is perfect. You cannot hide a bad subfloor with a thick pad. In fact, a pad that is too thick or too soft will actually make the bubbling worse because it allows the carpet to move too much underfoot. A firm, high-density 7/16 inch pad is the sweet spot for a professional stretch.
- Inspect the subfloor for any protruding nails or staples.
- Verify that tack strips are securely fastened to the perimeter.
- Ensure the carpet has acclimated to the room temperature for 48 hours.
- Use a power stretcher to achieve at least 1 percent tension.
- Trim the excess carpet leaving enough for a firm tuck into the gully.
- Seal all seams with a professional grade seaming iron and premium tape.
The ghost in the expansion gap
Even though carpet is a textile, it still requires space to exist within the room’s architecture. The expansion gap for carpet is the gully between the tack strip and the wall. This space allows the carpet to transition from a horizontal plane to a vertical tuck without bunching up. If an installer jams the carpet against the wall without a proper tuck, the tension has nowhere to go. It will eventually push back toward the center of the room and create a bubble. I see this all the time in DIY jobs. People think if they just cut the carpet exactly to the size of the room, it will stay flat. It won’t. The carpet needs that tensioned anchor on the pins to stay put. It is the same logic we use for laminate expansion gaps. Materials move. You have to give them a place to go or they will find their own way by buckling upward.
“Standard stretch-in installation requires the use of a power stretcher to prevent subsequent rippling and premature wear.” – CRI 104 Standard
The humidity factor in carpet stability
High humidity levels in a home can cause the natural and synthetic fibers in a carpet to expand. In coastal regions or during the summer months, a carpet that was installed with only a knee kicker will almost certainly develop bubbles as the backing absorbs moisture. Professional installers in humid climates must be even more aggressive with their power stretching. I have seen carpets grow by half an inch across a twenty foot room just because the air conditioner went out for a week. When the moisture leaves, the carpet might shrink back, but the latex bond has already been stressed. This is why acclimation is not optional. The carpet needs to reach an equilibrium with the home’s environment before the stretch is applied. If you skip this, you are just gambling with the homeowner’s money. I refuse to install in a house where the HVAC system isn’t running. It is a recipe for a callback, and I hate doing the same job twice.
Why the subfloor ruins the stretch
If the subfloor is dusty, oily, or crumbly, the tack strips will not hold. This is the most common reason for a failed stretch. On concrete slabs, I often see the masonry nails simply blow out a chunk of the floor because the concrete is too soft or ‘green’. You have to prep the surface. Sometimes that means using a primer to consolidate the surface of the concrete. Sometimes it means using a construction adhesive in addition to the nails on the tack strips. If the strip moves even a millimeter, you have lost your tension. A lot of guys think carpet is the ‘easy’ flooring, but I would rather install a whole house of site-finished hardwood than deal with a failing subfloor under a carpet. With hardwood, the problems are obvious. With carpet, the problems hide until you walk on them, and then they scream at you in the form of a big, ugly bubble in the middle of the room. Do the floor leveling. Fix the dips. Secure the strips. Only then do you bring in the power stretcher.