How to hide laminate expansion gaps that are too wide
How to hide laminate expansion gaps that are too wide
I once walked into a house where a homeowner had spent three days installing a beautiful grey oak laminate only to find that the edges near the fireplace looked like a jagged canyon. They had followed the instructions to leave an expansion gap but their cuts were erratic and the gap fluctuated from a quarter inch to nearly a full inch in spots. The standard baseboard was only half an inch thick which left the raw subfloor visible and the homeowner in a state of absolute panic. It is a common nightmare. They think they ruined the floor. They think they need to rip it all out and start over. But I told them what I tell every apprentice on my crew. A floor is a living thing that breathes and we just need to give it the right clothes to hide its movements. We spent the afternoon scribing custom trim and using backer rods to create a bridge that looked intentional rather than accidental. That floor is still there today and nobody can see the gap that once looked like a disaster.
The mechanics of the floating floor gap
To hide laminate expansion gaps that are too wide you must utilize wider baseboards or base shoe moldings to bridge the void. If the gap exceeds the reach of standard trim a backer rod and color-matched elastomeric sealant can provide a flexible aesthetic bridge. These methods ensure the floating floor maintains its structural integrity without showing the subfloor. Laminate is essentially a high-density fiberboard core topped with a photographic layer and a melamine wear layer. This HDF core is incredibly sensitive to atmospheric moisture. When the relative humidity in a room rises the wood fibers absorb water molecules and the entire floor surface expands. If you do not leave that gap the floor will hit the wall and begin to peak or buckle. The gap is the insurance policy for your floor. When that gap is too wide it simply means your insurance policy is showing its teeth. You need a solution that covers the gap without pinning the floor down because a pinned floor is a failing floor.
Why your subfloor is lying to you
Poor floor leveling is often the silent culprit behind a widening expansion gap during the installation process. If the concrete slab or plywood subfloor has a dip of more than three sixteenths of an inch over a ten foot span the laminate planks will bridge that dip. When you walk on those boards they deflect downward. This downward movement pulls the edge of the plank away from the wall and creates a gap that seems to grow and shrink as people move across the room. I have seen guys try to do a carpet install right next to a laminate edge without a proper transition strip and the tension from the carpet stretchers actually pulls the laminate planks out of their locking mechanisms. You must ensure the subfloor is flat within the tolerances of the National Wood Flooring Association standards before the first plank ever touches the ground.
“A floor is only as good as the subfloor beneath it; deflection is the enemy of every joint.” – Master Flooring Axiom
The physics of thermal expansion in wood composites
The laminate material responds to temperature and humidity at a molecular level which dictates the size of the gap needed at the perimeter. Each plank has a specific coefficient of linear thermal expansion that determines how much it will move. For a standard high density fiberboard core you can expect the floor to move about one sixteenth of an inch for every ten feet of width with every ten percent change in relative humidity. In regions like Houston or Phoenix where the climate can swing from swampy to bone dry this movement is aggressive. If you are working near showers or bathrooms the localized humidity is even higher. This is why a gap that looks fine in the summer might become a gaping hole in the winter when the furnace kicks on and sucks the moisture out of the air. You are not just hiding a gap. You are managing a dynamic system of wood fibers and resins.
| Material Type | Expansion Rate per 10 Feet | Recommended Gap |
|---|---|---|
| Laminate (HDF) | 0.125 inches | 3/8 inch |
| Solid Oak | 0.250 inches | 3/4 inch |
| LVP (Vinyl) | 0.060 inches | 1/4 inch |
Using backer rod and color matched caulk
A backer rod combined with a high quality siliconized acrylic caulk creates a flexible filler for gaps that are too wide for standard trim. You push the foam backer rod into the gap until it sits just below the surface of the laminate. Then you apply a bead of caulk that matches the darkest grain in your floor. This creates a bridge that can stretch and compress as the floor moves. Unlike wood putty which is brittle and will crack as soon as the floor shifts an elastomeric sealant moves with the material. This is particularly useful around stone hearths or door casings where you cannot easily add more molding. It takes a steady hand and a good wet finger to smooth it out but it can make an unsightly one inch gap virtually disappear into the shadows of the baseboard.
Replacing baseboards with a wider profile
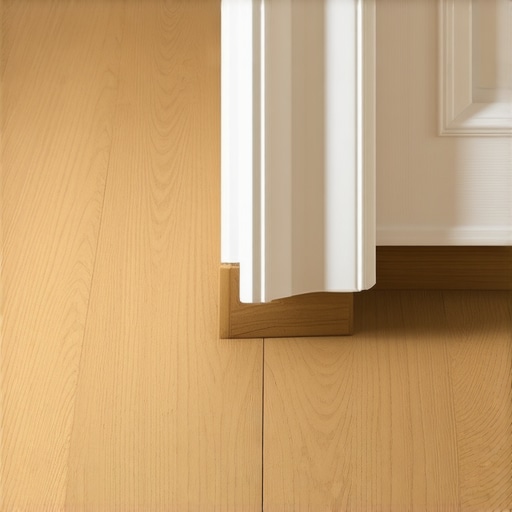
Choosing a thicker baseboard is the most professional way to resolve a gap that has exceeded the half inch mark. Most builder grade baseboards are only seven sixteenths of an inch thick which provides almost zero margin for error. If you upgrade to a colonial style baseboard that is three quarters of an inch thick you suddenly have nearly double the coverage. If the gap is still showing you can add a base shoe or a quarter round to the bottom of that baseboard. This layering of trim is an old carpenter trick that adds architectural depth while hiding the fact that the floor installer was a little too heavy handed with the saw. It is about creating layers that allow the floor to slide underneath the trim without being visible to the naked eye.
- Inspect the gap width at the widest point using a digital caliper.
- Select a baseboard profile that is at least one quarter inch wider than the gap.
- Use a foam backer rod for gaps exceeding three quarters of an inch.
- Apply a color matched flexible sealant for transitions to stationary objects.
- Ensure no nails penetrate the laminate planks during trim installation.
The ghost in the expansion gap
There is a specific phenomenon I call the ghost gap where the floor looks perfect for six months and then suddenly a gap appears in the middle of the room. This happens when the floor is locked at one end by a heavy kitchen island or a poorly placed transition strip. The floor wants to expand but it can only expand in one direction. This pushes the entire floor mass away from one wall. To fix this you often have to remove the trim and use a flooring jack or a heavy duty suction cup tool to pull the planks back into position. You then have to identify where the floor is being pinched and create room for it to move. It is like a puzzle where the pieces are constantly growing and shrinking. If you do not give the floor its space it will find its own space by breaking the locking tongues or opening up gaps where you least want them.
“Floating floors require a minimum perimeter expansion space of 1/4 inch to 1/2 inch depending on the total span of the installation.” – NWFA Installation Guidelines
The 1/8 inch that ruins everything
Precision is the difference between a floor that lasts thirty years and one that fails in three. When you are trimming around a carpet install or a doorway the difference of an eighth of an inch determines if the transition strip will hold or if the laminate will pull out. I always tell people to measure twice and cut once but in flooring it is more like measure three times and cut with a sharp blade. Dull blades heat up the melamine and cause chipping which makes the gap look even worse. If you have a wide gap you cannot just cover it with a thin piece of plastic. You need substantial wood or MDF trim that can take the abuse of a vacuum cleaner and the constant micro movements of the floor. Your floor is a structural engineering project. Treat it with the same respect you would give a bridge or a skyscraper. [image placeholder]
Final field notes on gap concealment
Fixing a wide gap is about patience and the right materials. Do not reach for the wood filler. Do not try to glue a small sliver of wood into the gap. That sliver will eventually pop out and become a tripping hazard or get sucked up by the vacuum. Stick to the proven methods of wider trim and flexible sealants. If the floor is truly drifting you must address the root cause which is usually a lack of acclimation or a pinched point somewhere in the layout. Once the mechanics are sound the aesthetics are easy to manage with a few pieces of well chosen molding and a tube of high grade sealant. Your floor will look solid and your secret about the wide expansion gap will stay hidden under the trim where it belongs.