How to Cut Laminate Planks Without Chipping the Decorative Surface
I spent three days grinding concrete on a job last month just so the floor wouldn’t click like a castanet. Most guys skip the leveling compound. They think the underlayment will hide the dip. It won’t. I have seen it a thousand times. You spend all that money on a decent laminate and then rush the prep. But it is not just the subfloor that ruins a project. It is the jagged, chipped edges on the planks that make a professional job look like a weekend disaster. My hands are stained with wood dye and my lungs have tasted more oak dust than clean air, but I know how to make a clean cut. You have to understand that laminate is a composite beast. It is a sandwich of high-density fiberboard, a photographic layer, and a melamine-infused wear layer that is harder than a cheap landlord’s heart. If you treat it like raw lumber, it will bite back.
The physics of a jagged edge
Laminate planks consist of a high-density fiberboard core and a decorative melamine wear layer that is prone to brittle fracture. Chipping occurs when the saw blade teeth exit the surface with excessive vibrational force. To achieve a clean cut, one must manage the exit angle of the blade and the teeth per inch rating of the tool.
When you look at a chipped plank, you are seeing the failure of the wear layer to handle the vertical tension of the blade. The melamine is essentially a thin sheet of plastic and resin. When the saw tooth comes up through the bottom, it pushes that top layer away from the core. If the bond is not supported or if the blade is too aggressive, the decorative layer snaps off in shards. This is why the direction of the blade rotation is the most important thing you will learn today. A circular saw rotates upward toward the base plate, while a table saw rotates downward toward the table. If you do not account for this, you are effectively pulling the floor apart as you cut it.
“A floor is only as good as the subfloor beneath it; deflection is the enemy of every joint.” – Master Flooring Axiom
Selecting the right blade for the battle
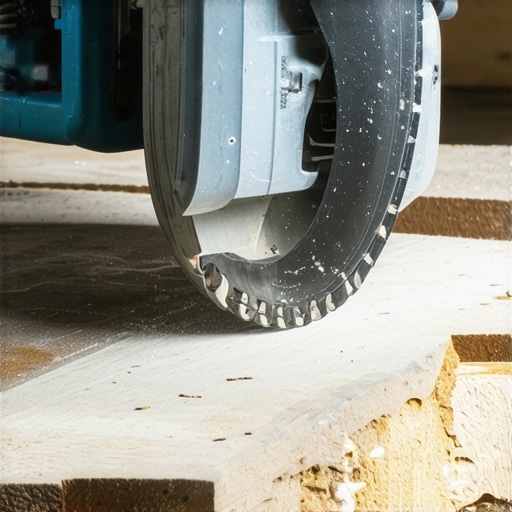
Carbide-tipped blades with a high tooth count are essential for laminate installation because they minimize mechanical stress on the HDF core. A finishing blade with at least sixty teeth is the industry standard for circular saws. Using a rip-cut blade with large gaps between teeth will cause catastrophic chipping on the plank edges.
I have seen guys try to use a standard 24-tooth framing blade. It is a bloodbath. Those large teeth are designed to hog out material quickly, not cleanly. For laminate, you want teeth that are small and numerous. You want a blade that nibbles rather than bites. The tooth geometry also matters. A triple-chip grind is often preferred for hard laminates because it balances the workload across the tooth face. This reduces the heat generated during the cut. Heat is a hidden enemy. It softens the resin in the wear layer, making it more likely to gum up or tear rather than snap cleanly.
The sacrificial tape technique
Blue painter’s tape or masking tape provides surface tension that prevents the decorative layer from splintering during the cutting process. By applying tape directly over the cut line, the melamine layer is held in place against the fiberboard core. This method is particularly effective when using a jigsaw for complex notching around door frames.
You lay the tape down, mark your line on the tape, and cut right through it. The adhesive provides just enough resistance to keep the edges from flying off. But don’t leave the tape on too long. If the room is hot, the adhesive can bond too tightly to the wear layer. I have seen guys rip the finish off a cheap plank just by pulling the tape off too fast. It is a delicate balance. You also need to ensure the base plate of your saw is smooth. I often put a layer of tape on the bottom of the saw itself to prevent it from scratching the finish as I slide it across the plank. Metal on melamine is a recipe for micro-scratches that show up as soon as the sun hits the floor.
| Blade Type | Teeth Per Inch (TPI) | Cut Quality | Best Use Case |
|---|---|---|---|
| Framing Blade | 24 | Poor | Rough subfloor work only |
| Fine Finish | 60-80 | Excellent | Straight cross-cuts |
| Laminate Special | 100+ | Superior | Final visible edges |
| Jigsaw Blade | 14-20 | Good | Complex curves and notches |
Why your subfloor is lying to you
Floor leveling is a prerequisite for a durable installation because subfloor dips cause the locking mechanisms to flex and eventually fail. When a laminate floor is installed over an uneven surface, the structural integrity of the tongue and groove system is compromised. This lead to plank separation and audible clicking sounds under foot traffic.
If you are cutting planks to fit a room that is not level, you are already fighting a losing battle. The cuts will never look right because the planks will be under constant tension. I spent years learning that a bag of self-leveling compound is cheaper than a callback. You pour it, you spread it, and you wait. Patience is the one tool they don’t sell at the big box stores. People want the floor done in an afternoon. They want to move the furniture back in and start living. But if you don’t address the 1/8 inch dip in the corner, your beautiful cuts won’t mean a thing when the joint snaps six months from now.
- Check the subfloor moisture with a pinless meter before starting.
- Acclimate the laminate planks in the room for at least 48 hours.
- Vacuum the subfloor to remove every grain of grit.
- Use a straight edge to mark lines instead of eyeballing the cut.
- Always wear a respirator to protect against HDF dust.
The back cut strategy for circular saws
Cutting from the back of the laminate plank ensures that the saw teeth enter the decorative surface first, which eliminates top-side chipping. Since a circular saw rotates upward, the cleanest cut is always on the side where the blade enters the material. This technique requires reverse marking to ensure the tongue and groove orientation remains correct.
This is where most rookies get confused. They flip the plank over and forget that the left side is now the right side. You have to think three steps ahead. I always mark the back of the plank with a big arrow pointing toward the wall. If you cut from the back, the messy exit of the blade happens on the bottom of the plank where it is hidden by the underlayment. It is a simple trick of physics. The blade pulls the material into the core rather than pushing it away. This is how you get those factory-clean edges that make people wonder if you used a laser.
“Deflection is the silent killer of laminate joints; the subfloor must be flat within 3/16 inch over ten feet.” – NWFA Technical Standard
Advanced techniques for showers and wet areas
Waterproof laminate requires silicone sealant at the perimeter expansion gaps to prevent moisture intrusion into the HDF core. Even if the wear layer is waterproof, the cut edges are vulnerable to swelling if exposed to standing water. This is why precision cutting is even more critical in bathrooms or near showers.
I don’t care what the box says about waterproof. If you leave a raw, cut edge exposed near a shower, it will soak up water like a sponge. The core will swell, the decorative layer will peel, and you will be ripping it out in a year. When I cut around a tub or a shower base, I leave the required 1/4 inch expansion gap, but I fill that gap with a high-quality 100 percent silicone. It stays flexible so the floor can move, but it keeps the water out of the core. It is the difference between a floor that lasts twenty years and one that fails during the first humid summer.
The role of environmental humidity
Relative humidity affects the brittleness of the melamine surface and the expansion of the wood fiber core. In high-humidity regions, the decorative layer may be more forgiving, but the core expansion risks are higher. In arid climates, the laminate surface becomes extremely brittle, increasing the likelihood of shattering during the cutting process.
If you are working in a place like Phoenix, the air is so dry it sucks the life out of everything. The laminate becomes like glass. You touch it with a blade and it wants to shatter. In those conditions, you have to slow down the feed rate of your saw. Don’t force the blade through the material. Let the teeth do the work. If you see smoke, you are going too fast or your blade is dull. Both will ruin the finish. In a swampy place like Houston, you have the opposite problem. The core is heavy with moisture and the blade can gum up. You need to keep your tools clean and sharp to handle the density changes. It is all about the chemistry of the material and how it reacts to the air around it.
Ultimately, the secret to a perfect cut is a combination of the right tool and the right mindset. You aren’t just cutting a board. You are managing a high-pressure laminate system. You are respecting the engineering that went into the product. When you take the time to tape your lines, select a high-TPI blade, and account for the subfloor levelness, you aren’t just a guy with a saw. You are an architect of the surface. You are building something that will hold up to the weight of a family’s life. And that starts with the very first cut.