The ‘Plunger’ trick for fixing a sunken laminate plank
I spent three days grinding concrete on a job last month just so the floor wouldn’t click like a castanet. That is the reality of professional flooring. Most guys skip the leveling compound and think the underlayment will hide the dip. It won’t. I have been in this game for twenty five years. My knees are shot and I smell like a mix of oak dust and the solvent from a fresh bucket of adhesive. When someone tells me they want to fix a sunken laminate plank with a bathroom plunger, I usually laugh. But then I remember that not every homeowner has a five thousand dollar tool trailer and the patience to rip up three hundred square feet of floating floor just to fix one bad joint. Laminate is a structural engineering challenge disguised as a decorative surface. It is a high density fiberboard core wrapped in a photographic layer and a melamine wear layer. It is sensitive. It is temperamental. It responds to the humidity in your house like a living thing. If your floor has a gap or a sunken spot, it is telling you a story about your subfloor. [IMAGE_PLACEHOLDER]
The science of suction on floating floors
Laminate planks can be repositioned using a suction cup or plunger to close gaps caused by environmental shifts or subfloor deflection. This repair method involves applying lateral force to the locking mechanism without disassembling the entire flooring system. You are essentially using atmospheric pressure to create a temporary handle on a surface that has no grip. When you press a plunger onto a non porous laminate surface, you push the air out. The higher pressure of the surrounding atmosphere clamps that rubber cup to the wear layer. This allows you to transfer kinetic energy from a rubber mallet into the plank itself. It is a game of friction and momentum. You are trying to overcome the friction between the plank backing and the underlayment. If you have a cheap foam underlayment, this is easy. If you have a high quality rubberized membrane, the grip is much tighter. You need to understand that the locking profile, whether it is a Uniclic or a Valinge system, is a tiny tongue of fiberboard. If you hit it too hard, you shear that tongue off. Then you have a permanent failure that no plunger can save.
Why your subfloor is lying to you
Subfloor flatness is the absolute requirement for any laminate installation because deflection will eventually cause the locking joints to snap or separate. Most people think their subfloor is flat. It isn’t. Plywood seams swell. Concrete slabs have humps and valleys. When a laminate plank sits over a valley, it creates a void. Every time you walk on it, the plank flexes into that void. This is called vertical deflection. Over thousands of footsteps, that movement acts like a lever. It slowly pulls the short end joint apart. Once a gap appears, dust and debris fall into the groove. This grit acts like a wedge. It prevents the plank from ever closing fully again. This is why you must vacuum the gap thoroughly before you even touch the plunger. If there is a single grain of sand in that groove, you can hit that floor until you are blue in the face and it will not close. You are fighting physics and the physical space occupied by matter.
“A floor is only as good as the subfloor beneath it; deflection is the enemy of every joint.” – Master Flooring Axiom
The ghost in the expansion gap
Expansion gaps are the perimeter spaces required for floating floors to move during seasonal humidity changes without buckling or gapping. If you do not leave a quarter inch at every wall, the floor will hit the drywall and have nowhere to go. It will lift up. Conversely, if the floor is not pinned properly by baseboards or if the house is too dry, the entire floor system can shift. This shift often manifests as a single gap in the middle of the room. It looks like a sunken plank, but it is actually the whole floor migrating toward one wall. The plunger trick works here because you are pulling the stray plank back into its family. You have to check the perimeter first. If the floor is tight against the wall on one side, you cannot pull the plank any further. You are trying to move a mountain with a piece of rubber. I have seen homeowners try this when their floor is actually locked under a heavy kitchen island. If you put a three hundred pound granite island on top of a floating floor, you have pinned it. You have killed the floor’s ability to breathe. In that case, the plunger trick will only result in a popped joint or a torn wear layer.
A chemical autopsy of high density fiberboard
High density fiberboard or HDF is the core material of most laminate flooring and is composed of compressed wood fibers and resins. These fibers are hygroscopic. They absorb moisture from the air. When the humidity in your home drops below thirty percent in the winter, those fibers shrink. The density of the board changes at a molecular level. The tongue and groove joints get slightly smaller. This is when gaps appear. In a region like Phoenix, the dry heat will shrink your boards until they show a gap. In a place like Houston, the humidity makes them swell. If you are trying to use the plunger trick in the dead of winter, you are fighting the natural contraction of the material. Sometimes it is better to wait for a more humid day when the wood has expanded naturally before trying to lock it back into place. You also have to consider the wear layer thickness. A twelve mil wear layer is standard for residential use. If you use a heavy industrial suction cup, you must ensure the surface is clean. Any grit between the rubber and the floor will scratch that melamine layer, and you will see that mark every time the sun hits the floor.
The one eighth inch that ruins everything
Vertical movement in a floating floor should not exceed one eighth of an inch over a ten foot span to maintain the structural integrity of the locking system. If your plank is sunken because the subfloor is more than three sixteenths of an inch out of level, the plunger is a temporary fix. It is a band aid on a broken leg. The plank will just move back once you walk on it. To truly fix a sunken spot, you need to support the plank from underneath. I have seen guys drill tiny holes and inject expanding foam. I hate that. It is messy and it usually creates a hump. The professional way is to pull the floor back to the wall and use a self leveling compound. But if you are in a pinch, the plunger is your best friend. You must apply the suction, then use a block of wood against the plunger base to strike it with a mallet. Do not strike the floor directly. The vibration of the mallet hit is what breaks the static friction. It is a rhythmic process. Tap, check, tap, check. You are coaxing the plank, not forcing it.
| Material Type | Core Density (kg/m3) | Expansion Coefficient | Stability Rating |
|---|---|---|---|
| Standard Laminate | 850 | High | Moderate |
| Engineered Oak | 700 | Medium | High |
| SPC Vinyl Core | 2100 | Low | Very High |
| Solid White Oak | 750 | Very High | Low |
Execution protocol for the plunger repair
Repairing a gap requires cleanliness and precision to ensure the locking mechanism resets without permanent damage to the fiberboard core. Follow these steps exactly. Do not skip the cleaning phase. Any dust left in the joint will prevent a flush fit. Use a vacuum with a narrow crevice tool. This is the most important step. If you have compressed air, use it to blow out the groove, but be careful not to blow dust under the other planks. After cleaning, you need to prepare the surface of the plank for the suction cup. If there is any floor wax or cleaner residue, the plunger will slip. This is dangerous. If it slips while you are swinging a mallet, you will gouge the floor.
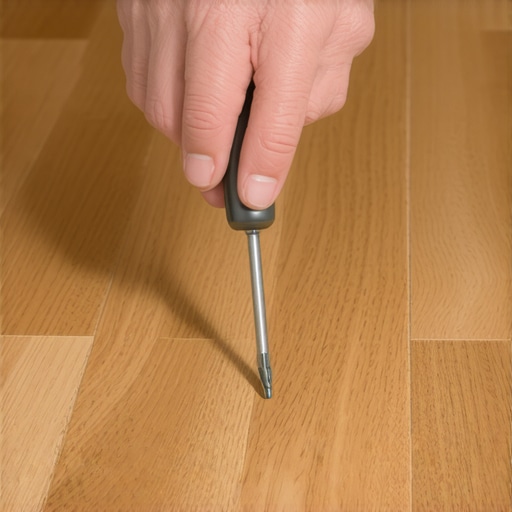
- Clean the gap with a high power vacuum and a thin wire or toothpick to remove stubborn debris.
- Wipe the plank surface with 99 percent isopropyl alcohol to remove all oils and residues.
- Moisten the rim of the plunger or suction cup slightly to improve the seal.
- Apply the suction cup to the center of the plank you need to move.
- Position a tapping block against the suction cup handle or base.
- Strike the tapping block with a rubber mallet in the direction of the gap.
- Check the gap after every strike to monitor progress.
- Once closed, apply a small drop of wood glue to the joint if the locking tab is worn.
“Laminate flooring requires a flat subfloor within 3/16 inch over a 10 foot radius to prevent joint failure.” – Standard Installation Protocol
The bottom line on sunken planks
A sunken plank is a symptom. The plunger is a way to treat the symptom, but you must understand the cause. If your subfloor is a wreck, you will be doing this every six months. If your house has wild humidity swings, you will be doing this every season. Take care of your floor. Maintain a steady humidity between thirty five and fifty five percent. Stop using wet mops that saturate the HDF core. And if you ever see a gap, fix it immediately before the groove gets filled with dirt and the fix becomes impossible. This is not just about looks. It is about the structural integrity of the surface you stand on every day. A floor is a machine. Keep the parts tight and it will last twenty years. Let them loose and it will fall apart in five.