How to Fix a Squeaky Subfloor Before You Pour Your Leveler
I smell like WD-40 and oak dust most days. My knees have seen twenty-five years of subfloors, and they have the scars to prove it. Most guys skip the leveling compound. They think the underlayment will hide the dip. It won’t. I spent three days grinding concrete on a job last month just so the floor wouldn’t click like a castanet. That experience taught me that if you do not address the noise now, you will hear it every time you walk across your expensive new laminate or tile. Flooring is not about the pretty stuff you see on top. It is about the structural engineering happening underneath your feet. If your subfloor squeaks, it is screaming for help because its fasteners are failing.
The physics of the subfloor squeak
A squeaky subfloor is caused by unwanted movement between the wood panels and the floor joists. When you walk, your weight pushes the plywood down, forcing a loose nail to slide against the wood fibers. This friction creates the high-pitched sound that ruins the peace of a home and signals structural instability. To fix this, you must identify the joists and install structural screws that pull the subfloor tight against the framing. This mechanical bond is the only way to ensure the surface remains silent before you apply any floor leveling products or start a carpet install.
We have to look at the microscopic level here. Wood is a cellular material. When moisture levels fluctuate, those cells expand and contract. In a place like the humid South, wood swells. In the dry air of the mountains, it shrinks. This constant movement eventually loosens the grip of smooth-shank nails that builders love because they are cheap and fast. Once that grip is gone, you have a gap. That gap is the enemy. Even a one-sixteenth of an inch space is enough to create a rattle that will haunt your laminate installation for a decade. You cannot just pour leveler over this and hope for the best. The leveler is brittle. If the wood underneath moves, the leveler will crack, and your expensive floor will fail.
“A floor is only as good as the subfloor beneath it; deflection is the enemy of every joint.” – Master Flooring Axiom
The chemistry of the bond and the leveler
Self-leveling underlayment is a high-tech slurry of Portland cement or calcium aluminate mixed with polymers. It is designed to be liquid enough to find the lowest point in the room, but it requires a perfectly stable substrate to function. If you have a squeak, you have movement. If you have movement, you have a substrate that will cause the leveler to delaminate or crack under the pressure of foot traffic. You must ensure the bond between the wood and the leveler is preceded by a mechanical bond between the wood and the joists. This is where the chemistry of the primer meets the physics of the fastener.
Before you even think about the leveler, you need to look at the moisture content of your subfloor. I use a pin-style moisture meter for this. If the wood is too wet, the screws won’t hold properly, and the leveler won’t cure correctly. You are looking for a moisture content between six and nine percent for most indoor environments. If it is higher, you have a drainage or HVAC issue that needs solving before you touch a screw gun. Once the moisture is right, you need to address the gaps. I often use a high-quality wood glue or construction adhesive in the tongue and groove joints if they are accessible from below. This creates a monolithic surface that acts as one single unit rather than a series of rattling plates.
The 1/8 inch that ruins everything
Precision is everything when you are prepping for a flat floor. A one-eighth inch dip over a ten-foot span is enough to void the warranty on most high-end flooring products. If you try to fill that dip with leveler without fixing the squeak, the weight of the leveler itself can exacerbate the problem. A five-gallon bucket of mixed leveler weighs about fifty pounds. If you pour four buckets into a low spot, you are adding two hundred pounds of dead weight to a subfloor that is already moving. That weight can pull the plywood away from the joists even further if they are not properly secured.
| Subfloor Material | Density Rating | Screw Retention | Moisture Resistance |
| :— | :— | :— | :— |
| CDX Plywood | High | Excellent | Moderate |
| OSB (Oriented Strand Board) | Medium | Fair | Low |
| Particle Board | Low | Poor | Very Low |
| Advantech | Very High | Superior | High |
You need to know what you are standing on. If you have particle board, you are in trouble. Particle board has the structural integrity of a wet cracker. You cannot fix squeaks in particle board effectively because the material just crumbles around the screw threads. In those cases, I tell the homeowner we are tearing it out and starting with real plywood. If you are prepping for showers, the subfloor must be even more rigid to prevent grout cracking. The TCNA has very specific rules about deflection for a reason. You are looking for L over 360 for ceramic and L over 720 for natural stone. That means the floor should not bend more than the length of the span divided by those numbers.
The ghost in the expansion gap
Every floor needs room to breathe. When you are fixing squeaks, you might be tempted to screw every square inch of the floor down. Do not screw into the expansion gap at the perimeter of the room. This gap is necessary for the natural movement of the home. If you lock the subfloor too tightly against the wall studs, you create a new kind of squeak that sounds like a groan. This happens because the house is settling while the floor is trying to expand. It is a battle of forces that the floor will always lose. I always leave at least a quarter-inch gap between the subfloor panels and the wall plates.
- Identify joist locations using a stud finder or by looking at the nail patterns.
- Use 2-inch or 2.5-inch structural wood screws with a torx head to prevent stripping.
- Drive screws every 6 to 8 inches along the joist line.
- Sink the heads of the screws slightly below the surface of the wood.
- Vacuum the entire floor to remove every speck of sawdust before priming.
- Check for vertical movement by standing near the joist while someone else walks.
“The subfloor must be clean, dry, and structurally sound; skipping the mechanical fastener check is a recipe for catastrophic finish failure.” – Master Flooring Axiom
The molecular reality of the leveler pour
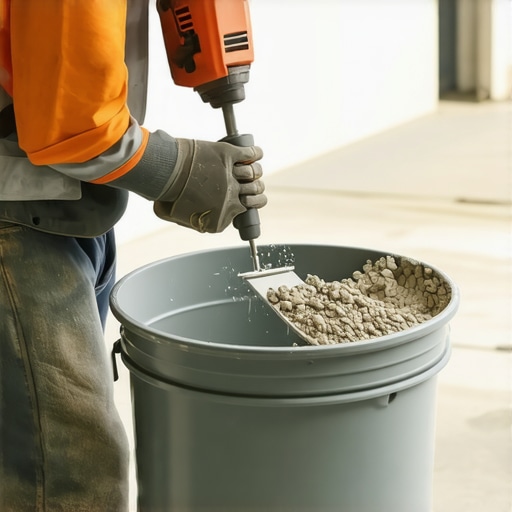
Once the squeaks are silenced, you are ready for the floor leveling phase. But do not just dump the bag. You need to use a primer. The primer is a bonding agent that penetrates the wood fibers and creates a bridge for the cement-based leveler. Without primer, the dry wood will suck the moisture out of the leveler too fast. This ruins the hydration process of the cement. When the hydration process is interrupted, the leveler becomes powdery and brittle. It will eventually break loose from the subfloor, and you will be back to square one. I prefer a high-solids acrylic primer. It smells a bit like Elmer’s glue, but it works.
[image_placeholder]
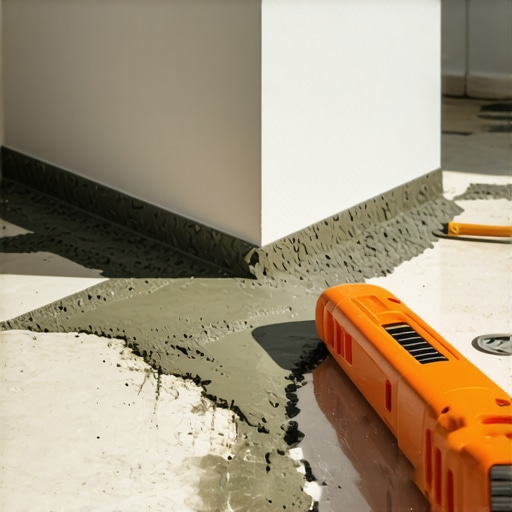
When you pour, you need to work fast. Leveler has a working time of about fifteen to twenty minutes before it starts to gel. I use a spiked roller to release air bubbles. Those bubbles are the result of outgassing from the wood. If you do not get them out, they leave little craters in your floor that will show through thin laminate or vinyl plank. The goal is a surface that looks like a still pond. No ripples, no bumps, just a flat, gray expanse that is ready for any finish you can dream of. Whether you are doing a carpet install or laying down expensive hardwood, this flat surface is your insurance policy.
The final word on subfloors
Do not be the person who spends five thousand dollars on Italian tile and five dollars on subfloor prep. The mechanic with sawdust under his nails knows that the beauty of the top layer is a lie if the foundation is rotten. Fix the squeaks. Use the right screws. Prime the surface. Only then can you pour your leveler with confidence. Your feet, and your wallet, will thank you in ten years when the floor is still as silent as the day it was installed. Flooring is a science of layers. Make sure your bottom layer is the strongest one in the building.