How to Level a Concrete Floor Before Installing Large Tile
I spent three days grinding concrete on a job last month just so the floor wouldn’t click like a castanet. Most guys skip the leveling compound. They think the underlayment will hide the dip. It won’t. I walked into that job site smelling like WD-40 and fresh oak dust, only to find a slab that looked like the rolling hills of Kentucky. If you lay a twelve by twenty-four inch tile over a half-inch dip, that tile will crack the first time a heavy person walks over it. There is no magic thin-set that fixes a bad slab. You either do the work with the grinder and the leveler now, or you rip out a shattered floor in six months. I have been on my knees with a moisture meter for twenty-five years and I can tell you that the subfloor is the only thing that matters. Large format tile is unforgiving. It has the flexibility of a glass pane. If the surface beneath it is not flat, the tile becomes a structural failure waiting to happen. Most homeowners see the shiny glaze and the pretty grout lines, but I see the structural integrity of the bond. I see the chemical reaction of the primer. I see the moisture vapor transmission rate trying to push the tile off the slab. If you do not respect the physics of the concrete, the concrete will win every single time.
The 1/8 inch that ruins everything
To level a concrete floor for large tile, you must achieve a flatness of 1/8 inch over a 10 foot radius. This requires aggressive grinding of high spots and filling low points with high-strength self-leveling underlayment. Large format tiles require this precision to prevent lippage and structural cracking. This standard is not a suggestion. It is a technical requirement for any tile with one side longer than fifteen inches. When you place a long, rigid piece of porcelain over a convex hump, you create a fulcrum. The tile will teeter. When you place it over a concave dip, you create a bridge. Neither scenario ends well. The industry calls this lippage, which is a polite way of saying your floor is a tripping hazard. We measure this with a ten-foot straightedge. If I can slide a nickel under that straightedge, we have work to do. If I can slide a quarter, we are in trouble. The physics of the bond require the tile to be in constant contact with the mortar bed. Any gap represents a pocket of air where the tile is unsupported. Under the weight of a refrigerator or a heavy dining table, that unsupported porcelain will snap. It is a simple lever and pulley problem, but the lever is a forty-dollar piece of Italian porcelain.
“A floor is only as good as the subfloor beneath it; deflection is the enemy of every joint.” – Master Flooring Axiom
Why your subfloor is lying to you
Concrete slabs are rarely flat because of the way water evaporates during the curing process. As the top surface dries faster than the bottom, the slab curls at the edges and settles in the center. Identifying these deviations requires a long level or a laser line. You cannot trust your eyes. The human eye is easily fooled by light reflecting off a gray surface. You must use a mechanical straightedge. I prefer a magnesium screed bar because it does not bow. When you drag that bar across the floor, you will see the daylight underneath it. Those are your low spots. When the bar hits a ridge and stops, that is your high spot. You must also check for the Concrete Surface Profile or CSP. For a leveling compound to stick, the concrete cannot be smooth like a garage floor. It needs to feel like eighty-grit sandpaper. If the concrete is too smooth, the leveler will simply peel off in a sheet. This is why we use a diamond grinder. We are not just leveling; we are creating a mechanical bond. We are opening the pores of the concrete so the primer can penetrate deep into the capillaries of the slab. This is a molecular battle. If the primer does not bite, the entire floor is floating on hope.
The chemistry of the bond
Success depends on the chemical transition between the old concrete and the new leveling compound. A high-solids acrylic primer must be applied to prevent the dry concrete from sucking the moisture out of the leveler too quickly. This ensures a proper crystalline hydration of the cement. If you pour self-leveling underlayment onto a thirsty, dry slab, the concrete will drink the water from the mix before the leveler has a chance to flow. The result is a chalky, weak surface that will crumble. This is why we prime. The primer acts as a bridge. It seals the pores of the slab and creates a sticky surface for the new cement to grab onto. I have seen guys skip the primer and use water instead. That is a recipe for disaster. The primer is the most inexpensive part of the job, yet it is the most frequent point of failure. You also need to consider the PSI of the leveler. For large format tile, I never use anything rated under 4,000 PSI. You want the leveler to be as hard as the slab it is sitting on. If you use a soft, gypsum-based patch under a hard porcelain tile, you are building a house on sand. The tile will move, the grout will crack, and you will be calling me to fix it. I do not like fixing other people’s mistakes because I usually have to use a jackhammer to do it.
Tools for the structural perfectionist
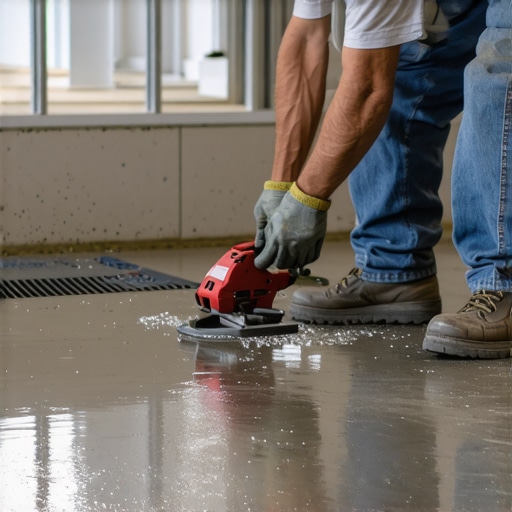
Leveling a floor requires a specific arsenal of tools designed for precision and speed. You need a 10 foot straightedge, a high-torque mixing drill, a spiked roller, and a diamond cup wheel grinder. These tools allow you to manipulate the cement before it begins its initial set. The spiked roller is particularly important. As you pour the leveler, air bubbles get trapped in the thick liquid. If you leave them, they will dry into tiny craters. The spiked roller breaks the surface tension and allows the air to escape while helping the material find its own level. You also need a gauge rake. This tool allows you to set the depth of the pour. If you need a quarter-inch of material, you set the rake to a quarter-inch and pull it across the floor. It takes the guesswork out of the process. For the high spots, nothing beats a seven-inch diamond grinder with a vacuum shroud. You do not want to fill the whole house with silica dust. It is dangerous for your lungs and it is a mess to clean. I have spent years breathing in dust and I can tell you that a good vacuum system is worth every penny. You want to see the floor, not a cloud of gray smoke.
| Method | Maximum Thickness | Cure Time | Best Use Case |
|---|---|---|---|
| Self-Leveling Underlayment | 1.5 inches | 4-24 hours | Large rooms with multiple low spots |
| Floor Patching Compound | 0.5 inches | 90 minutes | Small dips or filling cracks |
| Diamond Grinding | N/A | Immediate | Removing high spots and humps |
| Thick-Bed Mortar | 2.0 inches | 24 hours | Shower pans and extreme slopes |
A roadmap to a flat surface
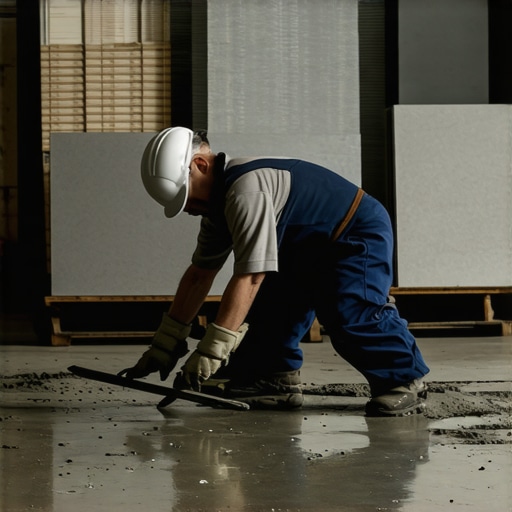
The installation process begins with a thorough cleaning of the slab to remove oils and drywall mud. Following this, high spots are ground down and the entire surface is primed. Finally, the leveling compound is mixed to a honey-like consistency and poured onto the floor. You must work fast. Most self-levelers have a working time of about twenty minutes. If you dawdle, the edges will start to set and you will get a visible seam where the two pours meet. This is called a cold joint. I always work with a partner. One person mixes while the other person pours and rakes. We keep a continuous flow of material moving. It is a rhythmic process. We start at the furthest corner and work our way to the exit. You cannot walk on this stuff once it is down. I have seen people drop their phone in a fresh pour and it ruins the whole finish. You have to be disciplined. You have to understand the timing. If the room is hot, the leveler will set faster. If it is cold, it will take longer. You have to adapt to the environment. A master knows the feel of the material. They know when it is ready to be rolled and when it is time to stay off it.
- Remove all baseboards and undercut door jambs before starting.
- Vacuum the floor twice to ensure no dust interferes with the primer bond.
- Mark the high and low spots with a wax pencil for easy identification.
- Mix the leveling compound with the exact amount of water specified by the manufacturer.
- Use a spiked roller to remove air bubbles and blend the pour.
- Allow the floor to cure for at least 24 hours before installing tile.
Moisture is the silent killer
Concrete slabs act like sponges, absorbing moisture from the ground and releasing it as vapor through the surface. Before installing tile, you must test the slab for its moisture vapor emission rate to prevent bond failure. I have walked into houses where the laminate was warped and the carpet smelled like a basement because nobody checked the moisture. For tile, moisture is less of a problem than it is for wood, but it can still cause efflorescence. That is the white, salty powder that comes up through your grout lines. It happens when water moves through the slab and carries minerals to the surface. If you have a high moisture reading, you need a vapor barrier. This is a topical coating that stops the water from moving. I use an epoxy-based barrier for the tough jobs. It is thick and it smells like a chemical factory, but it works. You have to respect the hydrology of the site. If the house is built in a swamp, the concrete will be wet. It is that simple. You cannot fight nature; you can only manage it with the right chemistry.
“Large format tile requires a substrate flatness that exceeds standard flooring practices; 1/8 inch is the law of the land.” – TCNA Installation Manual
Beyond the tile
While tile is the most demanding, floor leveling is equally important for laminate and carpet install projects. A flat floor prevents the clicking sound often heard in cheap laminate installations and ensures a plush feel for carpet. In showers, floor leveling is even more critical. You need the floor to slope perfectly toward the drain. If you have a flat spot in your shower, you will have standing water. Standing water leads to mold. Mold leads to rot. I have ripped out showers that were only five years old because the installer did not know how to pitch the floor. Whether you are doing a shower or a living room, the prep is the same. You have to be a stickler for the details. You have to care about the stuff that no one will ever see. Once the tile is down, the leveling compound is hidden forever. But you will feel it every time you walk across the room. You will feel the solid, silent strength of a floor that was done right. It is about the pride of the trade. It is about knowing that the floor is flat, the bond is strong, and the tile is secure.