The ‘Flashlight Check’ for Spotting Poorly Finished Grout Joints
Listen, I have spent twenty five years with sawdust under my nails and a back that clicks more than a cheap laminate floor. I am not here to talk about design vibes or what color of greige is trending this season. I am here to talk about structural integrity and the brutal reality of a job site. Most guys skip the leveling compound. They think the underlayment will hide the dip. It will not. I spent three days grinding concrete on a job last month just so the floor would not click like a castanet. That is the difference between a floor that lasts and a floor that fails. Most homeowners think a floor is just a cosmetic choice, but to me, it is a structural engineering challenge. If you do not respect the physics of the subfloor, the chemistry of the adhesive will eventually betray you. I have seen fifteen thousand dollar wide plank walnut floors cup until they looked like potato chips because the installer did not check the crawlspace humidity. It is a heartbreak that could have been avoided with a simple moisture meter and a little bit of patience. Today, we are focusing on the grout joint, the smallest part of the floor that causes the biggest headaches.
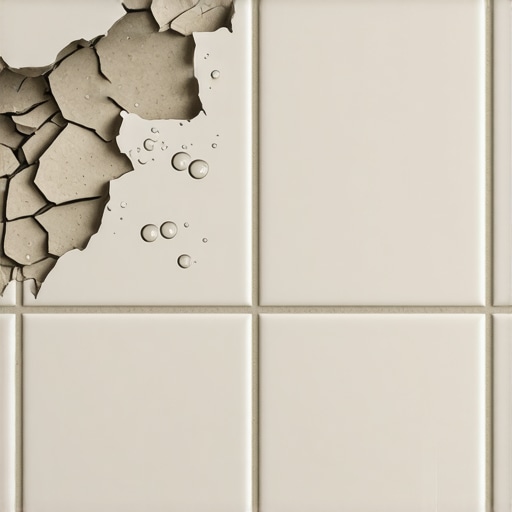
The shadow play of uneven grout
The flashlight check involves placing a high-lumen LED light flat against the floor surface to cast long shadows over every grout joint. This technique reveals lippage, pinholes, and inconsistent depths that are invisible under overhead lighting. Professional inspectors use this to verify TCNA compliance and surface flatness across the installation. When you lay a flashlight on the floor, you are essentially creating an artificial sunset. Every tiny bump becomes a mountain. Every dip becomes a canyon. In the world of tile and stone, we call this lippage. The Tile Council of North America (TCNA) has strict standards for how much one tile can sit higher than its neighbor. For a 1/16 inch grout joint, you only get 1/32 inch of allowable lippage. That is the thickness of a credit card. If your flashlight reveals shadows that look like the Grand Canyon, your installer did not use a leveling system or, worse, they did not bother with floor leveling before the first thin-set hit the slab. I have walked onto jobs where the carpet install was being pulled up for a tile upgrade, and the subfloor was so wavy it looked like the Atlantic Ocean. You cannot hide that with grout. Grout is not a structural filler; it is a sacrificial joint meant to handle the movement of the building.
“A floor is only as good as the subfloor beneath it; deflection is the enemy of every joint.” – Master Flooring Axiom
The physics of the hydration cycle
Grout curing is a chemical reaction known as hydration where water molecules bind with Portland cement to create a crystalline structure. If the water evaporates too quickly or if the installer uses too much water during cleanup, the bond weakens and the pigment leaches out of the joint. You see people using a soaking wet sponge to wipe down the tiles. This is a crime. When you introduce too much water to the surface of a fresh grout joint, you are performing a process called washout. You are literally pulling the cement and the color out of the mix. This leaves behind a soft, chalky residue that will crumble within six months. In showers, this is a death sentence. Water will find those pinholes, travel behind the tile, and start rotting the curb or the wall studs. I have seen showers that looked beautiful on day one but turned into moldy nightmares by day three hundred because the grout was too porous. You need to understand the molecular bond. Portland cement requires a specific water-to-cement ratio. Deviate from that, and you are just playing with mud. This is why epoxy grout is becoming the standard for high-moisture areas, even though it is a nightmare to work with for guys who are used to the old ways. Epoxy does not rely on hydration; it is a two-part chemical cure that creates a waterproof plastic bond.
Why your subfloor is lying to you
Subfloor deflection refers to the vertical movement of the floor under a load and it is the primary cause of grout cracking and tile failure. Most joists are engineered for L over 360 deflection, which is fine for carpet but will shatter a stone floor installation. I have seen it a thousand times. A homeowner wants a beautiful slate floor in their kitchen. The installer checks the floor, says it feels solid, and starts laying tile. Two weeks later, the grout is popping out in chunks. Why? Because when the refrigerator compressor kicks on or someone walks across the room, the plywood flexes. Tile and grout are rigid. They do not bend; they break. If you are moving from a carpet install to a hard surface, you have to beef up the subfloor. This usually means adding a layer of 3/4 inch exterior grade plywood or using a decoupling membrane. In the floor leveling process, you have to account for both the flatness and the rigidity. A floor can be perfectly flat but still be as bouncy as a trampoline. You need to check the joist span and the thickness of the sub-base. If you ignore this, no amount of high-tech grout will save your project from the inevitable cracks.
| Grout Type | Joint Width Recommendation | Best Application Environment | Shrinkage and Cracking Risk |
|---|---|---|---|
| Sanded Grout | 1/8 inch to 1/2 inch | Main floor living areas | Low due to sand aggregate |
| Unsanded Grout | Less than 1/8 inch | Polished marble walls | High if used in wide joints |
| Epoxy Grout | Any width | Steam showers and kitchens | Non-existent after chemical cure |
| High Performance Cement | 1/16 inch to 1/2 inch | Commercial high traffic | Minimal with proper hydration |
The chemistry of failure in the shower
Shower grout fails when the capillary action of the porous cement pulls soapy water into the substrate where it can harbor bacteria and dissolve thin-set. This process is accelerated by acidic cleaners that etch the cementitious bond and lead to joint erosion. When I am looking at a shower with my flashlight, I am looking for pinholes. Those tiny little bubbles are entry points. Think of grout like a hard sponge. It looks solid, but on a microscopic level, it is full of tunnels. In a humid environment like Houston or the Florida coast, these tunnels never dry out. This is why your grout turns black even if you scrub it every day. It is not surface dirt; it is a biological colony living inside the floor. If you had gone with laminate, you would have different problems, mainly swelling at the seams, but with tile, the problem is always moisture migration. To prevent this, you must use a high-quality sealer or move to a single-component grout that has the sealer built into the resin. I tell people all the time that the grout is the weakest link in your shower. If you treat it like an afterthought, you will be calling me in three years to tear the whole thing out and start over.
Laminate transitions and the grout illusion
Laminate flooring often utilizes a click-lock mechanism that mimics the look of grout joints but lacks the structural movement capabilities of a true mortar-based system. These floors require a perimeter expansion gap of at least 1/4 inch to prevent buckling during seasonal humidity shifts. People love the look of tile but the price of laminate. They buy these planks with beveled edges that look like grout lines. But here is the catch. Real tile is glued to the earth. Laminate is a floating floor. It is a giant wooden sail that expands and contracts with the weather. If you try to run your laminate tight against a tile transition without a T-molding, the floor will eventually heave up in the middle. I have seen homeowners try to grout the gap between their laminate and their tile. Do not do that. The movement of the wood will crush the grout into dust within a week. You need to respect the different languages these materials speak. One is rigid and mineral-based; the other is organic and reactive. Trying to make them act the same is a recipe for a callback.
The Flashlight Check Protocol
- Turn off all overhead lighting and close the curtains to create a dark environment.
- Place a high-intensity LED flashlight (500 lumens or more) directly on the tile surface.
- Slowly sweep the beam across the floor in a 180-degree arc.
- Identify shadows cast by tile edges (lippage) or voids in the grout joints.
- Mark areas of concern with blue painter’s tape for remediation.
- Repeat the process from the opposite side of the room to ensure no shadows were missed.
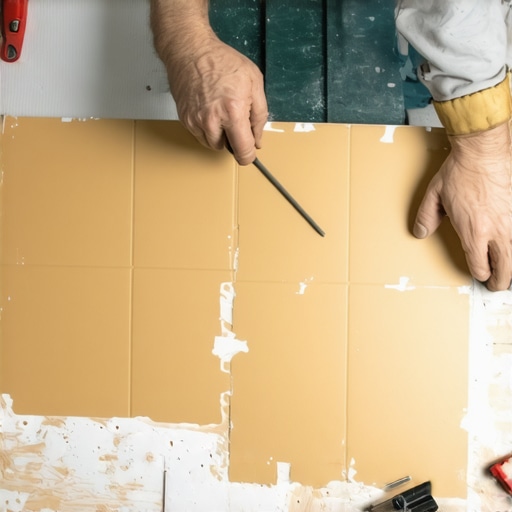
When carpet install logic fails tile
Carpet installers are used to hiding subfloor imperfections under thick padding, but this logic is disastrous when transitioning to hard surface flooring where every 1/8 inch dip is visible. A successful transition requires a perfectly level subfloor at the threshold to prevent tripping hazards and joint failure. When I see a guy who has spent his whole life doing carpet install work try to lay a tile floor, I usually see a mess. Carpet is forgiving. You can have a 1/4 inch dip in the plywood, and the pad will just bridge right over it. Tile is the opposite. Tile is a snitch. It tells on every mistake you made in the framing and the floor leveling stage. If your transition from the hallway carpet to the bathroom tile is not perfectly flush, that grout joint at the door is going to crack. The vibration from the transition between the soft carpet and the hard tile creates a stress point. This is why I always use a solid marble or metal transition strip that is mechanically fastened to the subfloor. You cannot rely on a bead of caulk to hold that line. It needs a structural break. The flashlight check at the doorway usually shows the worst of it because that is where the most foot traffic occurs.
“Consistency in the grout joint is the hallmark of a master; variation is the sign of a hurried amateur.” – TCNA Quality Standard
The 1/8 inch that ruins everything
Precision in flooring is measured in increments of 1/8 inch or less because the human foot can detect a height difference as small as 1/32 of an inch. Inconsistent grout widths often indicate that the tile was not properly back-buttered or that the spacers were removed too early. You might think a slightly wider grout joint here or there does not matter. You are wrong. Your eye is a master at finding patterns. When a joint goes from 1/8 inch to 3/16 inch, it breaks the grid. This usually happens because the installer did not account for the slight variations in tile size. Even expensive rectified tiles can vary by a fraction of a millimeter. A real pro will adjust the joints as they go to keep the grid true. If they do not, the error compounds until you are half an inch off at the other side of the room. This is why floor leveling is the foundation of the whole job. If the floor is flat, the tiles sit true. If the tiles sit true, the grout joints stay consistent. It is a chain of events that starts with the subfloor. If you break the first link, the whole floor is compromised. I always tell my apprentices that if you spend more time with the level than the trowel, you are doing it right. Grout is just the final signature on a job well done, or the evidence at the scene of a crime. Use the flashlight check and see which one you have in your house.