The Painters Tape Hack for Grouting a Hexagon Mosaic Shower Floor
Most guys skip the leveling compound. They think the underlayment will hide the dip. It won’t. I spent three days grinding concrete on a job last month just so the floor wouldn’t click like a castanet. I was working on a luxury shower floor where the slab had a three quarter inch drop over just four feet. If I had just slapped down my thin-set and started laying those tiny hexagon tiles, the finished product would have looked like a mountain range. Every hex would have caught a toe. I had to get the grinder out, hook up the vacuum, and create a surface so flat it would make a machinist jealous. This is the reality of professional flooring. It is not about the pretty colors or the patterns you see in magazines. It is about the physics of the substrate. I smell like oak dust and burnt concrete half the time because I refuse to build on a lie. When you are dealing with showers, the stakes are even higher. Water is a patient enemy. It will find the one spot where you got lazy and it will rot your house from the inside out. This article breaks down a specific technique to handle one of the most frustrating tasks in the trade: grouting those endless joints in a hexagon mosaic without ruining the finish.
The subfloor secret that makes or breaks a shower
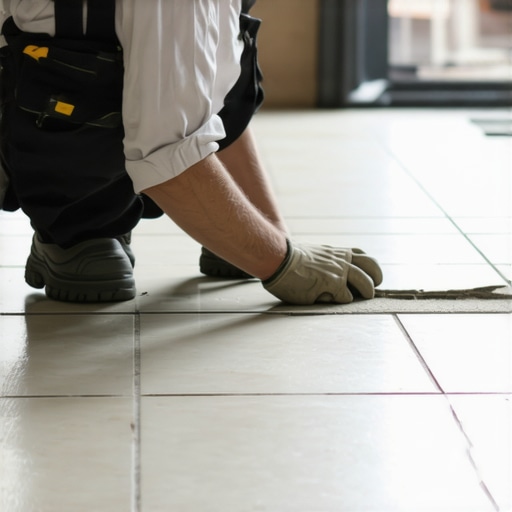
Floor leveling is the foundation of any successful tile installation, especially when dealing with the high density of grout lines found in hexagon mosaics. You cannot rely on the tile itself to bridge gaps or hide imperfections in the substrate. A flat floor ensures that thin-set thickness remains consistent across the entire shower pan. I have seen too many rookies try to fix a dip by adding more mud. All that does is create a pocket of moisture that never dries. If your floor leveling is off by even a sixteenth of an inch, your hexagons will tilt. This creates lippage. Lippage is the technical term for when the edge of one tile sits higher than its neighbor. In a shower, this is a safety hazard and a cleaning nightmare. You need a self-leveling underlayment or a perfectly screeded mud bed that meets TCNA standards for flatness. If you are used to a carpet install, you might think a little padding hides everything. In the world of tile, there is no padding. There is only the hard truth of the concrete slab. I use a ten foot straightedge to check every square inch before the first tile touches the floor.
“A floor is only as good as the subfloor beneath it; deflection is the enemy of every joint.” – Master Flooring Axiom
[IMAGE_PLACEHOLDER_1]
Why hexagon mosaics fail without proper floor leveling
Showers require a precise slope to the drain, typically one quarter inch per foot, which makes the installation of small tiles like hexagons particularly challenging. Because each hexagon is small, it follows the contour of the floor perfectly. If the floor has a bump, the tile has a bump. This is why floor leveling and slope management are the most critical phases of the project. I have walked onto jobs where the previous guy tried to treat a shower floor like a laminate installation, thinking he could just click things together and move on. Laminate allows for some minor subfloor variation because of its rigid core. Mosaic tile has zero structural rigidity until the thin-set has cured. If your slope is not uniform, the hexagons will drift. They will start to pull apart, leaving wide grout lines in some places and tight ones in others. You end up with a grid that looks like it was laid by someone with blurry vision. Precision is the only way out. I spend more time on my knees with a level than I do actually laying the tile. It is the only way to guarantee that the water flows to the drain and not into the corners of the room.
The mechanics of the painters tape hack
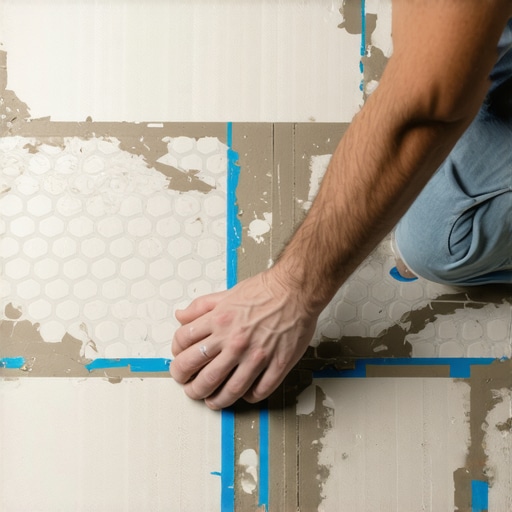
The painters tape hack involves covering the entire surface of the set mosaic tile with high quality masking tape before applying grout to prevent staining. This method is specifically designed for porous tiles like natural stone or unglazed porcelain where grout pigment can get trapped in microscopic surface pits. You lay the tile. You let it cure for twenty four hours. Then you cover the whole floor in tape. You take a fresh utility knife and you cut out the grout lines. It sounds like a lot of work. It is a lot of work. But it saves you from the agony of scrubbing grout haze off of three thousand individual hexagons. The adhesive on the tape must be strong enough to stay put during the grouting process but light enough to pull away without leaving a residue. I prefer the blue or green multi-surface tapes. They have a polyisobutylene or acrylic base that resists the moisture in the grout. When you pull that tape up, you are left with perfectly crisp grout lines and a tile surface that is as clean as the day it came out of the box. No chemicals. No heavy scrubbing. Just clean, professional results.
Chemistry of the bond between grout and tile
Grout chemistry dictates how the material will behave during application and how well it will resist water penetration over the long term. Most modern grouts are polymer modified, meaning they contain powdered resins that activate when mixed with water. These resins improve the flexibility and the bond strength of the material. However, they also make the grout stickier. This stickiness is why the tape hack is so effective. If you are using an epoxy grout, which is the gold standard for showers, you are dealing with a two part chemical reaction. Once you mix it, the clock is ticking. Epoxy grout is essentially a plastic. If it dries on the surface of your tile, you are not getting it off without a jackhammer. The tape acts as a sacrificial barrier. It allows the grout to fill the joints completely while protecting the decorative face of the hexagon. We are talking about a molecular bond here. The grout needs to adhere to the edges of the tile, not the top. By using tape, you ensure the chemical energy of the grout is focused exactly where it belongs: in the gap.
A comparison of moisture barriers and substrates
| Material Type | Moisture Resistance | Installation Complexity | Best Use Case |
|---|---|---|---|
| Cement Board | Moderate | High | Standard wall tile |
| Liquid Membrane | Extreme | Low | Complex shower pans |
| Sheet Membrane | Extreme | Medium | Large format floors |
| Unmodified Thin-set | Low | Low | Substrate prep only |
| Modified Thin-set | High | Medium | Mosaic floor tile |
The mandatory checklist for mosaic success
- Verify subfloor deflection is within TCNA L/360 limits.
- Ensure floor leveling compound has cured for at least twenty four hours.
- Perform a water bead test on tiles to check for porosity before grouting.
- Use a moisture meter to confirm the subfloor is below 4 percent moisture content.
- Apply painters tape only to fully cured and clean tile surfaces.
- Cut grout lines with a sharp blade to avoid fraying the tape edges.
- Mix grout to a peanut butter consistency to prevent slump in the joints.
- Remove tape at a forty five degree angle once grout has reached its initial set.
How the logic of a carpet install ruins tile work
Carpet installation relies on tension and tack strips to hold the material in place, which is the complete opposite of the rigid bond required for tile. I often see people coming from a carpet install background who try to leave gaps at the edges of the room that are too large, or they don’t understand why the subfloor has to be so stiff. Carpet is forgiving. It hides a world of sins. Tile hides nothing. If your subfloor flexes even a tiny bit, the grout lines in your mosaic will crack. This is called deflection. If you have a joist system that is too weak, you need to add plywood or use a reinforcing underlayment. You cannot just throw down some pad and call it a day. In a shower, any movement will break the waterproof seal. Once that seal is broken, you have a mold farm under your floor. I tell people all the time that if they want a floor that lasts thirty years, they need to stop thinking like a decorator and start thinking like a structural engineer. The hexagon pattern is beautiful, but it is the engineering underneath that keeps it that way.
“Movement joints are not an option; they are a structural requirement for any tiled assembly.” – TCNA Handbook for Ceramic Tile Installation
Why laminate installers struggle with thin-set physics
Laminate flooring is a floating system that allows for expansion and contraction, whereas tile is a bonded system that must be fused to the substrate. Installers who are used to the laminate world often struggle with the wet chemistry of thin-set and grout. They are used to a dry fit. Tile is a wet process. You have to manage the evaporation rate of the water in your mix. If the subfloor is too dry, it will suck the water out of the thin-set, and the bond will fail. This is why we often damp down a concrete floor before we start. It is called Saturated Surface Dry. It ensures the thin-set cures through its chemical process rather than just drying out. When you are doing the painters tape hack, you also have to consider the moisture. If you apply the tape too early, the trapped moisture from the curing thin-set will loosen the adhesive. You have to wait. Patience is a tool, just like a trowel. If you rush a tile job, you are just building a failure that someone like me will have to tear out in two years.
The 1/8 inch gap that prevents floor failure
Expansion joints are the most misunderstood part of flooring, but they are the reason floors don’t buckle when the temperature changes. Even in a shower, materials expand and contract. You need an eighth of an inch gap around the perimeter of your mosaic floor. This gap should never be filled with hard grout. It must be filled with a 100 percent silicone sealant that matches the color of your grout. This allows the entire tile assembly to move as a single unit. If you grout right up to the wall, the pressure from expansion will cause the center of the floor to tent. I have seen floors pop up like a tent because there was no expansion gap. It sounds crazy that a little bit of heat can move stone and ceramic, but the physics do not lie. I always leave that gap. I use spacers to make sure it is uniform. Then, after the tape hack is done and the grout is dry, I come back and run a clean bead of silicone. It is the professional way to finish a job. It is the difference between a floor that lasts and a floor that fails.
Environmental factors and regional humidity controls
Humidity plays a massive role in how grout and adhesives cure, especially in regions with extreme weather. If you are working in a swampy environment like Houston, your drying times will be doubled. If you are in the dry heat of Phoenix, your grout might dry too fast, leading to cracking and powdering. You have to adjust your mix and your timeline to the room. I use a hygrometer on every job site. I want to know exactly what the air is doing. If the humidity is too high, I will run a dehumidifier for twenty four hours before I even think about applying tape or grout. Tape won’t stick to a damp tile face. Grout won’t cure if it can’t release its moisture. You are the master of the environment on your job site. You don’t just work in the room; you control the room. This is the level of detail required for a master floor installation. It is about more than just the tape hack. It is about the hundreds of small decisions you make from the moment you step onto the subfloor until the final wipe down.