How to Stop Shower Wall Grout from Crumbling into the Tray
I have spent twenty five years with oak dust in my lungs and the smell of WD-40 on my hands. I do not look at a shower as a place to relax. I look at it as a high-pressure hydraulic environment that is constantly trying to destroy your home. When a homeowner calls me because their grout is crumbling into the tray, they usually expect a quick fix with a tube of caulk. They are wrong. Grout does not just fall out for no reason. It fails because of structural movement, improper chemistry, or a fundamental misunderstanding of how materials expand. I once spent three days grinding concrete on a job last month just so the floor wouldn’t click like a castanet, and I approach shower walls with that same obsession. Most guys skip the leveling compound. They think the underlayment will hide the dip. It won’t. If your wall studs are bowed or your subfloor is flexing, that grout is doomed before you even open the bag.
The structural lie behind the tile
To stop shower wall grout from crumbling, you must eliminate substrate deflection and ensure the transition between the wall and the tray is sealed with 100 percent silicone rather than cementitious grout. Grout is not flexible. When the shower tray shifts under the weight of water and a human body, any rigid grout at that joint will inevitably crack and disintegrate into the tray. You need to address the structural movement and the chemical bond between the tile and the wall. Building a shower is a structural engineering challenge, not a cosmetic one.
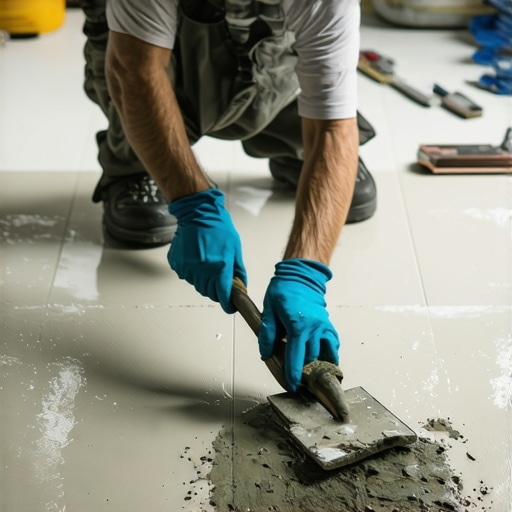
The first thing you have to understand is that grout is essentially a bridge. If the two piers of that bridge move in different directions, the bridge collapses. In a shower, the wall is one pier and the floor tray is the other. If you are dealing with a wooden subfloor, the deflection must meet the TCNA standard of L/360. If your joists are too far apart, the floor bounces. That bounce transfers to the tray, which then pulls away from the wall tile. I have seen guys try to install laminate or carpet in a bathroom, which is a crime in my book, but failing to level a subfloor before setting a shower tray is just as bad. A floor leveling compound is not an option, it is a requirement for a stable base.
“A floor is only as good as the subfloor beneath it; deflection is the enemy of every joint.” – Master Flooring Axiom
The physics of the shifting shower tray
Shower tray movement is the primary cause of grout failure at the base of the wall. When you fill a shower tray with several gallons of water and step inside, the weight can cause the tray to compress the subfloor or the thin-set beneath it. If there is even a 1/32 inch gap of air under that tray, the resulting movement will shear the grout right out of the joint. This is why a mortar bed is necessary under acrylic or fiberglass trays to create a solid, non-moving base. Without it, you are asking the grout to act as a structural anchor, which it is not designed to do.
We also need to talk about the chemistry of the bond. Many installers use a cheap, modified thin-set that does not have enough polymer content to handle the moisture and heat cycles of a shower. Over time, water penetrates the grout, reaches the thin-set, and weakens the bond of the tile itself. When the tile becomes loose, it vibrates. That vibration turns the grout into dust. I have walked into jobs where the wide-plank walnut in the hallway was perfectly acclimated, but the bathroom tile was falling off because the installer used a bucket-mixed mastic in a wet area. Mastic is organic. It turns back into glue when it gets wet. You must use a high-quality, polymer-modified thin-set that meets ANSI A118.15 standards.
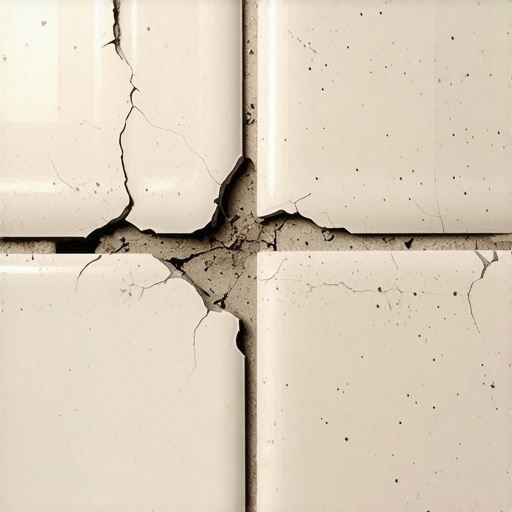
The molecular failure of cheap grout
The chemical composition of your grout determines its resistance to cracking and water absorption. Standard sanded grout is porous and brittle. In a high-moisture environment, it absorbs water, which then expands and contracts as it dries. This cyclic stress eventually breaks the Portland cement bonds. Upgrading to a high-performance cement grout or an epoxy grout can solve the crumbling problem by providing a much higher compressive strength and lower water absorption rate.
Epoxy grout is a different beast entirely. It does not use water to cure. It uses a chemical reaction between a resin and a hardener. This results in a joint that is nearly as hard as the tile itself and completely waterproof. However, if your walls are still moving, even epoxy grout will fail. It might not crumble into dust, but it will pull away from the edge of the tile. This brings us back to the most important rule in flooring and tiling. You must account for movement. Every change of plane, such as where the wall meets the floor, must be a movement joint.
Grout performance comparison
| Grout Type | Water Absorption | Flexibility | Durability |
|---|---|---|---|
| Standard Sanded | High | Very Low | Moderate |
| High Performance | Low | Low | High |
| Epoxy Grout | Zero | Moderate | Extreme |
Why your subfloor is lying to you
A subfloor that looks flat is rarely level enough for a large format tile installation. If you are installing heavy tile on a shower wall that sits on a plywood subfloor, you are fighting a losing battle against wood movement. Wood expands and contracts with humidity. In a place like Houston, the humidity will make that wood swell until it puts pressure on the wall studs. This pressure translates into the tile, crushing the grout. This is why we use cement backer boards or waterproof foam boards like Schluter-Kerdi instead of green board drywall.
I have seen homeowners try a carpet install in a master bedroom that transitions into a tile bathroom with no threshold. They skip the floor leveling and end up with a height difference that they try to mask with a massive glob of grout. That grout will crack in a week. You need to ensure the transition is stable. If the subfloor has a dip near the shower entry, the tray will tilt. A tilt of even a fraction of an inch will cause the wall grout to compress on one side and stretch on the other. Grout cannot stretch. It only breaks.
“Cementitious grout is a rigid material in a world of moving parts; failure to provide movement joints is a failure of the system.” – Tile Council of North America
The 1/8 inch that ruins everything
The size of your grout joint and the depth of the thin-set determine the longevity of the installation. If your grout joints are too narrow, specifically under 1/8 inch for sanded grout, the material cannot properly pack into the space. This creates a thin, weak veneer of grout that flakes off as soon as the house settles. Conversely, if the joint is too wide without enough sand for structural integrity, it will shrink and crack during the hydration process. It is a delicate balance of physics and chemistry.
You also have to consider the environment. If you are in a dry climate like Phoenix, the grout might dry too fast. If it dries before the chemical hydration process is complete, it will never reach its full strength. It will remain soft and chalky. I always tell my guys to lightly mist the grout joints with water if the job site is too hot. It sounds crazy to add water to a shower to fix it, but controlled hydration is the secret to a rock-hard finish. It is the same reason we acclimate hardwood. We are managing the moisture content of the environment to prevent material failure.
Checklist for a permanent grout fix
- Verify subfloor deflection meets L/360 standards
- Use a mortar bed to support the shower tray base
- Install cement backer board with proper taping and thin-set
- Ensure 100 percent thin-set coverage on the back of tiles
- Leave a 1/8 inch gap at all changes of plane
- Fill the wall to tray transition with 100 percent silicone sealant
- Allow grout to cure for 72 hours before exposing to water
The ghost in the expansion gap
The most common mistake is the lack of an expansion gap at the perimeter of the floor and the corners of the walls. Every room has a pulse. It expands in the summer and shrinks in the winter. If you tile tight against the walls or the tray with no gap, the tile has nowhere to go. It will tent or the grout will explode out of the joints. In my twenty five years, I have seen more floors ruined by a lack of an expansion gap than by water damage itself. It is a silent killer of tile installations.
When you are dealing with a shower, that gap must be filled with a color-matched silicone caulk. Silicone is an elastomer. It can compress and return to its original shape. Cement grout cannot do this. If you see grout crumbling specifically at the corners or where the wall meets the tray, it is because some hack decided to use grout where they should have used silicone. You can scrape that old grout out and replace it with a high-quality silicone to stop the crumbling, but if the tile is already loose, you are just putting a bandage on a broken leg. The tile must be solid for the seal to hold.
The hidden danger of improper mixing
Mixing grout with too much water is a recipe for a powdery, crumbling mess. I see it all the time. An installer wants the grout to flow easier, so they add an extra cup of water to the bucket. This dilutes the polymers and creates air bubbles in the mix. When the water evaporates, it leaves behind a honeycomb structure that has no structural strength. The grout looks fine for a month, then it starts falling out in chunks. You have to follow the manufacturer’s mixing instructions to the gram. I use a digital scale on my jobs because I do not trust my eyes when it comes to chemistry.
You also have to watch the “slake” time. After you mix the grout, you have to let it sit for ten minutes to let the chemicals fully react. Then you mix it again without adding more water. If you skip the slake, the grout will be inconsistent. Some parts will be hard and others will be soft. This inconsistency leads to localized failure. The homeowner thinks it is a leak, but it is actually just bad prep work. It is the same as skipping the moisture barrier on a concrete slab before a laminate floor leveling job. You are inviting disaster because you were too lazy to wait ten minutes.
Final thoughts on shower integrity
Stopping grout from crumbling is about respecting the materials. You cannot force a rigid material like cement to behave like a flexible one. You have to engineer the shower to minimize movement and use the right chemicals to bond everything together. If your subfloor is solid, your tray is supported, and your transitions are silicone, that grout will stay exactly where you put it for the next thirty years. If you cut corners, the house will find them. It always does. You have to be the architect of the floor, not just the guy laying the tile. Stick to the standards, watch your moisture levels, and never trust a subfloor that you haven’t checked with a straight edge and a level. That is the only way to build a shower that lasts.