I’ll never forget the frustration of stepping onto my new laminate floor, only to feel that unwelcome give under my feet. It was a mix of annoyance and disbelief—how could something so seemingly straightforward turn into a persistent hassle? That lightbulb moment hit me hard. I realized that loose joints and gaps weren’t just aesthetic issues; they threatened the durability of my entire flooring project. If you’ve ever experienced similar setbacks—peaking joints, squeaks, or unsteady planks—you know exactly what I mean. But here’s the good news: after digging into this problem, I discovered effective, DIY-friendly ways to tighten those joints without resorting to glue or complex tools.
Why Fixing Laminate Joints Matters More Than You Think
Loose or misaligned joints in your laminate flooring can lead to more than just visual imperfections. They compromise the structural integrity, cause squeaking, and even create pathways for water and debris to build up, which accelerates wear and tear. According to flooring experts, improper installation or subfloor issues are common culprits, but the good news is that there are practical fixes you can implement yourself. DIY solutions not only save money but also give you peace of mind knowing you can maintain your floors over time.
Is It Really Possible to Tighten Laminate Joints Without Glue?
Absolutely. I used to think that only professional bonding was the answer, but I made the mistake early on of over-relying on adhesives—only to find that improper application sometimes worsened the problem. Instead, I now focus on methods that enhance the click-lock mechanism and improve joint tightness naturally. For example, techniques like adjusting the subfloor, using specialized tapping tools, or employing alternative click-lock tactics can make a big difference. Want to learn how I mastered these tricks and how you can too? Keep reading, and I’ll walk you through the most effective hacks. If you’re tired of loose joints and gaps, these strategies can help you restore your floor’s tightness and longevity. Dive into the details here: [Stop Laminate Floor Peaking](https://floorcraftstore.com/stop-laminate-floor-peaking-4-installation-fixes-for-2026). Have you experienced stubborn gaps that just won’t stay tight? You’re not alone, but there’s a way forward.
Assess the Existing Gaps and Loosened Areas
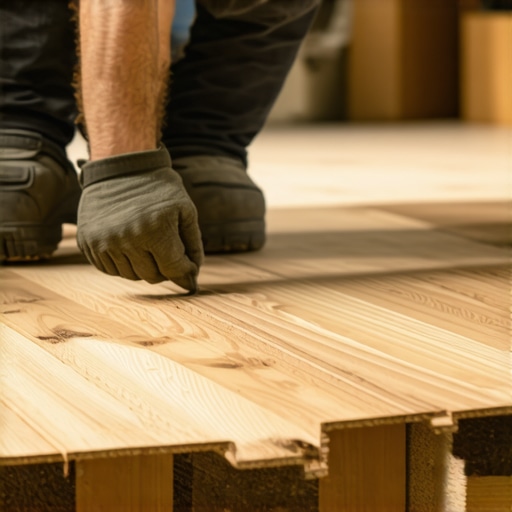
Start by identifying which sections of your laminate flooring are loose or misaligned. Use a putty knife or a tapping block to gently test the joints. I remember working on a DIY project where I discovered a stubborn looseness in a corner; pressing firmly with a tapping block revealed just how much that joint had shifted. Mark these areas clearly so you can focus your efforts effectively.
Prepare the Right Tools and Materials
Gather a rubber mallet, tapping block, and possibly a pair of pliers. Avoid using excessive force or hammering directly on the planks—think of it like adjusting a guitar string; gentle, targeted taps produce better results. If necessary, acquire a special click-lock tool designed for laminate flooring that helps secure stubborn joints without damaging the planks.
Realign and Reinforce the Joints
Tap the Joints into Place
Place the tapping block firmly against the edge of the plank, then gently tap with the mallet to click the joint back into place. In my experience, starting from the middle and working outward prevents new gaps. It’s akin to reseating puzzle pieces—careful pressure ensures they click together snugly.
Use Tapping Techniques for Tight Fitting Joints
For stubborn joints, angle the tapping to apply lateral pressure, mimicking the way a locksmith adjusts a lock. A small, deliberate strike can close gaps you couldn’t push together with hand pressure alone. I once fixed a squeaky plank by tapping along the joint’s length, which also helped reduce noise—see how these methods can serve dual purposes.
Secure the Joints Without Glue
Many believe glue is the only fix, but it can complicate future removals or repairs. Instead, focus on click-lock adjustments. Adjusting the subfloor or ensuring it’s level is crucial—an uneven surface can cause joint failure over time. To check for levelness, use a long spirit level or a straightedge; if you find dips or humps, refer to this guide for leveling tips.
Test the Stability and Finish Up
After re-seating the problematic joints, walk over the floor to detect any squeaks or movement. If joints still feel loose, repeat the tapping process or consider shim placements behind the planks for additional support. Keep in mind that proper subfloor preparation can make or break your efforts—more details can be found here. Finally, clean the surface thoroughly to remove debris that might interfere with joint integrity, ensuring your laminate remains tight and durable.While many homeowners focus on the visible aspects of flooring and bathroom renovations, let’s dig deeper into the nuances that often go unnoticed but can dramatically impact the durability and performance of these installations. For instance, a widespread myth is that leveling concrete slabs is always about fairness and flatness. In reality, the process also involves understanding moisture content and substrate stability. Ignoring these factors can lead to issues such as laminate buckling or peeling over time, which expert installations carefully address by conducting thorough assessments using tools like hygrometers and moisture meters. This is supported by studies showing that proper subfloor preparation reduces warranty claims significantly, emphasizing the importance of precision over surface appearance alone.
Equip Yourself with the Right Tools for Maintenance
Maintaining your floors over time demands precision and quality tools. I personally swear by a digital moisture meter from Tramex. It allows me to monitor the moisture levels in concrete slabs and subfloors with pinpoint accuracy, ensuring that my laminate or carpet installations are not at risk of future buckling or mold growth. Regular moisture checks prevent problems before they start and are invaluable when tweaking or repairing existing installations. For tile showers, I turn to a high-precision grout removal tool from Dremel, which makes replacing or sealing grout joints quick and mess-free. Having the right equipment not only saves time but significantly extends the lifespan of your renovations.
Top Software for Planning and Scaling
When it comes to larger projects—like installing a curbless shower or leveling large areas—using specialized software can make all the difference. I recommend SketchUp for creating detailed 3D models of your bathroom layout. This helps in visualizing different configurations, ensuring proper water drainage, and calculating precise materials needed, which reduces waste and rework. For project management, tools like Trello or Asana keep task progress transparent, ensuring deadlines are met and enabling timely ordering of materials such as self-leveling compounds or underlayment supplies.
Strategies for Long-Term Success
Consistency in routine inspections and proactive repairs is key. Set a schedule—perhaps quarterly—to check for signs of grout cracks, tile or laminate gaps, or subfloor shifting. Using a subfloor integrity checklist from industry experts can guide you in diagnosing underlying issues. For example, addressing minor water leaks in the shower early can prevent costly subfloor rot, which might otherwise compromise your entire flooring system.
How do I maintain my floors over time?
Regular cleaning with non-abrasive tools, avoiding excessive moisture, and promptly repairing small damages help maintain your floors’ long-term durability. Investing in a quality vacuum with HEPA filters and soft brush heads minimizes debris that can scratch surfaces or dislodge grout. Additionally, sealing grout lines annually prevents water ingress, especially in showers, which extends the life of your tile work and underlying substrates. Remember, proactive maintenance is much less expensive than major overhauls down the line. If you’re interested in advanced water management, I recommend trying techniques discussed in this expert guide on shower waterproofing. Start with minor inspections—like investing in a good moisture meter—and you’ll see a significant difference in your project longevity.
The Hardest Lesson I Learned About floor leveling,showers,laminate,carpet install
One of my biggest takeaways was realizing that even small imperfections in subfloor preparation can have cascading effects on the entire project. I once underestimated the importance of moisture testing before installation, which led to lamination issues down the line. That experience taught me to always prioritize thorough prep work, understanding that these foundational steps are the backbone of lasting results.
3 Myths About floor leveling,showers,laminate,carpet install That Held Me Back
I used to think that a perfectly flat surface meant instant success; however, I discovered that moisture control and substrate stability are equally crucial. Believing that quick fixes could replace proper leveling led to premature failures. Challenging these myths helped me develop a more comprehensive approach that saves time and money in the long run.
What Experts Won’t Tell You About floor leveling,showers,laminate,carpet install
Many top professionals keep hush about the subtleties of subfloor diagnostics—like moisture content and structural integrity—that make or break durability. I learned that investing in quality tools like a reliable moisture meter can reveal hidden issues before they escalate. This knowledge empowers you to make informed decisions and avoid costly rework.
My Essential Toolkit for Flooring Success
Over the years, I’ve come to trust specific tools that elevate my work, such as a digital moisture meter for moisture assessment and a high-quality tapping block for secure joints. These devices have been game changers, allowing me to execute precise repairs and prevent future problems. Incorporating these tools into your own toolkit can significantly improve your renovation outcomes.
Where to Go from Here
If you’re inspired to take your flooring and shower projects to the next level, start by educating yourself with detailed guides on subfloor preparation and moisture testing. For strategic planning, software like SketchUp helps visualize complex layouts, while project management tools like Trello keep your timelines on track. Remember: Every step you take toward knowledge and preparation adds up to a more resilient and beautiful finish.
Your Turn to Try
Embarking on your own flooring or shower renovation can be daunting, but with the insights shared, you’re better equipped to succeed. Don’t hesitate to experiment with these techniques or ask questions—your home will thank you for it. What’s the first step you’re planning to tackle in your project? Share your story below—I’d love to hear about your journey toward a flawless finish.