The ‘Wrench Test’ for Finding a Failing Garage Door Cable Before It Snaps
The ‘Wrench Test’ for Finding a Failing Garage Door Cable Before It Snaps
If you live in the San Francisco Bay Area, you know that the sound of a garage door opening is the background noise of daily life. Whether you are heading out to commute from Burlingame or returning home to San Mateo after a long day, you rely on that heavy door to move effortlessly. Most homeowners give a lot of credit – and a fair amount of anxiety – to the garage door springs. We’ve all heard the stories of a spring snapping with the sound of a gunshot. But as an expert technician at Floorcraft, I, Lynn Lenardon, am here to tell you that the springs have a silent partner that is just as critical, and arguably more prone to “hidden” failure: the garage door cables.
While the springs provide the power, the cables do the actual heavy lifting. They are the tendons of your garage door system. When they fail, the results are often catastrophic, leading to crooked doors, smashed car hoods, or even personal injury. Because I’ve spent years performing bay area garage doors inspections, I’ve developed a specific diagnostic tool I call the “Wrench Test.” This proactive approach allows me to find internal cable rot and fraying that the naked eye often misses. In this guide, I will teach you how to perform this test safely so you can identify a failing cable before it becomes an emergency garage door repair situation.
Understanding the health of your cables is the first step in responsible home maintenance. In a region where garage door repair is a frequent necessity due to our unique environmental factors, being able to spot trouble early can save you thousands of dollars in structural repairs and replacement costs. Let’s dive into why these cables are so vital and how you can master the Wrench Test.
Why Garage Door Cables are the ‘Silent Workhorses’ of Your Home
To understand why a failing cable is so dangerous, you first have to understand the physics at play. Your garage door can weigh anywhere from 150 to over 500 pounds. The torsion spring, located on the header above the door, stores the energy required to lift that weight. However, the spring doesn’t touch the door. It transfers that energy to a metal shaft, which turns drums at either end. The cables are wrapped around these drums and attached to the bottom brackets of the door.
There are two primary types of cable systems used in residential properties: torsion cables and extension cables. Torsion cables are the most common in modern Bay Area homes. They are under constant, immense tension. Even when the door is closed, those cables are pulled taut, holding the weight of the door against the floor. Extension cables, found on older systems, run along the tracks and use a pulley system. Regardless of the type, these cables are typically made of galvanized “aircraft cable” – multiple strands of steel wire wrapped together for maximum strength.
The problem is that these cables are “silent workhorses.” They don’t squeak like a dry roller or hum like a failing motor. They simply hold on until they can’t. Because they are comprised of dozens of tiny individual wires, the failure usually begins on the inside or in a single strand. If you want to learn more about the power source behind these cables, you should read our companion guide on The ‘Wrench Test’ for Spotting a Failing Garage Door Torsion Spring Before It Snaps. Understanding how the springs and cables work in tandem is essential for any homeowner looking to avoid an urgent garage door repair.
The Warning Signs: When Your Cable is Screaming for Help
Before we get to the tactile Wrench Test, you should perform a visual inspection. Even though many cable issues are internal, there are several “red flags” that indicate your system is reaching its breaking point. If you see any of these, it is time to fix garage door components immediately.
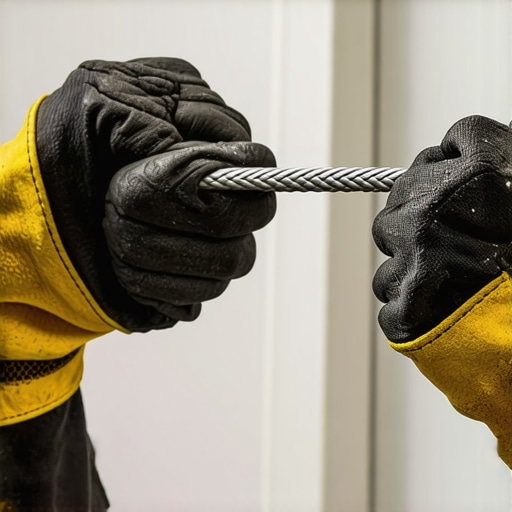
The most common indicator is what we in the industry call “shaggy” spots. According to manufacturers like Clopay, these are areas where individual wire filaments have separated from the main strand. If you see tiny wires sticking out like a frayed piece of rope, the cable has already lost a significant percentage of its load-bearing capacity. Another major sign is “splitting strands,” where the tight braid of the cable looks loose or unraveled in a specific section. This usually happens near the bottom bracket where the cable is most exposed to moisture and salt.
You should also look for noticeable slack. When the door is fully open, the cables should still have a baseline of tension. If you see a cable hanging loosely or “jumping” off the drum, you have a serious alignment issue that will lead to garage door cable repair or a full collapse. Finally, look at the drums themselves. The cable should be wound neatly, like thread on a spool. If the cable is overlapping itself or looks “bunched,” it is being crushed and weakened with every cycle of the door. These visual cues are your first line of defense, but they aren’t foolproof. That is where the Wrench Test comes in.
Step-by-Step: How to Perform the ‘Wrench Test’
The Wrench Test is a professional “hack” that allows you to feel what you cannot see. Because cables are often coated or tightly wound, internal rust and broken strands can hide just beneath the surface. This test uses a simple tool to amplify the texture of the cable, making defects obvious. This is a critical part of garage door cable replacement diagnostics.
- Step 1: Safety First. You must disconnect the garage door opener. Pull the red emergency release cord while the door is in the fully closed position. Never attempt to inspect or touch cables while the opener is engaged or while the door is in motion. For added safety, place a C-clamp on the track just above one of the rollers to ensure the door cannot lift unexpectedly.
- Step 2: Select Your Tool. You will need a small metal tool – a 1/4-inch or 10mm box-end wrench is perfect. The metal-on-metal contact is what provides the necessary feedback.
- Step 3: The Tactile Glide. With the door closed (and the cables under tension), hold the wrench lightly by the handle. Place the “O” or “U” shaped end of the wrench around the cable. Do not grip the cable with your hands! Slowly and lightly run the wrench along the length of the cable from the bottom bracket up as high as you can safely reach.
- Step 4: Feel for the “Snag.” A healthy cable will feel perfectly smooth. If the wrench “catches,” “clicks,” or feels a “burr,” you have found a broken internal strand. Even a single broken wire filament can catch the metal of the wrench. If you feel a snag, that cable is no longer safe and requires urgent garage door repair.
- Step 5: The Tension Tap. Use the handle of the wrench to lightly tap the cable. A cable under proper, even tension should “ring” with a clear, high-pitched note, similar to a guitar string. If the cable emits a dull “thud” or feels “mushy,” it has stretched beyond its service life or the torsion spring is failing to provide adequate counter-balance.
This test is superior to a visual check because it identifies “pitting” and internal oxidation. If your wrench catches on multiple spots, you are likely days or weeks away from a total cable snap. Identifying this now allows you to schedule a repair on your terms rather than dealing with a stuck car on a Monday morning.
Why the Bay Area Climate Accelerates Cable Failure
Living in the San Francisco Bay Area provides a beautiful backdrop, but the climate is notoriously harsh on mechanical systems. Whether you are in the foggy hills of San Mateo or the coastal side of Burlingame, your garage door is fighting a constant battle against the elements. This is why bay area garage doors often have a shorter lifespan than those in drier, inland climates.
The primary culprit is salt air. Salt is highly corrosive to galvanized steel. As the “marine layer” rolls in each evening, it carries microscopic salt particles that settle on your garage door hardware. These particles trap moisture against the steel, leading to oxidation. While the outside of the cable might look okay, the moisture wicks into the center of the braided strands, causing “hidden rust.” This internal rust acts like sandpaper, grinding the wires against each other every time the door moves.
Furthermore, the temperature fluctuations in the Bay Area – warm afternoons followed by cold, damp nights – cause the metal to expand and contract. Over time, this contributes to metal fatigue. If your garage floor is not perfectly level, it adds uneven stress to one cable over the other, accelerating the wear. To understand how your foundation affects your door’s longevity, see our article on Why Your Garage Door Installation Will Fail Without a Level Concrete Floor. Localized factors like these make regular use of the Wrench Test a mandatory part of Bay Area homeownership.
The Danger Zone: Why You Should Never DIY a Cable Replacement
While the Wrench Test is a safe way to diagnose a problem, actually performing a garage door cable replacement is a job that must be left to professionals. I cannot stress this enough: the cables are under hundreds of pounds of “stored tension.” If you loosen the wrong bolt without properly securing the torsion shaft, that tension is released instantly.
When a cable or a bottom bracket is released under tension, it can whip around with enough force to sever a finger or cause deep lacerations. Furthermore, the torsion spring itself can spin out of control if the cable is removed, leading to catastrophic injury. Professional technicians use specialized winding bars and heavy-duty clamps to “lock down” the system before a cable is ever touched. We also check the “drums” for wear; a jagged drum can shred a brand-new cable in a matter of days.
If your Wrench Test reveals a snag, do not attempt to fix garage door spring or cable components yourself. This is the definition of an emergency garage door repair. At Floorcraft, we have seen far too many DIY attempts end in hospital visits or destroyed garage door tracks. A professional repair ensures that the tension is balanced perfectly between the left and right sides, which is something that is nearly impossible to achieve without professional-grade gauges and experience.
Professional Maintenance vs. Emergency Replacement
There is a significant difference in both cost and stress between preventative maintenance and emergency replacement. When a cable snaps, the door usually falls crookedly. This often bends the vertical tracks, pops the rollers out of their hinges, and can even burn out the motor of your garage door opener as it struggles to lift an unbalanced load. What could have been a simple cable swap suddenly becomes an expensive garage door opener repair and track reconstruction.
One of the golden rules in our industry, supported by experts at OK Discount Garage Door, is the “Rule of Two.” If one cable is frayed or failing, you must replace both. Cables are installed at the same time and undergo the exact same number of cycles. If the left cable has reached its fatigue limit, the right one is inevitably close behind. Replacing them as a pair ensures the door remains level and prevents a second service call just a few months later.
For property managers handling commercial garage door repair, this is even more critical. A snapped cable on a high-traffic commercial door can shut down a business for a full day, leading to lost revenue. Regular professional inspections, including a version of the Wrench Test, are the most cost-effective way to manage overhead and ensure the safety of tenants and employees. Whether it is a residential fix garage door opener task or a complex industrial cable reset, early detection is the key to longevity.
Conclusion & Final Safety Checklist
The garage door is likely the largest moving object in your home. Treating it with respect means looking past the surface and checking the components that do the heavy lifting. By using the Wrench Test once every six months, you can stay ahead of the corrosive Bay Area air and ensure your home remains safe and functional.
Your Final Safety Checklist:
- Visual Check: Look for “shaggy” wires or rust.
- The Wrench Test: Feel for snags or internal burrs.
- Sound Check: Tap the cable; listen for a clear ring.
- Balance Check: If the door looks crooked, call a pro immediately.
If your Wrench Test has revealed any snags, or if you simply haven’t had your door serviced in the last year, don’t wait for a snap. At Floorcraft, we specialize in garage door repair bay area residents can trust. Contact us today for a comprehensive safety inspection in Burlingame, San Mateo, and the surrounding areas. Let’s keep your “silent workhorses” running smoothly for years to come.