The ‘Sandpaper’ Secret for Fixing Uneven Tile Edges
The microscopic war against lippage and the sandpaper secret
Lippage represents the vertical displacement between the edges of two adjacent tiles, usually resulting from uneven subfloors or improper thin-set application. Fixing these sharp edges requires a blend of mechanical grinding and chemical understanding. Most guys skip the leveling compound. They think the underlayment will hide the dip. It won’t. I spent three days grinding concrete on a job last month just so the floor wouldn’t click like a castanet. The smell of WD-40 and oak dust still clings to my jacket from that site. We were dealing with a slab that had a quarter inch dip over four feet. You cannot fix that with more glue. You fix it with sweat and a floor grinder. When you install tile over an unlevel surface, the corners will kick up. This creates a trip hazard and an eyesore that catches every shadow in the room. The secret to salvaging a floor where the tiles are already set involves silicon carbide sandpaper and diamond polishing pads. It is a slow process that requires a steady hand and a deep respect for the material hardness.
Why your subfloor is lying to you
Subfloor deflection and moisture vapor transmission are the primary reasons why tile installations fail or develop uneven edges over time. You might think a plywood subfloor is flat because it looks okay to the naked eye. It is not. If your joist spacing is too wide, the floor will flex. This flex snaps the bond between the tile and the thin-set. For natural stone, you need a deflection rating of L/720. For standard ceramic, L/360 is the minimum. If you ignore these numbers, the sandpaper secret will not save you. I have seen 24-inch porcelain tiles crack right down the middle because the installer thought one layer of 5/8 inch subfloor was enough. It never is. You need to verify the stiffness of the structure before the first bag of mortar is opened. Leveling is not just about aesthetics. It is about the structural integrity of the entire flooring assembly. When the subfloor moves, the tile remains rigid. Something has to give. Usually, it is the grout line or the tile itself. Using a long straightedge is the only way to find the truths that the subfloor is trying to hide from you.
“A floor is only as good as the subfloor beneath it; deflection is the enemy of every joint.” – Master Flooring Axiom
The chemistry of the bond and thin-set physics
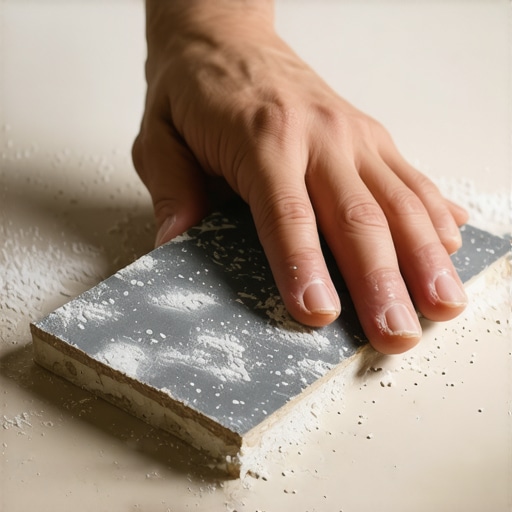
Modified thin-set mortars contain polymers that increase bond strength and allow for slight movement without total failure of the adhesive layer. Choosing the right mortar is a science. You cannot use a standard unmodified thin-set on a large format tile and expect it to stay flat. Large format tiles require medium bed mortar to support the weight and prevent the tile from sinking as the water evaporates from the mix. This sinking is a major cause of lippage. As the mortar cures, it shrinks. If the mortar bed is too thick or uneven, the shrinkage will be inconsistent. This pulls one side of the tile down more than the other. You end up with a ledge. The sandpaper secret comes into play here to ease that transition. By carefully sanding the high edge of a porcelain tile, you can remove the sharpness that catches socks and toes. You are essentially creating a micro-bevel. It requires a 120-grit diamond pad followed by a 200-grit and 400-grit to restore the factory finish. It is tedious work. It is the kind of work that separates a floor installer from a floor architect.
Technical specifications for tile leveling
| Material Type | Recommended Grit for Edges | Maximum Allowable Lippage |
|---|---|---|
| Ceramic Tile | 120 to 200 Grit | 1/32 inch |
| Porcelain Tile | 200 to 400 Grit | 1/32 inch |
| Natural Marble | 400 to 800 Grit | 1/64 inch |
| Granite Slab | 800 to 1500 Grit | 0 inch |
The 1/8 inch that ruins everything
Precision in flooring is measured in increments of 1/8 inch over ten feet, which is the industry standard for floor leveling. If you are off by more than that, your laminate will bounce and your carpet install will show every hump. When I am prepping a room for a shower floor, that 1/8 inch becomes even more vital for proper drainage. A shower is a wet environment where gravity is your only friend. If the tile edges are uneven in a shower, water will pool against the high edges. This leads to mold growth and grout erosion. The sandpaper method is particularly useful in showers to ensure that the perimeter tiles meet the drain assembly with a smooth transition. I often see guys try to use a thick layer of thin-set to level a shower floor. This is a recipe for disaster. The mortar will never cure properly in such a thick application. You need a dedicated mud bed or a high-quality self-leveling compound designed for wet areas. Stop trying to take shortcuts with the mud. The mud is the foundation. If the foundation is soft, the house falls down. If the mud bed is wavy, the tile will be a nightmare to walk on.
- Check subfloor for flatness using a 10-foot straightedge.
- Grind down high spots in concrete using a diamond cup wheel.
- Fill low spots with a high-compressive strength leveling compound.
- Ensure moisture levels in the slab are below 75 percent relative humidity.
- Use a lippage tuning system with clips and wedges during installation.
- Keep a set of diamond sanding pads on hand for post-cure adjustments.
Laminate and carpet transition traps
Transitions between different flooring types like laminate and carpet require specific height adjustments to prevent tripping and edge wear. People often forget that a carpet install requires a different subfloor prep than a hard surface. If you are going from a thick tile to a thin laminate, you have a height problem. You cannot just slap a T-molding down and call it a day. The T-molding will eventually snap or trip someone. You need to ramp the subfloor. Use a feather-finish compound to create a gentle slope over three or four feet. This makes the height difference invisible to the foot. While most people want the thickest underlayment for their laminate, too much cushion actually causes the locking mechanisms on LVP or laminate to snap under pressure. The floor needs to be supported by a rigid base. If the base is spongy, the joints will flex every time you walk on them. This leads to the floor pulling apart. I have seen it happen in dozens of homes where the owner thought they were being smart by doubling up on the foam. It is a mistake that costs thousands of dollars to fix. Stick to the manufacturer specifications for underlayment thickness.
“Industry standards exist to prevent the failures that occur when we prioritize speed over physics.” – TCNA Handbook Reference
The physics of floor leveling and gravity
Self-leveling underlayment acts as a liquid that seeks its own level, but it requires mechanical agitation and proper priming to bond correctly. You cannot just pour it and walk away. You need to use a spiked roller to release air bubbles. You need to ensure the perimeter is sealed so the liquid does not leak into the walls or the basement. The chemistry of these compounds is complex. They dry fast. You have about fifteen minutes to get it right. If you miss that window, you end up with a bigger mess than you started with. I remember a job in a high-rise where the installer didn’t seal the pipe penetrations. He poured fifty bags of leveler and half of it ended up in the ceiling of the apartment below. It was a disaster. Leveling is a high-stakes game. But when it is done right, the tile lays down like a dream. The edges align perfectly. You won’t even need the sandpaper secret if your prep is flawless. That is the goal. Use the tools. Trust the physics. Work until the floor is flat. Your knees and your clients will thank you later. This is the only way to build a floor that lasts a lifetime.