The Flashlight Test for Finding Grout Pinholes in Shower Walls
I spent three days grinding concrete on a job last month just so the floor would not click like a castanet. Most guys skip the leveling compound. They think the underlayment will hide the dip. It won’t. I have spent twenty five years on my knees with a moisture meter and a level. I have seen the same mistakes repeated from the luxury high rises of Manhattan to the humid basements of the Gulf Coast. A floor is not a decoration. It is a structural engineering challenge that starts at the subfloor and ends at the microscopic pores of your grout. If you ignore the physics of moisture vapor transmission or the chemistry of polymer modified thin set, your expensive tile or laminate will fail. It is that simple. This guide focuses on the flashlight test, a method to identify the tiny structural failures in grout pinholes before they rot your wall studs.
The physics of the flashlight test for grout integrity
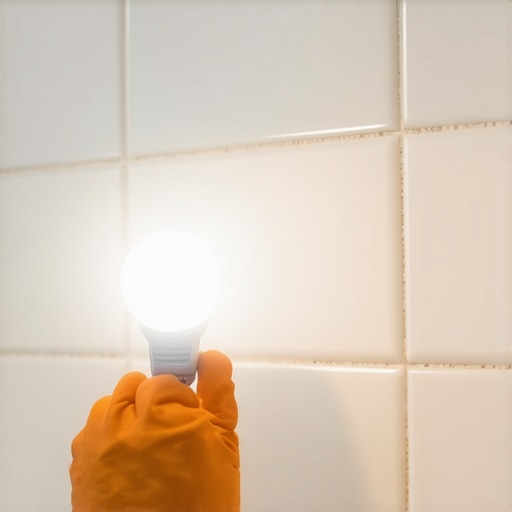
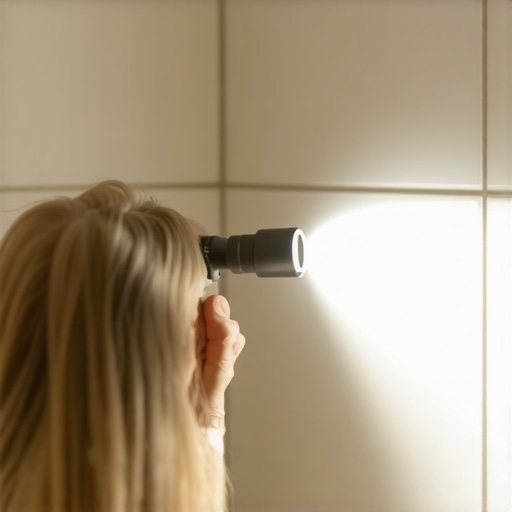
The flashlight test uses high lumen grazing light to reveal shadows cast by microscopic grout pinholes and voids that are invisible under standard overhead lighting. By placing a powerful LED light source parallel to the tile surface in a darkened room, you amplify the topography of the grout line. This method identifies areas where the grout mixture was too thin or where air bubbles became trapped during the application process. These pinholes act as tiny straws, pulling water behind the tile through capillary action and eventually saturating the backer board. This process can lead to catastrophic failure in showers where moisture management is the only thing standing between your subfloor and black mold. You cannot trust your eyes alone. You need to leverage the way light interacts with surface irregularities to see the truth of the installation.
“A floor is only as good as the subfloor beneath it; deflection is the enemy of every joint.” – Master Flooring Axiom
Why your subfloor is lying to you
Subfloor leveling is the most vital step in any flooring installation because an uneven base creates mechanical stress that snaps grout bonds and breaks LVP locking mechanisms. When you walk across a floor, you are applying hundreds of pounds of pressure per square inch. If there is a void under the tile because of a dip in the concrete, the tile will flex. That flex is called deflection. Even 1/16 of an inch of deflection can cause the grout to crack or the pinholes to widen. I have seen carpet install jobs where the homeowner thought they could switch to tile without prep. They were wrong. You must use a self leveling underlayment that reaches a compressive strength of at least 3,000 PSI to ensure the substrate can handle the load. If the subfloor is wood, you need to check the joist spacing and ensure the plywood thickness meets TCNA requirements for the specific tile weight. A dip in the subfloor is a ticking time bomb for your grout lines.
The ghost in the expansion gap
Expansion gaps are non negotiable spaces around the perimeter of a room that allow the floor to breathe and shift without buckling or cracking. Whether you are dealing with hardwood or laminate, the material will expand and contract based on the relative humidity of the room. In a bathroom, this is even more critical. If you tight fit your tiles or laminate against a wall, the pressure has nowhere to go. It will push against the center of the floor, causing it to crown or buckle. For showers, the transition between the wall and the floor must be a movement joint filled with 100 percent silicone sealant, not grout. Grout is rigid. It will crack at any change of plane. When you perform the flashlight test, look closely at these corners. If you see grout where there should be silicone, you are looking at a future leak. The chemistry of the bond matters more than the color of the finish.
| Grout Type | Absorption Rate | Compressive Strength | Best Use Case |
|---|---|---|---|
| Sanded Grout | High | Low to Medium | Wide joints over 1/8 inch |
| Unsanded Grout | High | Low | Narrow joints and polished stone |
| High Performance Grout | Low | High | Heavy traffic and wet areas |
| Epoxy Grout | Near Zero | Extreme | Commercial showers and chemical exposure |
The 1/8 inch that ruins everything
Precision in grout joint width and depth ensures that the cementitious bond is strong enough to resist the hydraulic pressure of water during a shower. If the grout is too shallow, it lacks the structural mass to stay in place. It will eventually flake out, leaving the edges of the tile exposed. During a carpet install, you worry about the stretch and the tack strip. In a shower, you worry about the water cement ratio. If the installer used too much water to mix the grout, the resulting material will be soft and porous. As the water evaporates out of the wet grout, it leaves behind microscopic tunnels. These are the pinholes the flashlight test is designed to find. A professional mix should have the consistency of peanut butter, not soup. If it is runny, it is ruined. You are basically installing a sponge between your tiles.
- Check the subfloor for levelness using a 10 foot straight edge.
- Verify that the moisture content of the concrete is below 4 percent.
- Ensure the thin set coverage is at least 95 percent for wet areas.
- Mix grout at a low RPM to avoid whipping air into the paste.
- Wait the full cure time before performing a flood test.
The swampy humidity of the south and your floor
Environmental conditions during installation dictate the success of the bond because high humidity slows the evaporation of water in the adhesive and grout. If you are in a place like Houston or Miami, the air is thick with moisture. This means your laminate needs longer to acclimate and your grout needs more time to reach its full hardness. If you seal the grout too early, you trap moisture inside the joint, which can lead to efflorescence. This is that white, powdery salt that rises to the surface. It is not just ugly. It is a sign that the grout is being chemically compromised. Always use a hygrometer to check the room conditions before you start. If the humidity is above 60 percent, you need to run a dehumidifier or wait for a better window. The physics of the room will always beat the schedule of the contractor.
“Cementitious grout is a porous material that requires mechanical density to achieve water resistance.” – TCNA Handbook Standards
The chemistry of the modern wear layer
Wear layers on modern flooring materials are measured in mils and determine the lifespan of the surface against abrasion and chemical cleaners. For laminate or vinyl being used near bathrooms, a 20 mil wear layer is the industry standard for durability. However, the wear layer only protects the top. The edges are the weak point. This is why the flashlight test is so useful even for non tile floors. You can use it to find gaps in the planks where water can seep in. Once water reaches the HDF core of a laminate plank, it will swell. There is no fixing it. You have to rip it out. I have seen entire floors ruined because a dog spilled a water bowl and the owner did not realize the planks had a 1/32 inch gap. That small space is all it takes for the capillary action to begin. Precision is the difference between a ten year floor and a two year floor. Don’t be the guy who thinks close enough is good enough. It never is.