The ‘Mist Test’ for Verifying Your Shower’s Waterproof Membrane
The structural reality of a wet room
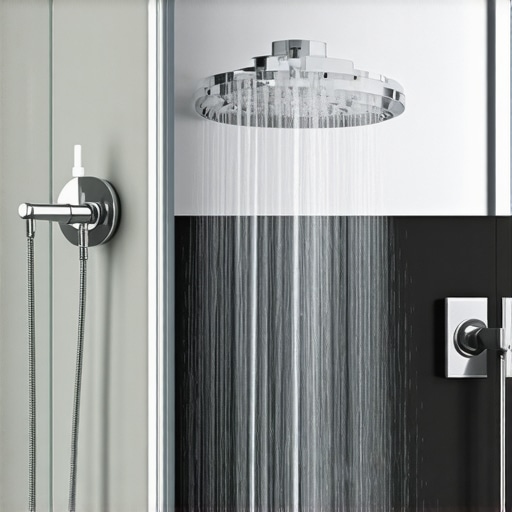
A waterproof membrane must be verified through the mist test or flood testing to ensure zero moisture migration into the substrate. This process involves applying a fine water vapor to the cured membrane surface to observe for immediate absorption or runoff. If the substrate darkens, the membrane has failed. I spent three days grinding concrete on a job last month just so the floor wouldn’t click like a castanet. Most guys skip the leveling compound. They think the underlayment will hide the dip. It won’t. I have spent twenty five years on my knees with a moisture meter. I have seen what happens when you trust a bucket of pre mixed mastic in a high moisture environment. It turns into a milky sludge. It fails. The shower is the most high stakes area of the home. It is a box of water built inside a box of wood or concrete. If the chemistry of your liquid applied membrane is off, or if you thinned it out too much to save a buck, the house starts rotting from the inside out. You smell it before you see it. That damp, earthy funk of mold. By the time the tile starts popping, you are already looking at a five figure tear out.
Why your subfloor is lying to you
Subfloor flatness is the single most vital factor in determining the longevity of a tile or laminate installation. A subfloor can look level to the naked eye while hiding significant troughs and ridges that exceed the industry standard of one eighth inch over ten feet. I have seen homeowners buy the most expensive Italian marble only to have the grout lines crack within a month. Why. Because the installer didn’t use a straightedge. They didn’t check for deflection. They didn’t look at the joist spacing. You cannot hide a bad subfloor with more thinset. Thinset is an adhesive, not a filler. When thinset is applied too thick, it shrinks as it cures. This shrinkage pulls at the tile, creating hollow spots or even cracking the stone. You need a dedicated self leveling underlayment with a minimum compressive strength of 3000 PSI. I use a spiked roller to get the air bubbles out. If you leave those bubbles, you are creating tiny caves of weakness. The floor will crunch when you walk on it. It sounds like breakfast cereal. It is a sign of failure. It is the sound of a job done poorly. I smell like floor wax and sawdust for a reason. I do the work the right way.
“A floor is only as good as the subfloor beneath it; deflection is the enemy of every joint.” – Master Flooring Axiom
The microscopic failure of cheap thinset
Polymer modified thinset provides the molecular bond necessary to hold large format tiles to a waterproof membrane. Cheap, unmodified mortars lack the flexibility to handle the expansion and contraction cycles of a bathroom. Heat from the shower causes tiles to expand. If the mortar is too rigid, the bond snaps. This is called shearing. On a microscopic level, the polymers in a high quality thinset form a bridge between the non porous membrane and the ceramic tile. Think of it as a million tiny anchors. If you use a cheap product, you have no anchors. You just have a dry sandwich of dust. I always check the date codes on the bags. If the thinset has been sitting in a damp warehouse for six months, it is garbage. It will clump. It will not hydrate correctly. You want a creamy, peanut butter consistency. If it is runny, it will not support the weight of the tile. If it is too dry, it will skin over before you can set the piece. Both lead to a callback. I hate callbacks. They cost me money and they cost me my reputation.
The chemistry of a perfect bond
Waterproofing membranes require a specific chemical compatibility with the thinset used for the tile overlay. Some membranes are fleece backed to provide a mechanical bond, while others rely on chemical adhesion to a liquid rubber surface. You must verify that your thinset is rated for the specific membrane. ANSI A118.15 is the gold standard for improved modified dry set cement mortars. If the bag doesn’t say it, don’t use it. I have seen guys try to use carpet adhesive for vinyl planks in a bathroom. It is a disaster. The moisture in the air emulsifies the glue. The planks start floating away like little boats. You need to understand the science. You need to understand moisture vapor transmission or MVT. Concrete is a sponge. It breathes. If you trap that moisture under a non porous laminate without a proper 6 mil poly barrier, the floor will buckle. It will hump up in the middle of the room. It will happen every time. No exceptions.
| Material | Moisture Tolerance | Bond Strength | Cure Time |
|---|---|---|---|
| Modified Thinset | High | 400 PSI | 24 Hours |
| Leveling Compound | Medium | 3000 PSI | 12 Hours |
| Moisture Barrier | Extreme | N/A | 4 Hours |
| Epoxy Grout | Total | 1000 PSI | 8 Hours |
A checklist for structural survival
- Verify subfloor flatness within one eighth inch over ten feet.
- Check concrete moisture levels using a calcium chloride test or in situ probe.
- Vacuum all debris to ensure the primer penetrates the substrate.
- Apply waterproof membrane in two perpendicular coats to avoid pinholes.
- Perform the mist test to verify surface tension and integrity.
- Use a notched trowel to ensure 95 percent mortar coverage in wet areas.
The ghost in the expansion gap
Every hard surface floor requires an expansion gap at the perimeter to accommodate changes in humidity and temperature. If you jam laminate or tile tight against the drywall, the floor has nowhere to go when it expands. It will lift. It will create a hollow sound. Many installers cover this gap with baseboard, but the gap must exist underneath. I have seen floors rip the baseboards right off the wall because they were pinned too tight. While most people want the thickest underlayment, too much cushion actually causes the locking mechanisms on LVP to snap under pressure. You want a high density underlayment. You want something that doesn’t compress more than a fraction of a millimeter. If the floor feels like a trampoline, it is going to break. The tongue and groove joints are only a few millimeters thick. They are the weakest link. Treat them with respect. Treat the physics of the room with respect. The air in your house is a living thing. It gets wet. It gets dry. Your floor reacts to all of it.
The one eighth inch that ruins everything
Minor deviations in the subfloor lead to major failures in the finished surface. If you have a high spot, the tile will teeter like a seesaw. If you have a low spot, the tile will sag. This creates lippage. Lippage is more than an eyesore. It is a trip hazard. It causes the edges of the tile to chip when you run a vacuum over them. I use a leveling system with clips and wedges. It forces the tiles to stay on the same plane while the mortar sets. It is not a substitute for a flat floor, but it is a vital tool for a professional finish. If you think you can eye it, you are wrong. I have been doing this for two decades and I still use a level. Every time. No shortcuts. The mist test is just the final check. The real work happens in the prep. The real work is the grinding, the priming, and the leveling. That is where the floor is won or lost.