The 24-Hour Rule for Primer Before Pouring Leveler
The 24-Hour Rule for Primer Before Pouring Leveler
Most guys skip the leveling compound. They think the underlayment will hide the dip. It won’t. I spent three days grinding concrete on a job last month just so the floor wouldn’t click like a castanet. I walked onto that site and saw a slab that looked like the surface of the moon. The previous crew had just slapped down some primer and left it for three days while they went to finish another job. When I got there, that primer was so bone dry and covered in drywall dust that it had zero integrity. I could peel it up with a putty knife. That is the reality of the 25 year veteran on his knees. If you miss your window for the pour, you are not just wasting time. You are building a floor on a foundation of sand. A floor is a structural assembly. It is not a rug. It is a performance surface that must withstand thousands of pounds of pressure and constant environmental shifts.
The ticking clock on substrate adhesion
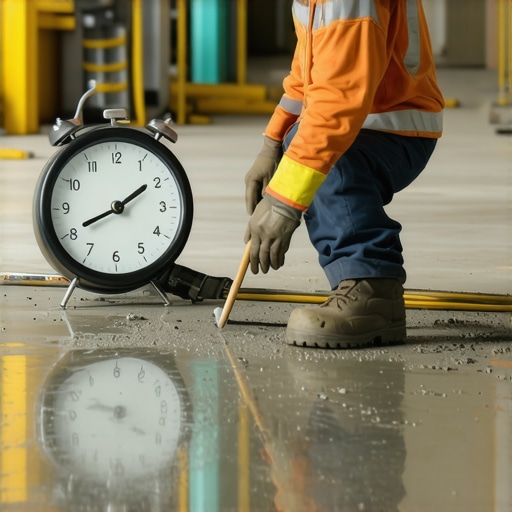
The 24-hour rule for primer before pouring self-leveling underlayment dictates that the bond strength of the polymer chains decreases significantly after a day. Adhesion relies on a chemical bond that remains active while the acrylic or epoxy particles are still receptive to the cementitious overlay. If the primer dries for too long, it becomes a contaminant rather than an adhesive agent. You have to understand the molecular reality of what is happening on that slab. Primer is designed to penetrate the pores of the concrete. It fills those microscopic voids to prevent air from escaping and causing pinholes in your leveler. But once that primer cures past a certain point, it skins over completely. It becomes a plastic sheet. When you pour wet leveler over a plastic sheet that has been sitting for 48 hours, you are essentially pouring it onto a slip-and-slide. The leveler will settle. It will look flat. But three months later, when the homeowner walks across it in high heels, the lack of a mechanical bond will cause the leveler to delaminate from the substrate. It makes a hollow sound. It is the sound of a failed installation.
“A floor is only as good as the subfloor beneath it; deflection is the enemy of every joint.” – Master Flooring Axiom
The chemistry of the tacky interface
A successful pour requires a tacky surface or a receptive polymer matrix to ensure the leveling compound integrates with the concrete substrate. This interfacial transition zone is where the structural integrity of the flooring system is won or lost. If the primer is too wet, it mixes with the leveler and weakens the compressive strength. If it is too dry, it creates a bond breaker. I have seen guys try to pour over primer that has been sitting for a week. They say the bucket says it is fine. The bucket is lying. The bucket does not account for the dust on your job site. It does not account for the humidity in the room. When you wait too long, the primer attracts every bit of airborne debris. Sawdust, skin cells, and microscopic particles settle on that surface. You can not see them, but they are there. They create a layer of filth between the bond agent and the leveler. This is why the 24 hour window is the gold standard for anyone who actually cares about the longevity of their work.
How substrate porosity dictates your timeline
Different substrates like porous concrete, exterior grade plywood, or non-porous tile require specific primer application methods to maintain suction control. A highly absorbent surface will suck the moisture out of your primer in minutes, potentially shortening your open time for the leveler pour. You need to test the porosity with a simple water droplet test. If the water disappears into the slab in less than sixty seconds, you have a thirsty floor. That floor will drink your primer and leave the surface dry and brittle. In those cases, I often do a double coat. The first coat seals the pores. The second coat provides the actual bond. If you wait more than 24 hours between these steps or before the final pour, you lose the chemical bridge. You are left with a mechanical bond only, and in the world of high performance flooring, a mechanical bond is the bare minimum. We want more than the minimum. We want a floor that will outlast the house.
| Primer Type | Drying Time | Max Pour Window | Best Use Case |
|---|---|---|---|
| Acrylic Latex | 1-3 Hours | 24 Hours | General Subfloors |
| Epoxy with Sand Broadcast | 6-12 Hours | 48 Hours | Non-Porous / Oil Soaked |
| Polyurethane | 2-4 Hours | 12 Hours | Fast Track Projects |
| Water-Based Neoprene | 1-2 Hours | 24 Hours | Wood Subfloors |
The ghost in the expansion gap
Every installation must respect expansion joints and perimeter isolation to prevent compressive failure in the self-leveling underlayment. If you run your leveler right up to the drywall without a foam spacer, the floor has nowhere to go when the house settles. This is where the 24 hour rule becomes part of a larger system. If you prime the floor and then wait two days to install your foam spacers, you have already allowed dust to contaminate the perimeter bond. I see this all the time in shower installations. Someone will prime the subfloor for a mud bed or leveler, go home for the weekend, and come back Monday to finish the prep. By then, the primer is a dead surface. In a wet environment like a shower, that bond is the only thing keeping your tiles from cracking when the house breathes. You have to be surgical. You prime, you set your spacers, and you pour. It is a continuous workflow, not a series of disconnected tasks.
Why your subfloor is lying to you
A subfloor might look flat and clean, but calcium chloride testing often reveals moisture vapor emission rates that will destroy your primer bond. Even the best primer cannot fight hydrostatic pressure coming from a concrete slab that was poured without a vapor barrier. If you apply primer over a damp slab and wait 24 hours, you might see bubbles forming. That is the moisture trying to escape. If you ignore those bubbles and pour your leveler, you are trapping that moisture. Eventually, the pressure will blow the leveler right off the floor. I once saw an entire laminate floor in a basement that felt like a trampoline. When we ripped it up, the leveler was in pieces, floating on a thin film of water. The installer had primed the floor but didn’t check the moisture levels. He waited too long to pour, the primer failed, and the moisture did the rest. Always use a moisture meter. Your eyes are not calibrated to detect 4 percent moisture content.
“Substrate preparation is 90 percent of the job; the finish flooring is just the victory lap.” – NWFA Professional Standards
The 1/8 inch that ruins everything
Precision in floor leveling means maintaining a tolerance of 1/8 inch over 10 feet to satisfy LVP and hardwood manufacturers. If your leveler is not bonded perfectly due to a late pour, that 1/8 inch gap will eventually become a 1/4 inch deflection. Think about the locking mechanisms on a modern click-lock floor. Those plastic tongues are tiny. They are engineered to sit on a flat surface. When the subfloor dips because the leveler has detached from the primer, that joint flexes. It flexes every time someone walks on it. After a thousand flexes, the plastic snaps. Now you have a gap in your floor that you can fit a credit card into. All of this because someone didn’t want to re-prime a floor that sat for two days. It is laziness disguised as efficiency. While most people want the thickest underlayment, too much cushion actually causes the locking mechanisms on LVP to snap under pressure. You need a rock solid, well bonded leveler, not a thick pad to hide your mistakes.
- Check the ambient temperature and substrate temperature before mixing.
- Ensure the primer has changed color from milky to translucent before pouring.
- Use a spiked roller to break the surface tension of the leveler.
- Never add more water to leveler than the manufacturer specifies.
- Vacuum the floor with a HEPA filter right before applying primer.
- Seal all cracks in the subfloor to prevent leveler from leaking into the basement.
The physics of surface tension and flow
The flow characteristics of self-leveling underlayment are governed by surface tension and the viscosity of the cementitious mix. When you pour leveler, it wants to find its own equilibrium. However, it needs a slick surface to move across. A fresh primer coat provides that surface. If the primer is too old and dry, it creates frictional resistance. The leveler stops moving before it reaches its true level. This results in mounding or valleys in the finish. You end up with a floor that is worse than when you started. I have spent hours with a floor grinder removing high spots because an installer poured leveler over old primer. The leveler just sat there like cold oatmeal instead of flowing like water. It is a physical failure. The chemical surfactants in the leveler are designed to interact with the active polymers in the primer. When that interaction is missing, the physics of the pour fail. You lose the self-leveling property and you are left with a manual leveling mess.
Environmental variables in the workshop
The evaporation rate of primer solvents is highly dependent on relative humidity and airflow across the subfloor. In a dry climate like Phoenix, your 24 hour window might actually be an 8 hour window. The heat will bake that primer until it is brittle. In a humid environment like New Orleans, the primer might stay tacky for 36 hours. But you cannot gamble on that. You have to control the environment. Turn off the HVAC so you do not have forced air blowing dust onto your wet primer. Close the windows to prevent rapid drying. Flooring is science. It is the management of variables. If you treat it like a chore, it will bite you. If you treat it like a structural engineering project, you will never have a callback. I have not had a leveler failure in twenty years because I follow the clock and I trust my moisture meter. If I miss the 24 hour window, I grind it off and start over. It is the only way to be sure. It is the difference between a handyman and a master. Ensure the substrate is between 50 and 90 degrees Fahrenheit. Anything outside that range will mess with the curing process and the bond strength. Do not rush the prep. The prep is the floor.