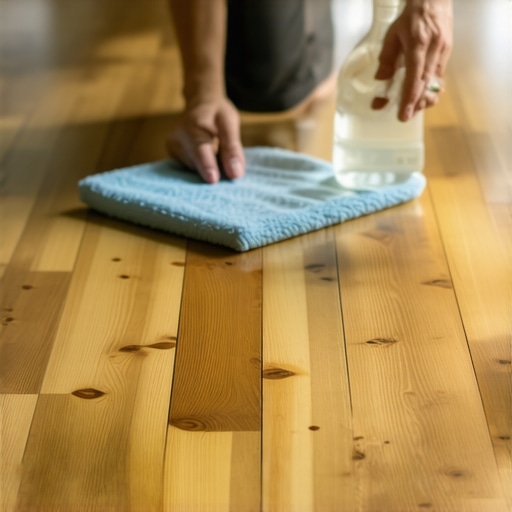
How to remove permanent marker from a laminate floor
Removing permanent marker from a laminate floor requires an understanding of the chemical bond between the ink pigments and the aluminum oxide wear layer. You must use a solvent that breaks down the resin in the ink without dissolving the melamine finish that protects the high-density fiberboard core. If you act quickly, the non-porous nature of high-quality laminate prevents the stain from becoming a permanent structural defect.
I spent three days grinding concrete on a job last month just so the floor wouldn’t click like a castanet. Most guys skip the leveling compound. They think the underlayment will hide the dip. It won’t. When I finally finished that perfectly flat subfloor, the homeowner’s kid walked across the brand-new planks with a black permanent marker. I saw my hard work under threat from a chemical compound designed to stay put forever. I didn’t panic because I know how these surfaces are built. Laminate is not just a picture of wood. It is a multi-layered engineering marvel. The top layer is a thermo-fused melamine resin often infused with microscopic particles of aluminum oxide. This creates a surface that is incredibly hard but susceptible to certain chemical interactions. When that marker hits the surface, the solvents in the ink attempt to bite into the resin. Your job is to interrupt that bite before it reaches the decorative paper layer below.
The chemical reality of marker ink
Permanent marker ink consists of a carrier solvent and a resin that binds the pigment to a surface once the solvent evaporates. On a laminate floor, the solvent quickly flashes off, leaving the resin and pigment trapped on the textured surface of the wear layer. Because laminate is not porous like real oak or pine, the ink sits on top rather than soaking in, provided the floor was installed correctly with tight joints. If your floor leveling was ignored during installation, the gaps between the planks can act as channels for the ink to reach the unprotected HDF core. Once liquid ink hits that compressed wood flour, it travels via capillary action, making removal nearly impossible without replacing the entire plank.
“A floor is only as good as the subfloor beneath it, deflection is the enemy of every joint.” – Master Flooring Axiom
The alcohol solution for stubborn stains
Isopropyl alcohol with a concentration of 91 percent or higher is the most effective solvent for removing permanent marker from laminate without damaging the finish. This high-purity alcohol dissolves the ink resin almost instantly. You should never pour the alcohol directly onto the floor. Instead, dampen a clean white microfiber cloth. Using a white cloth is vital because colored rags can bleed dye into the floor, creating a secondary problem that is even harder to fix. Gently rub the marker lines in a circular motion. You will see the ink transfer from the floor to the cloth. As the cloth becomes saturated with ink, move to a clean section of the fabric to avoid smearing the pigment back into the texture of the laminate.
Why the joints matter more than the stain
The integrity of the locking mechanism determines whether a surface stain remains a cosmetic issue or becomes a structural failure. If the floor was installed over an uneven subfloor, the constant vertical movement, or deflection, can weaken the tongue and groove joints. This creates micro-cracks. When you apply a cleaning agent like alcohol or acetone to a stain near these weakened joints, the liquid can seep into the core. Laminate cores are essentially high-density sponges. When they get wet, they swell. This is why I always tell people that floor leveling is the most important part of a laminate or carpet install. A flat floor stays tight, and a tight floor keeps chemicals on the surface where they can be wiped away safely.
The danger of abrasive cleaning methods
Abrasive pads and magic erasers can strip the AC rating right off your laminate floor if used with too much pressure. Laminate durability is measured by the Abrasion Class (AC) rating. An AC3 floor is standard for residential use, while AC4 is for heavy traffic. These ratings represent the thickness and density of the aluminum oxide particles in the wear layer. When you use a magic eraser, which is essentially extremely fine melamine foam sandpaper, you are grinding down that protective shield. While it might remove the marker, it will also leave a dull spot in the finish that will catch the light and look like a permanent greasy smear. Always start with the gentlest chemical method before moving to mechanical abrasion.
Comparison of solvent effectiveness
| Solvent Type | Inks Targeted | Risk Level | Drying Time |
|---|---|---|---|
| Isopropyl Alcohol 91% | Standard Permanent | Low | Fast |
| Acetone (Nail Polish Remover) | Industrial Grade | High | Instant |
| Dry Erase Marker | Fresh Stains | Zero | Slow |
| Mineral Spirits | Oil-based markers | Medium | Moderate |
The dry erase marker trick
One of the safest ways to lift permanent ink is to use a dry erase marker to re-liquefy the dried resin. Dry erase markers contain a non-polar solvent that is designed to stay wet and keep pigments in suspension. By drawing directly over the permanent marker lines, you are introducing fresh solvent to the old stain. Let it sit for ten seconds, then wipe it away with a soft cloth. This method is brilliant because it carries almost no risk of damaging the melamine finish or seeping into the core. It is the first thing I try before reaching for the heavy chemicals like acetone or lacquer thinner.
The influence of moisture from nearby showers
High humidity environments like bathrooms or areas near showers can soften the resins in some laminate floors, making them more susceptible to staining. If you have a laminate floor in a hallway outside a bathroom, the steam from the shower can cause the planks to expand and contract daily. This cycling stresses the wear layer. In these high-moisture zones, a permanent marker stain can be more difficult to remove because the microscopic pores of the wear layer are more active. I generally advise against laminate in high-moisture areas, but if you have it, you must ensure your perimeter expansion gaps are clear. This prevents the floor from peaking, which would otherwise expose the vulnerable edges of the planks to the marker ink.
Laminate maintenance checklist
- Always use white microfiber cloths to prevent dye transfer.
- Test any solvent in a hidden corner or inside a closet first.
- Avoid soaking the joints with liquid cleaners.
- Use a dabbing motion rather than aggressive scrubbing.
- Clean the area with plain water after the ink is removed to neutralize the solvent.
- Ensure the subfloor is level to prevent joint separation and ink seepage.
The chemistry of acetone and the AC rating
Acetone is a powerful solvent that should only be used as a last resort on laminate floors. It is capable of dissolving many types of plastic and synthetic resins. However, because high-quality laminate is cured under intense heat and pressure, it is generally resistant to a quick wipe with acetone. The key is the AC rating. A floor with a high AC rating has a denser layer of protection. If you must use acetone, you should be extremely careful to avoid touching any plastic transitions or baseboards. Acetone will melt those instantly. If you have a cheap, builder-grade laminate with a low AC rating, the acetone might actually soften the decorative paper layer, leading to a permanent white spot that looks like a bleach stain.
“The wear layer is a shield, but even shields can be dissolved by the wrong chemistry.” – Master Flooring Axiom
The myth of the thick underlayment
While most people want the thickest underlayment, too much cushion actually causes the locking mechanisms on LVP and laminate to snap under pressure. This is a crucial point for maintenance. If your floor has too much vertical play because of a thick, soft underlayment, the joints are constantly rubbing against each other. This friction creates heat and wear at the seams. If a child drops a marker and it bleeds into one of these worn seams, the ink is no longer on the surface. It is now embedded in the structural tongue of the plank. No amount of alcohol or acetone will get it out once it is in the wood fiber. This is why I insist on a high-density, thin underlayment and a perfectly level subfloor. It is about protecting the floor from more than just foot traffic. It is about protecting it from life’s accidents.
Why carpet install logic fails on laminate
In a carpet install, you can often cut out a stained section and patch it with a remnant, but laminate requires a full plank replacement if the stain persists. This is why the removal of permanent marker is so high-stakes. With laminate, you cannot simply hide the mistake. If the marker has penetrated the wear layer, you are looking at unclicking the floor back to the wall to replace that one damaged board. This is a labor-intensive process that can take hours. Understanding the molecular structure of the wear layer allows you to avoid this outcome. You are fighting a battle of chemistry. The pigment wants to stay, the resin wants to hold it, and your solvent needs to be strong enough to break that bond without destroying the floor beneath it.
The physics of expansion gaps and cleaning
The 1/8 inch that ruins everything is often the expansion gap left at the perimeter of the room. If this gap is missing, the floor will pressure-fit against the walls. This pressure distorts the planks. When the planks are distorted, the top wear layer is under tension. Applying a cold solvent to a floor under tension can theoretically cause micro-crazing in the melamine. It sounds extreme, but I have seen finishes crack when exposed to rapid temperature changes or harsh chemicals while the floor was under physical stress. Always ensure your floor is floating freely. This structural health translates to chemical resilience. A floor that can breathe is a floor that can be cleaned safely.
The ghost in the expansion gap
If you find that the marker ink has disappeared from the surface but a faint shadow remains in the texture, you are dealing with pigment entrapment. Many laminate floors have an embossed-in-register texture that mimics real wood grain. This texture has deep valleys. A flat cloth will only hit the peaks. In this case, you need a soft-bristled toothbrush. Dip the toothbrush in the isopropyl alcohol and very gently agitate the valleys of the texture. Do not scrub hard. The goal is to let the bristles reach the pigment that the cloth missed. Wipe immediately with a dry cloth to lift the dissolved ink before it settles back into the grain. This level of detail is what separates a professional fix from a ruined floor. You have to think like the person who built the material.