The Water Bead Test for Checking Your Grout Sealer Integrity
The Water Bead Test for Checking Your Grout Sealer Integrity
Grout is the most misunderstood component of a tile assembly. Most homeowners and even some green contractors view it as a colored caulk that fills gaps. It is actually a porous cementitious product that acts like a hard sponge. If you do not seal it properly, that sponge will suck up every drop of dirty mop water, spilled wine, and bathroom humidity it touches. The water bead test is the only definitive way to verify if your chemical barrier is still functional or if your subfloor is at risk of moisture intrusion. I have spent thirty years crawling across concrete slabs with a moisture meter in one hand and a level in the other. I know the smell of damp mortar and the grit of oak dust in my lungs. I have seen what happens when people ignore the physics of porosity. To understand grout, you have to understand the microscopic network of capillaries that exist within a cured cement matrix. When you apply a high quality sealer, you are not just painting the surface. You are changing the surface energy of the grout particles to repel liquids. If that energy state fails, the water enters, the mold grows, and the structural integrity of your floor leveling compound begins to degrade from the bottom up.
The simple physics of surface tension on tile
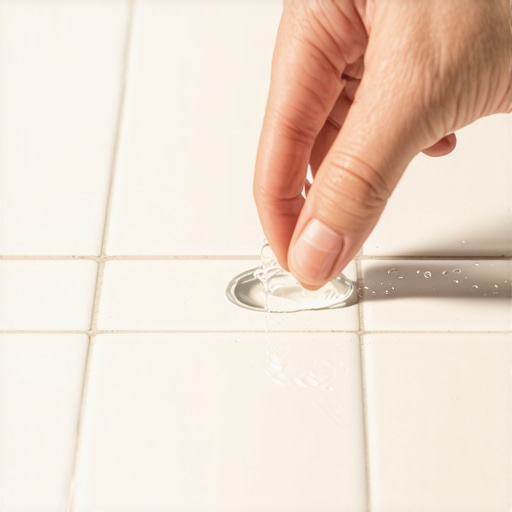
The water bead test requires placing a few drops of clean water onto your grout lines to observe if the liquid sits on top or penetrates the surface. If the water forms a distinct sphere, your sealer is intact. If the grout darkens and absorbs the water, the seal has failed. Most guys skip the leveling compound. They think the underlayment will hide the dip. It won’t. I spent three days grinding concrete on a job last month just so the floor wouldn’t click like a castanet. That job taught me that every layer of the floor must be perfect. If the subfloor has a dip, the tile will flex. When the tile flexes, the grout cracks. Once the grout cracks, the sealer is useless because water will bypass the surface and move straight into the thin-set. This leads to a total system failure. You cannot fix a bad subfloor with a good sealer. You have to start with a flat, stable surface that meets the deflection standards of the Tile Council of North America. If your subfloor is plywood, it needs to be the right thickness and have the right spacing. If it is concrete, it must be dry and free of laitance. Only then can you worry about the integrity of your grout joints.
“A floor is only as good as the subfloor beneath it; deflection is the enemy of every joint.” – Master Flooring Axiom
The chemical bond of fluoropolymers in sealer
Modern grout sealers utilize fluoropolymer chemistry or silane siloxane structures to create a hydrophobic barrier within the pores of the cement. These chemicals work by lowering the surface energy of the grout to a point where water molecules cannot flatten out and soak into the material. When you perform the water bead test, you are actually testing the presence of these chemical bonds. Over time, friction from foot traffic and the caustic nature of many floor cleaners will strip these molecules away. This is why a shower floor needs more frequent testing than a kitchen floor. In a shower, the constant heat and soap scum act as solvents that break down the sealer. If you are using a penetrating sealer, the chemical is sitting just below the surface. If you are using a film-forming sealer, it is a literal plastic coating on top. I prefer penetrating sealers because they let the grout breathe. If you trap moisture under a film-forming sealer, the grout will turn mushy and eventually crumble. You have to understand that grout is a breathing entity. It needs to release vapor from the subfloor while blocking liquid from the top. It is a delicate balance that requires the right product for the right environment.
The 1/8 inch that ruins everything
Precision in floor leveling is the difference between a floor that lasts fifty years and one that fails in five. A variance of more than 1/8 inch over ten feet creates stress points that will eventually telegraph through the grout and tile. I once walked into a job where the homeowner complained that their grout was always dirty. I did the water bead test and it failed instantly. But the bigger problem was that the floor wasn’t level. As people walked across the kitchen, the tiles were moving just enough to create micro-fissures in the grout. Those fissures acted like straws, sucking up dirty water every time they mopped. No amount of sealer can fix a floor that is moving. You have to ensure that your subfloor is within the L/360 deflection limit for ceramic tile or L/720 for natural stone. If you are transitioning from a carpet install to a tile floor, you need to manage that height difference with a proper transition strip, but more importantly, you need to make sure the subfloor under the carpet is as solid as the one under the tile. Many people think they can just throw some laminate over an old floor, but every type of flooring requires a specific subfloor preparation. If you ignore the leveling, you are just waiting for the grout to fail.
| Sealer Type | Longevity | Moisture Resistance | Breathability |
|---|---|---|---|
| Penetrating (Solvent) | 5-10 Years | High | Excellent |
| Penetrating (Water) | 3-5 Years | Medium | Good |
| Film-Forming (Acrylic) | 1-2 Years | Very High | Poor |
The ghost in the expansion gap
Perimeter expansion gaps are required by every flooring manufacturer to allow for the natural movement of the building and the materials themselves. If you grout your tile tight against a wall or a cabinet, the floor has no room to breathe and will eventually tent or crack. This is especially true in regions with high humidity. If you live in a place where the air feels like a wet blanket, your wood subfloor is going to expand and contract significantly. That movement is transferred directly to the tile. If you didn’t leave a 1/4 inch gap at the walls, the pressure has nowhere to go but up. This pressure creates cracks in the grout that you might not even see with the naked eye. When you do the water bead test, watch the edges of the tiles. If the water disappears into a hairline crack near the baseboard, you have a structural problem, not just a sealer problem. I always use a color-matched 100 percent silicone caulk at all change of plane joints. Silicone is flexible. Grout is not. If you put grout in a corner where two walls meet, it will crack. It is a mathematical certainty. Use the right material for the job and you won’t have to keep re-sealing cracks that shouldn’t be there in the first place.
Shower walls and the capillary effect
Showers are the most aggressive environment for grout because they are subjected to hydrostatic pressure and constant wet-dry cycles. The water bead test should be performed every six months on shower floors and the first two rows of wall tile. If the water doesn’t bead, you are inviting moisture to sit behind your tiles. This is how you end up with mold growing on the backside of your drywall or backer board. Even if you have a waterproof membrane like Kerdi or Wedi, the grout still needs to be sealed to prevent the accumulation of minerals and bacteria. I have seen too many showers where the homeowner thought the grout was fine because it looked clean. Then they do the test and the water just vanishes. That water is sitting in the mortar bed, slowly rotting out the curb or the wall studs. You have to be proactive. If you wait until you see a stain, it is already too late. The damage is done. Use a high-quality solvent-based sealer for showers. It penetrates deeper and lasts longer against the heat of the water. Do not cheap out on the stuff from the big box stores. Go to a professional tile shop and buy the industrial grade chemicals. Your shower will thank you for it.
- Clear the area of all rugs, furniture, and debris before testing.
- Clean the grout lines with a pH-neutral cleaner and let them dry for 24 hours.
- Use a small dropper or a spray bottle to apply water to multiple locations.
- Wait at least ten minutes to see if the water remains beaded or is absorbed.
- Check both high-traffic areas and protected areas under cabinets for comparison.
- Document the results to track the degradation of the sealer over time.
Why your subfloor is lying to you
A subfloor may look flat to the naked eye but still possess significant dips and humps that will compromise your grout joints. Using a ten-foot straightedge is the only way to verify the topography of the surface before you start laying tile. I have seen guys try to use extra thin-set to level a floor as they go. That is a recipe for disaster. Thin-set is meant to be a bond coat, not a leveling agent. As it cures, it shrinks. If the thin-set is 1/2 inch thick in one spot and 1/8 inch in another, it will shrink at different rates. This creates internal tension in the tile assembly that will eventually manifest as cracked grout. If the grout is cracked, the sealer cannot do its job. I always use a high-flow self-leveling underlayment if the floor is out of spec. It is an extra step and it costs more money, but it is the only way to guarantee a professional result. When you have a perfectly flat floor, your grout joints are uniform. When they are uniform, the sealer is applied evenly. When the sealer is even, the water bead test will give you a consistent result across the entire room. It all goes back to the foundation. You can’t build a palace on a swamp and you can’t put a high-end tile floor on a wavy subfloor.
“Grout is not waterproof; it is merely a sacrificial buffer between tiles that requires constant vigilance.” – National Tile Standards Handbook
The regional climate expert perspective
Regional humidity levels dictate how often you need to check your grout sealer and what type of products you should use for your installation. In high-humidity coastal areas, moisture is always trying to move through your floor from the ground up. In a place like Florida or Louisiana, the moisture vapor transmission rate through a concrete slab can be massive. If you seal the top of the grout but don’t have a moisture barrier under the slab, that vapor pressure will eventually blow the sealer right off the grout. It’s called osmotic blistering. You see it a lot with epoxy coatings, but it happens to grout too. In dry climates like Arizona, the grout can actually become too dry and brittle if it’s not sealed, leading to dusting and erosion. You have to adapt your maintenance schedule to your environment. If you’re in a swamp, check your sealer every few months. If you’re in the desert, you might get away with every two years. Regardless of where you live, the water bead test is your best friend. It doesn’t lie. It doesn’t care what the bottle said about lasting twenty years. It shows you the reality of your floor in real-time. If the water beads, you’re good. If it doesn’t, get to work. Don’t let a simple maintenance task turn into a five-figure demolition project.