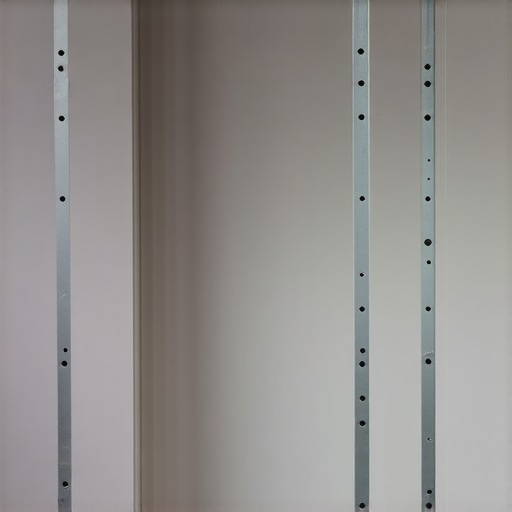
The ‘Magnet Hack’ for Finding Metal Studs in a Bathroom Wall
The magnetic pull of a 25 gauge stud
To find a metal stud in a bathroom wall with a magnet, you need a high-strength neodymium magnet that can detect the steel through 5/8 inch moisture-resistant drywall. Move the magnet in a slow S-pattern across the surface until you feel the sharp tug of the screw or the stud flange. This method is superior to electronic sensors because bathroom walls are often packed with plumbing and electrical interference that confuses standard density-based sensors. I have spent thirty years on my knees in this industry. My joints creak like an old subfloor and my hands carry the permanent scent of WD-40 and fine oak dust. I have seen every shortcut in the book and most of them lead to a lawsuit. Most guys skip the leveling compound. They think the underlayment will hide the dip. It won’t. I spent three days grinding concrete on a job last month just so the floor wouldn’t click like a castanet. That job started because the homeowner wanted to hang a heavy vanity on a wall they thought was solid wood. It was metal. Knowing the difference between a 20-gauge structural stud and a 25-gauge non-structural partition is the difference between a bathroom that lasts and one that collapses. When you are dealing with the moisture-rich environment of a shower, every screw penetration matters. If you miss that stud and blow a hole in the vapor barrier, you are inviting rot into the skeleton of your home. Use the magnet. It does not lie like the cheap plastic boxes from the big box store.
Why your subfloor is lying to you
Floor leveling requires a substrate that is within 1/8 inch of flat over a 10 foot radius to ensure the structural integrity of the locking mechanisms. If your subfloor has a dip or a crown, the laminate or vinyl plank will flex every time you step on it, eventually snapping the tongues and grooves. This is a physics problem, not an aesthetic one. People buy waterproof floors and think they are invincible. Water might not hurt the plastic, but if the subfloor is uneven, the physical movement of the planks will pump moisture and air underneath, creating a literal petri dish of mold. I once walked into a house where the laminate looked perfect but smelled like a swamp. The installer ignored a 1/4 inch dip. Every step acted like a piston, drawing humidity from the crawlspace through the joints. You must use a straightedge. You must use a level. If you are working on a concrete slab, the moisture content must be below 75 percent relative humidity as measured by an in-situ probe. Do not trust a surface meter. They are for amateurs who want to get home early.
“A floor is only as good as the subfloor beneath it; deflection is the enemy of every joint.” – Master Flooring Axiom
The chemical failure of cheap thinset
Modified thin-set mortar uses liquid latex polymers to create a flexible bond that can withstand the thermal expansion of a bathroom floor. Standard, unmodified mortar is brittle. In a room where temperatures fluctuate from a steaming shower to a cold morning, a brittle bond will fail. This results in the hollow sound you hear when walking on tile, often called drummy tile. To prevent this, you must understand the molecular interlock. When the mortar hydrates, it forms needle-like crystals that grow into the pores of the tile and the substrate. If you have dust on your subfloor, those crystals grow into the dust, not the floor. I have seen guys pour a thousand dollars of self-leveling compound over a dusty floor without priming it first. The whole floor eventually peeled up like a giant grey scab. It is a tragedy of laziness. You need to vacuum. Then you need to vacuum again. Then you apply a high-solids acrylic primer to seal the pores and ensure the leveling compound doesn’t lose its water too fast. If the water leaves the mix before the crystals form, the floor will have the structural strength of a wet cracker.
| Substrate Material | Deflection Limit (L/n) | Ideal Moisture Content (%) | Recommended Fastener |
|---|---|---|---|
| Plywood (CDX) | L/360 | Under 12% | Ring-shank nails |
| Concrete Slab | L/720 | Under 4% (Calcium Chloride) | Concrete Screws |
| OSB (Subfloor Grade) | L/360 | Under 10% | Adhesive + Screws |
| Metal Stud Wall | N/A | N/A | Self-tapping Fine Thread |
The 1/8 inch that ruins everything
An expansion gap is a mandatory 1/4 inch to 3/8 inch space left around the perimeter of a room to allow for the natural movement of the flooring materials. Wood and even some stone-plastic composites expand and contract with changes in humidity and temperature. If you run the floor tight against the baseboards or the metal studs of a bathroom wall, the floor has nowhere to go. It will buckle. It will peak at the seams. It will ruin your life. I have seen $20,000 hardwood floors ruined because the installer didn’t want to see a gap. That is what baseboards and shoe moldings are for. They are not just decorations; they are structural covers for the breathing room the floor requires. In a bathroom, this gap is even more vital. The moisture from the shower causes the subfloor and the finish floor to swell. If you lock that floor under a heavy toilet or a kitchen island, you have pinned the material. It cannot move. The tension will find the weakest point, usually the joint right in the middle of the hallway, and it will pop.
Why laminate and showers are a recipe for disaster
Laminate flooring consists of a high-density fiberboard core that acts like a sponge when exposed to the standing water typical of a bathroom environment. Even if the surface is laminate and the joints are tight, the core is vulnerable. Once water penetrates the wear layer through the expansion gap or a poorly caulked perimeter, the fiberboard swells. This swelling is irreversible. The edges will mushroom and the floor is dead. I don’t care what the box says about 24-hour water resistance. That is a lab test under perfect conditions. In the real world, your kid leaves a soaking wet towel on the floor for six hours and your floor is toast. If you must have the look of wood in a bathroom, use an engineered wood with a waterproof core or a high-quality luxury vinyl plank with a 20-mil wear layer. But even then, you must seal the perimeter with 100 percent silicone caulk. Do not use acrylic caulk. It will crack and fail within a year.
- Vacuum the substrate twice to remove all particulate matter.
- Check for floor levelness using a 10-foot straightedge.
- Prime the subfloor with an approved acrylic bonding agent.
- Mix leveling compound with a high-shear mixer to avoid lumps.
- Maintain a wet edge during the pour to prevent cold joints.
- Ensure the room temperature is between 65 and 85 degrees Fahrenheit.
The ghost in the expansion gap
A hollow sound under a floating floor indicates a vertical deflection caused by a subfloor dip exceeding the manufacturer’s tolerance. This is the ghost that haunts every bad installation. You walk across the room and hear a click-clack. That is the sound of the locking mechanism rubbing against the neighboring plank. Over time, this friction wears down the joint until it fails completely. While most people want the thickest underlayment, too much cushion actually causes the locking mechanisms on LVP to snap under pressure. You want a high-density, low-compression underlayment. If it feels like a yoga mat, it is too soft. It should feel like firm rubber. The goal is to support the joint, not to provide a bouncy walk. The chemistry of the adhesive also plays a role if you are doing a glue-down install. You need a pressure-sensitive adhesive that stays tacky. If the glue dries out and becomes brittle, it will release the plank. I have seen floors in Phoenix shrink so much in the dry heat that the gaps between planks were wide enough to hold a nickel. This happened because the installer didn’t acclimate the wood. You need to let the material sit in the room for at least 72 hours. Let it get used to the house. Let it breathe. Only then do you pin it down.
“Moisture is a silent killer of warranties; if you don’t document your readings, you don’t have a leg to stand on.” – TCNA Guidebook