The ‘Feather Finish’ Secret for Smooth Transitions Between Rooms
The physics of the feathered edge and why your transitions fail
Most guys skip the leveling compound. They think the underlayment will hide the dip. It won’t. I spent three days grinding concrete on a job last month just so the floor wouldn’t click like a castanet. I have spent twenty-five years on my knees with a straightedge and a trowel, and if there is one thing I have learned, it is that a floor is a structural system, not a rug. When you walk from a thick oak plank onto a thin piece of laminate, that tiny 1/8 inch lip is a disaster waiting to happen. It is not just about tripping. It is about the physics of the joint. If the subfloor is not perfectly ramped using a high-quality feather finish, the locking mechanism on your new floor will flex every time someone steps on it. Eventually, that plastic tongue will snap. Then you have a floating floor that actually floats away from the wall. This is why I am obsessed with the chemistry of Portland cement-based patches and the geometry of the transition ramp. You cannot hide a bad subfloor with a fancy T-molding. You have to fix the foundation first.
The truth about feather finish compounds
Portland cement based patch, feather finish, floor leveling, and subfloor preparation are essential for a professional finish. These high-polymer compounds create a smooth transition between different flooring types like laminate, hardwood, or tile. Using a flat trowel, installers create a tapered edge that eliminates vertical offsets and protects the locking system. Feather finish is a specialized material. It is not the same as the bag of concrete mix you find at a big-box store. This stuff is engineered with re-dispersible polymer powders that allow it to bond to wood, concrete, and even old ceramic tile without a separate primer in many cases. The particle size is microscopic. This allows the installer to pull the material so thin that it literally disappears into the pores of the substrate. When I am working a bead of this across a plywood seam, I am looking for a zero-point transition. If I can see a shadow, the ramp is not long enough. A good rule of thumb is a twelve-inch ramp for every eighth of an inch in height difference. This gradual slope ensures that the flooring material remains in its flat-plane state, preventing the internal stresses that lead to gapping and peaking.
“A floor is only as good as the subfloor beneath it; deflection is the enemy of every joint.” – Master Flooring Axiom
The ghost in the expansion gap
Expansion gaps, perimeter spacing, laminate flooring, and floating floor installation require precise subfloor leveling to function. A level substrate ensures that the floor boards can move as a single unit during seasonal humidity changes. Without a feather finish ramp, the laminate planks will bind at the doorway transition. Laminate is basically a picture of wood glued to a high-density fiberboard core. That core is thirsty. It expands and contracts with the seasons. If you have a dip in the floor at the doorway and you just slap a transition strip over it, you are pinning the floor down. The floor wants to move, but the dip and the molding are holding it hostage. You will hear it first. A dry, rubbing sound. That is the sound of your investment dying. By using a feather finish to bridge the gap between rooms, you create a flat runway. This allows the floor to slide back and forth under the baseboards as the moisture levels in your house shift. I always check the moisture content of the subfloor with a pin-meter before I even open a bag of patch. If your plywood is over 12 percent moisture, that patch is going to pop off like a scab. You have to solve the moisture before you solve the level.
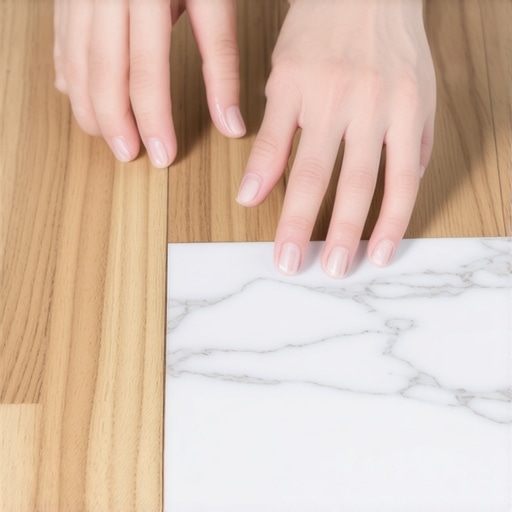
Water meets the threshold near showers
Wet area transitions, shower floor leveling, waterproof membranes, and tile installation demand feather finish applications to ensure proper drainage. In bathrooms, the transition between hardwood hallway and tiled shower areas is a critical failure point. Using a cementitious patch prevents water pooling at the threshold and protects the subfloor. This is where most guys mess up. They put down a cement backer board and leave a huge jump at the door. Then they try to cover it with a marble threshold that is an inch thick. It looks like a hurdle in the middle of your bathroom. I use a feather finish to ramp the hallway subfloor up to meet the height of the backer board. This creates a slope that is invisible to the eye but felt by the feet. When you are dealing with showers, the transition is also about moisture. I use a synthetic latex additive in my patch mix to make it more water-resistant. You do not want a gypsum-based product anywhere near a shower. Gypsum turns back into mud the second it gets damp. I have torn out dozens of floors where the transition turned into gray mush because the installer used the cheap stuff. Stick to Portland-based products for anything within ten feet of a bathroom.
Subfloor prep for the perfect carpet install
Carpet installation, tack strip placement, subfloor smoothing, and floor leveling are often ignored but highly necessary. Even though carpet padding is thick, subfloor imperfections will eventually telegraph through the carpet fibers. A feather finish ensures that seams and concrete cracks do not create wear patterns over time. People think carpet is forgiving. They are wrong. Carpet is a filter. It catches dust and oils. If you have a ridge in your concrete slab and you do not feather it out, the carpet will wear down on that ridge five times faster than anywhere else. Within a year, you will see a dark line across the room. That is not dirt. That is the backing of the carpet being ground into the concrete. I always run a four-foot level over the subfloor before a carpet install. Any dip deeper than 3/16 of an inch gets filled. Any hump gets ground down or feathered out. This is especially true at the transitions between carpet and hard surfaces. If the subfloor is not level, the tack strip will sit at an angle, and the carpet will eventually pull off the pins. A solid, flat base is the only way to get a stretch that lasts a decade.
| Material Type | Janka Hardness / Strength | Recommended Patch | Acclimation Time |
|---|---|---|---|
| Solid White Oak | 1360 lbf | Portland Cement Based | 10-14 Days |
| Engineered Maple | 1450 lbf | Polymer Modified | 3-5 Days |
| Laminate HDF | High Density | Feather Finish | 48 Hours |
| SPC Luxury Vinyl | Rigid Core | Self-Leveling Underlayment | 48 Hours |
Chemical science of the mechanical bond
Adhesive chemistry, mechanical bonding, polymer modification, and substrate porosity dictate the success of a floor. A feather finish relies on calcium aluminate cement to provide rapid drying and high compressive strength. Understanding the evaporation rate prevents delamination of the flooring material. The science here is intense. When you mix that powder with water, you are starting a chemical reaction that creates microscopic crystals. These crystals grow into the pores of the wood or concrete. This is a mechanical bond. If the surface is contaminated with oil or old wax, the crystals have nowhere to go. The patch will just sit on top like a pancake. I always hit the subfloor with a 40-grit sandpaper before I patch. I want to open up those pores. I want that feather finish to bite into the floor. This is even more important with modern adhesives. If you are gluing down a plank, the glue is only as strong as the patch it is stuck to. If your patch is weak or chalky, the whole floor will lift. That is why I never buy the bargain-bin floor prep. I want the stuff with the highest polymer content available. It smells like a chemistry lab, but it holds like iron.
“Deflection is not just a measurement; it is a structural failure that ruins the aesthetics of the finished surface.” – TCNA Handbook Methodology
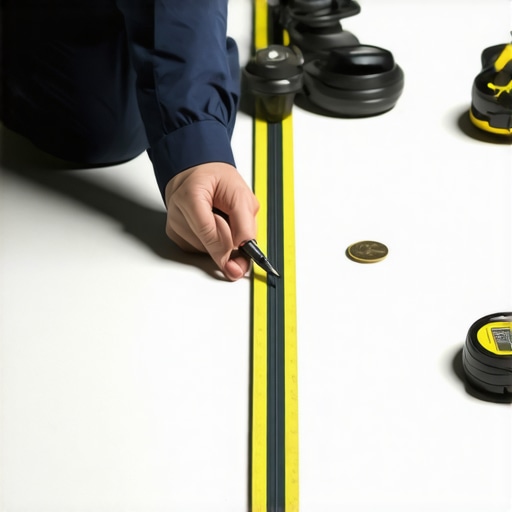
The 1/8 inch that ruins everything
Vertical offsets, trip hazards, flooring height, and transition strips must be precisely managed. A height difference of 1/8 inch or more requires a feathered ramp to meet ADA compliance and aesthetic standards. Using a straightedge, installers can map the floor to identify low spots. This is the part of the job that requires patience. Most guys are in a rush to get the planks down. They ignore the dip in the doorway. But think about the leverage. A flooring plank is a long lever. If one end is hovering over a dip, the other end is being pushed up. This creates a see-saw effect. Every time you walk across the room, the floor is moving. This movement sucks air and dust up from the subfloor and blows it out the cracks. It is called pumping. Eventually, the joints get filled with grit and they start to squeak. You can avoid all of this by spending twenty minutes with a bag of feather finish and a wide trowel. You have to be a surgeon with the tool. Keep the pressure even. Keep the angle low. Let the material do the work of filling the void.
The professional transition checklist
- Inspect the subfloor for moisture and contaminants.
- Sand down high spots and ridges in the plywood or concrete.
- Mix the feather finish to a creamy, lump-free consistency.
- Apply the material with a flat trowel at a steep angle for the first pass.
- Ramp the material out at least twelve inches for every 1/8 inch of lift.
- Allow the patch to dry completely until the color lightens.
- Lightly sand the edges of the patch to ensure a zero-point transition.
- Vacuum all dust before applying adhesives or underlayment.
The regional reality of floor leveling
The climate where you live changes how you handle floor leveling. In the humid Southeast, I have to be extremely careful with wood-based subfloors. The plywood swells and shrinks so much that a rigid patch can sometimes crack. In those environments, I use a more flexible additive in my feather finish. In the dry mountain states, the opposite is true. The concrete slabs suck the moisture out of the patch so fast it doesn’t have time to bond. I have to damp down the concrete with a sponge before I apply the patch so it doesn’t flash-dry. It is about understanding the equilibrium. Your floor is a living thing. It reacts to the air around it. If you treat it like a static object, you are going to have failures. You have to anticipate how the subfloor and the finish floor will dance together over the next twenty years. That is the difference between a floor installer and a floor architect. One just lays boards. The other builds a surface that lasts a lifetime.