The ‘Finger Rub’ Check for Floor Leveler Chalkiness and Strength
The Finger Rub Check for Floor Leveler Chalkiness and Strength
I spent three days grinding concrete on a job last month just so the floor wouldn’t click like a castanet. Most guys skip the leveling compound or they rush the prep work. They think the underlayment will hide the dip. It won’t. I walked onto a site where the previous installer had poured five bags of self-leveling underlayment over a slab that was basically a dust bowl. When I arrived, the entire surface felt like a chalkboard. I ran my index finger across the gray surface and it came back white. That is the kiss of death for any flooring installation. If that leveler is chalky, your bond is non-existent. You are essentially building a house on top of loose sand. I had to take a 7-inch diamond cup wheel to the whole room, wearing out my knees and my respirator, just to get back to a solid substrate that could actually hold a floor.
The microscopic failure of a dusty subfloor
Floor leveler failure occurs when the chemical bond between the compound and the substrate is interrupted by surface contaminants or improper hydration. A chalky residue indicates that the polymers in the leveler did not cross-link correctly or the water was absorbed too quickly by a thirsty, unprimed slab. This creates a brittle interface. At a molecular level, the calcium aluminate crystals need a stable environment to grow and interlock. When dust is present, those crystals attach to the loose particles instead of the solid concrete. This results in a floor that sounds hollow when walked upon and eventually cracks under the weight of furniture or foot traffic. You can smell the failure before you see it, a dry, earthy scent that tells you the moisture was sucked out of the mix before it could cure. It is a structural nightmare disguised as a flat surface.
“A floor is only as good as the subfloor beneath it; deflection is the enemy of every joint.” – Master Flooring Axiom
Why leveler fails before you even open the bag
Environmental conditions and storage play a massive role in whether a leveling compound will maintain its structural integrity once mixed. If a bag of leveler has been sitting in a humid garage for six months, it has already begun to hydrate. This is known as warehouse set. When you finally mix it, the chemical reaction is stunted. The result is a pour that looks okay but dries into a soft, chalky mess. You must check the date codes on every bag. I never use anything older than three months. The chemistry of these products is precise. They are not just bags of sand. They are engineered blends of Portland cement, calcium aluminate, and high-performance polymers. If the ratio is off or the product is old, the structural capacity is compromised.
The finger rub test as a diagnostic tool
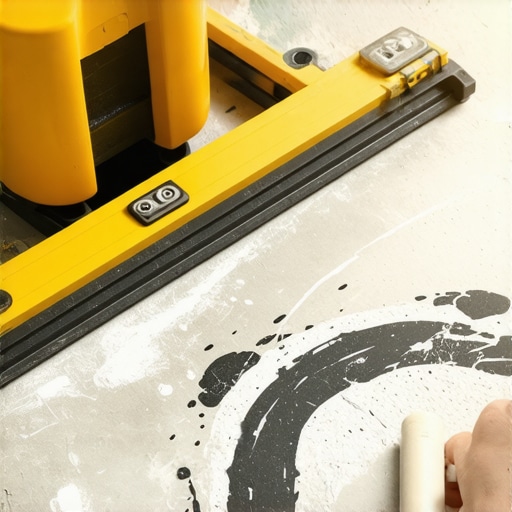
The finger rub test is a manual inspection method used to verify the surface hardness and bond strength of a cured leveling compound. To perform this, apply firm pressure with your thumb or forefinger and drag it across the surface. If a significant amount of powder transfers to your skin, the surface is laitance-heavy or under-hydrated. A healthy leveler should feel like solid stone. It should be cold to the touch and produce zero dust. If you see a white track left behind, you cannot install laminate, hardwood, or tile over it. That powder acts as a bond breaker. No adhesive in the world can stick to a surface that is shedding its own skin. You have to prime it again with a high-solids acrylic or, in worst-case scenarios, grind it off and start over.
The 1/8 inch that ruins everything
Precision in subfloor flatness is the difference between a quiet, high-end floor and a noisy, cheap-feeling installation. Most manufacturers require a floor to be flat within 1/8 inch over a 10-foot radius. If your leveler is chalky and starts to crumble, that 1/8 inch gap will eventually double. As the leveler turns back into dust under the floor, the planks of your laminate or LVP will begin to bounce. This vertical movement puts immense pressure on the locking mechanisms. Eventually, the plastic tongues will snap. I have seen million-dollar homes where the floors click and pop because someone didn’t want to spend the extra time checking the chalkiness of their prep work. It is a preventable tragedy.
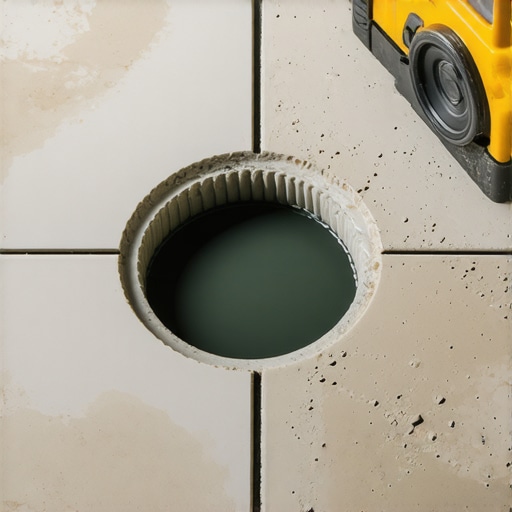
How moisture vapor turns leveler into powder
Moisture vapor emission from a concrete slab can delaminate even the strongest leveling compounds if a proper vapor barrier is not used. Concrete is a sponge. It breathes moisture. If you pour leveler over a wet slab without a moisture-rated primer, the vapor pressure will push against the bottom of the leveler. This prevents a permanent bond. Over time, the moisture breaks down the crystalline structure at the bottom of the pour. This is why you see leveler coming up in chunks. The finger rub check might pass on the top, but underneath, the material is turning into mush. You must use a calcium chloride test or a pinless moisture meter before you ever think about opening a bag of leveler. In my experience, skipping this step is the fastest way to an expensive insurance claim.
| Compound Type | Setting Time | PSI Strength | Best Use Case |
|---|---|---|---|
| Gypsum Based | 2-4 Hours | 2,000-3,000 | Repairing old wood |
| Portland Cement | 4-6 Hours | 4,000-5,000 | Commercial concrete |
| Calcium Aluminate | 1-3 Hours | 5,000+ | Fast-track tiling |
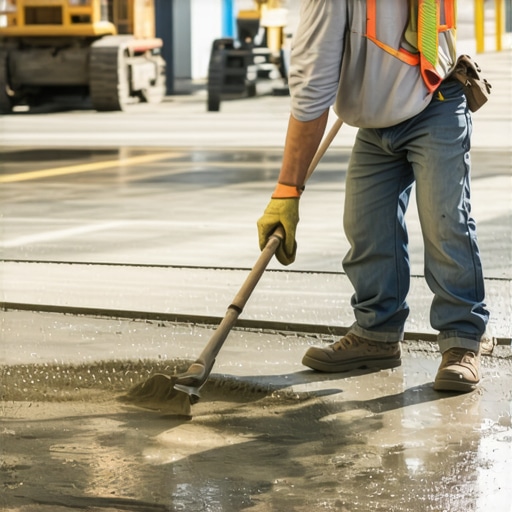
Preparation checklist for a rock solid foundation
Following a rigorous preparation sequence ensures that the leveling compound achieves its maximum rated PSI and bonding potential. You cannot take shortcuts when it comes to the chemistry of the floor. Each step is a link in a chain. If one link breaks, the whole floor fails. Most installers are too lazy to do the dirty work. I am not. I want to sleep at night knowing my floors are permanent.
- Vacuum the substrate twice using a HEPA filter to remove microscopic dust.
- Measure water with a graduated cylinder to ensure the exact water-to-powder ratio.
- Check the temperature of the water to prevent flash-setting.
- Prime the floor until it stops absorbing the liquid and a film forms.
- Mix for exactly two minutes using a high-torque drill and a non-aerating paddle.
- Use a spiked roller to release trapped air bubbles from the wet pour.
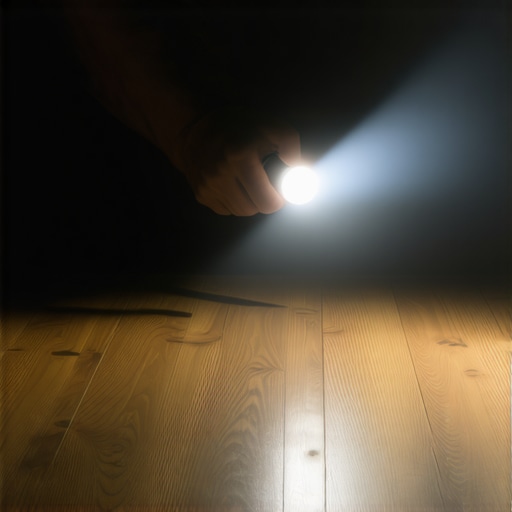
Why your subfloor is lying to you
Subfloors often appear flat and stable to the naked eye while hiding significant structural issues like deflection and moisture pockets. Just because a slab looks gray and dry doesn’t mean it is ready for a finish. I always say that the subfloor is the most dishonest part of a house. It hides the sins of the foundation crew. You need to use a straightedge. You need to use a moisture meter. You need to use your hands. The finger rub is about feeling the truth of the material. If it feels soft, it is soft. There is no magic spray that fixes a bad pour. You have to be willing to do the hard work of mechanical abrasion. While most people want the thickest underlayment, too much cushion actually causes the locking mechanisms on LVP to snap under pressure. A firm, flat subfloor is always better than a thick, squishy pad.
“Substrate preparation is the most critical phase of a ceramic tile installation.” – TCNA Handbook Summary
The ghost in the expansion gap
Expansion gaps are the lungs of a floor, allowing for the natural movement caused by seasonal temperature and humidity changes. If you fill your expansion gaps with leveler, you have created a ticking time bomb. The floor needs space to grow. When the leveler is chalky and breaks off into these gaps, it can jam the floor in place. This leads to buckling in the center of the room. I have walked into houses where the floor was humped up three inches off the subfloor because the installer didn’t respect the perimeter. The leveler should be contained. It should be a flat, hard island that the floor can float over. If your leveler is shedding dust into the gap, it creates friction. Friction leads to noise. Noise leads to unhappy customers. Keep your gaps clean and your leveler hard.
Surface integrity for carpet and laminate
While carpet is more forgiving of subfloor imperfections, laminate and tile require a surface that is virtually indestructible. For a carpet install, a slightly chalky leveler might not be a catastrophe because the padding absorbs some movement. However, for showers and laminate, it is a non-starter. In a shower, the leveler is part of a waterproofing system. If it is chalky, the thin-set will not grab. Your tiles will pop off the floor like tiddlywinks. For laminate, the constant micro-movement of the planks will grind a chalky leveler into fine dust, which then works its way up through the joints and into your home’s air. It is a mess. Do the work. Check the bond. Rub the floor. If your finger stays clean, you are ready to build. If not, get back to work.