Why Your Shower Curb Is Rotting Behind the Tiles
Why Your Shower Curb Is Rotting Behind the Tiles and How to Fix It
I once walked into a luxury bathroom where a fifteen thousand dollar marble shower looked pristine from the outside. The grout lines were tight and the stone was polished to a mirror finish. But the homeowner complained of a weird smell, a mix of damp earth and old socks. I took a mallet and tapped the curb. It didn’t sound like solid masonry. It sounded like a wet sponge. When I pulled the first tile, I didn’t find mortar. I found black sludge. The installer had used three stacked 2x4s to build that curb, wrapped them in a plastic liner, and then driven nails through the top of the curb to hold the cement board. Those nails created a highway for water. For two years, every shower the family took sent a few tablespoons of water directly into the wood. The wood rotted, the mold flourished, and the entire subfloor was beginning to compromise. This is the reality of many modern showers where aesthetics trump engineering.
The anatomy of a structural failure at the threshold
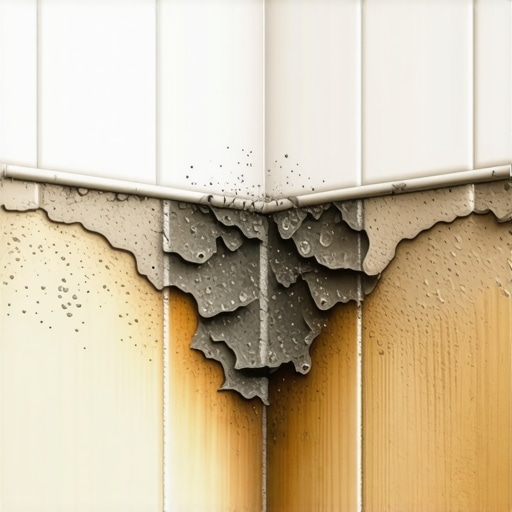
Shower curb rot occurs when moisture penetrates the tile and grout layers and becomes trapped against organic framing materials like 2×4 lumber. This failure is almost always caused by improper waterproofing techniques, specifically the use of fasteners that puncture the waterproofing membrane on the top or inside of the curb. Most homeowners think of tile as a waterproof shield, but it is actually a reservoir. Grout is porous. Even if you seal it, water eventually migrates through. When that water reaches a wooden curb that has been compromised by nails or screws, it has nowhere to go but into the grain of the wood. This starts a biological process where fungi consume the cellulose in the wood, turning your structural support into a pile of mush. I have seen curbs that were so soft you could push a screwdriver through them with one finger. This is why the industry is moving away from wood entirely.
The physics of capillary action and the hidden water highway
Capillary action is the process where liquid flows into narrow spaces without the assistance of, or even in opposition to, external forces like gravity. In a shower, this means water can actually travel upward behind the tile if the waterproofing is not continuous from the floor to the walls. Think of a paper towel dipping into a glass of water. The water climbs. Your cement board acts the same way. If your shower liner is just tucked over the curb but not properly sealed to the wall membrane, water will find that gap. It will wick up the back of the wall and down into the curb. This is often where the damage starts. The water sits in the mortar bed, held there by the curb, and if there is no pre-slope under the liner, the water just stagnates. This creates a hydrostatic pressure that forces water into any microscopic hole in your waterproofing. It is not just a leak, it is a slow-motion flood occurring every time you turn on the shower head.
“A floor is only as good as the subfloor beneath it; deflection is the enemy of every joint.” – Master Flooring Axiom
Why a 2×4 is the worst choice for a wet zone
Using wood to build a shower curb is an outdated practice that relies on perfect execution of a flawed system. Wood naturally expands and contracts with changes in humidity, which puts constant stress on the rigid tile and grout lines above it, eventually leading to cracks. When you use 2x4s, you are inviting movement. Even kiln-dried lumber has a moisture content that fluctuates. In a bathroom, where humidity swings from thirty percent to ninety percent in ten minutes, that wood is moving. If that wood gets wet from a leak, it swells. That swelling cracks the grout, which allows more water in. It is a feedback loop of destruction. I always tell guys that if they must use wood, they better treat it like a nuclear reactor. But honestly, why bother? We have better materials now. High-density foam and solid concrete curbs do not rot, do not swell, and do not provide a food source for mold. If you are still using wood, you are building a ticking time bomb in your client’s house.
The chemistry of the modified thin set bond
Modified thin set contains polymers such as acrylic or latex that increase the bond strength and flexibility of the mortar. This chemistry is vital in shower installations because it allows the tile assembly to withstand the thermal expansion and structural shifts without losing its grip on the membrane. When we talk about the molecular level, these polymers create a bridge between the cementitious material and the waterproof membrane. If you use an unmodified thin set on a non-porous membrane, the water in the mix has nowhere to go, and it can take weeks to cure, or worse, it never develops a full bond. The chemistry of your adhesive must match the porosity of your substrate. In a shower, you are often bonding to a plastic or fabric membrane. You need those long-chain polymers to reach out and grab that surface. Without that chemical bond, the tile will eventually de-bond, creating gaps where water will pool and begin the rot process all over again.
Why floor leveling is the foundation of a dry bathroom
Floor leveling is a required step before any shower installation to ensure that the subfloor is flat and capable of supporting the weight of the pan and the glass enclosure. An unlevel floor can cause the shower drain to sit higher than the surrounding area, preventing proper drainage. I have seen jobs where the floor was off by a half-inch across the bathroom. The installer tried to make it up with extra thin set. That is a amateur move. Extra thin set shrinks as it cures, which can create voids. If the floor is not level, your curb will not be level. If your curb leans toward the bathroom floor instead of into the shower, water will run off the glass door and onto your bathroom floor. This can damage adjacent flooring like laminate or carpet install in the hallway. I spend more time with a level and a grinder than I do with a tile saw. If the foundation is crooked, the finish will be a disaster. You cannot hide a bad subfloor with pretty tile.
| Material Type | Rot Resistance | Structural Stability | Ease of Waterproofing |
|---|---|---|---|
| Traditional 2×4 Wood | Very Low | Moderate | Difficult |
| Stacked Cement Board | High | High | Moderate |
| Pre-fabricated Foam | Excellent | High | Very Easy |
| Solid Poured Concrete | Excellent | Very High | Moderate |
The danger of transitions between carpet and tile
The transition from a wet zone like a shower to a dry zone like a bedroom carpet is a critical point of failure for many homes. If the shower curb fails, the moisture travels along the subfloor, often soaking the tack strip and padding of the nearby carpet before it is even noticed. This is why the integrity of the curb is about more than just the shower. It is about protecting the rest of the house. I have seen situations where a rotting curb led to a mold infestation in a master bedroom carpet three feet away. The water moves through the subfloor via the easiest path. If you have an unlevel floor that slopes toward the door, you are basically piping water into your carpet. When doing a carpet install near a bathroom, I always check the moisture levels of the subfloor at the transition. If that wood is over twelve percent, there is a leak somewhere, and it is usually the curb.
The mistake of treating laminate like a waterproof surface
Laminate flooring is often marketed as water resistant, but it cannot handle the constant moisture migration from a failing shower curb. When water escapes the shower zone, it gets under the laminate planks and causes the core to swell and the edges to peak. People think that because the top layer of laminate is plastic, they are safe. They are not. The core is high-density fiberboard, which is basically compressed sawdust and glue. It loves water. A leaking shower curb will ruin a laminate floor in a matter of weeks. The moisture gets trapped under the underlayment, and since the laminate cannot breathe, the water has nowhere to go. This is why I am a stickler for the curb. It is the dam that protects your expensive flooring in the other rooms. If the dam breaks, the village gets flooded.
“Waterproof does not mean the same thing as water-tight; the difference is the longevity of your home’s structure.” – Tile Council of North America Standard
The checklist for a waterproof shower curb
- Verify that the subfloor is level within one-eighth of an inch over ten feet.
- Construct the curb using non-organic materials like solid brick or pre-fabricated high-density foam.
- Ensure a pre-slope of at least one-quarter inch per foot exists beneath the waterproofing liner.
- Never drive fasteners through the top or the inside face of the curb.
- Apply a liquid or sheet-bonded membrane over the entire curb, extending at least six inches into the room and up the walls.
- Perform a twenty-four hour flood test before any tile is installed to verify the integrity of the dam.
The chemical reality of vapor drive in hot showers
Vapor drive occurs when high-temperature water creates steam that exerts pressure against the walls and floor of the shower. This vapor can pass through materials that liquid water cannot, leading to condensation and rot behind the scenes. In a small, poorly ventilated bathroom, the vapor drive is intense. If you have not used a proper vapor barrier or a topical membrane, that steam is getting into your wall cavity. It hits the cool 2x4s of the curb or the wall studs and turns back into liquid water. This is why old-school felt paper and mud beds worked for a while, they could breathe. But in today’s airtight homes, we need to stop the vapor at the surface. Modern membranes are designed to have a very low perm rating, meaning they stop almost all vapor. This keeps the framing dry and the mold away. If you skip this step, you are letting the steam rot your house from the inside out.
How to fix a rotted curb without tearing out the whole shower
Fixing a rotted curb typically requires removing the bottom two rows of tile on the inside and outside of the shower to access the damaged framing. The wood must be replaced with a non-rot alternative and the waterproofing must be tied back into the existing system. This is a surgical procedure. You have to be careful not to puncture the liner that goes under the floor. Once you have the old wood out, you can rebuild with cement bricks or a foam curb. Then, you use a high-quality sealant or a piece of membrane to bridge the gap between the new curb and the old walls. It is not an easy job, and it is never as good as doing it right the first time. I usually spend twice as long cleaning up the mess of the previous guy than I do actually building the new curb. But if you do not fix the source of the rot, the new tile will be on the floor in another two years.
Final thoughts on shower structural integrity
The shower curb is the most abused part of the bathroom. It gets stepped on, it gets soaked, and it has to hold up a heavy glass door. Treating it like an afterthought is the hallmark of a hack. You have to think like an engineer. You have to understand that water is looking for a way out, and your job is to give it only one path, down the drain. From the floor leveling at the start to the final bead of silicone at the end, every step matters. If you cut corners on the curb, you are not just risking a few tiles. You are risking the floor joists, the subfloor, and the health of the people living in the house. Do it right, use the right chemistry, and respect the physics of water. Your knees and your wallet will thank you in the long run.