Why Your New Grout Looks Blotchy and Discolored as It Dries
The molecular failure of the perfect finish
Grout discoloration occurs when the hydration process is interrupted by excess moisture or improper chemical ratios during the curing stage. When you see light and dark patches on a fresh floor, you are looking at a failure of pigment suspension or a localized concentration of mineral salts. It is rarely a bad batch of product. It is almost always a failure of the installer to respect the chemistry of Portland cement and the physics of evaporation. Most homeowners expect a uniform color like paint, but grout is a porous mineral structure that reacts to its environment with extreme sensitivity.
The three days I spent grinding out a nightmare
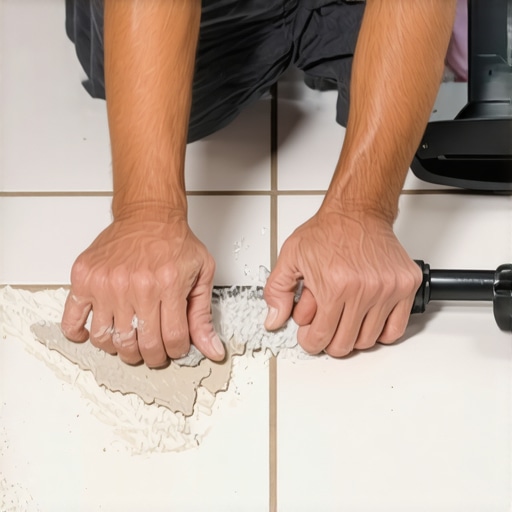
I once walked onto a job site where a homeowner had spent four thousand dollars on premium Italian slate. The installer was a guy who usually did carpet install work and thought he could breeze through a shower build. He mixed his grout by eye, dumping water in until it looked like soup. Two days later, the charcoal grout looked like a Dalmatian dog with white spots everywhere. I spent three days on my knees with a diamond blade cleaning out the joints because the thin-set had squeezed up too high and the excess water had washed out the pigment. He didn’t check the floor leveling or the subfloor moisture before he started. It was a total loss of time and materials that could have been avoided with a simple measuring cup and a bit of patience. You cannot treat tile like you treat a laminate click-lock floor. It is a chemical reaction, not a puzzle.
The hidden chemistry of water ratios
Proper grout mixing requires a precise water-to-powder ratio to ensure that pigment particles stay suspended uniformly throughout the mixture. If you add too much water to the bucket, you are effectively diluting the color. As that excess water evaporates, it creates microscopic voids in the grout structure. These voids change how light hits the surface, making the grout look lighter or blotchy. This is a common issue in showers where the vertical walls might dry faster than the floor, or where the subfloor holds onto moisture longer than the tiles themselves.
“A floor is only as good as the subfloor beneath it; deflection is the enemy of every joint.” – Master Flooring Axiom
The chemical process of hydration requires just enough water to turn the cement into a crystalline structure. If the water is dirty or if it contains high levels of minerals like calcium or magnesium, those minerals will migrate to the surface as the grout dries. This is the primary cause of white, powdery residue. If you are working in a region with hard water, use distilled water for your mix. It sounds like overkill until you see a black floor ruined by white streaks.
The ghost of efflorescence in the joints
Efflorescence is the migration of soluble salts to the surface of a porous material where they form a white crystalline deposit. This is the most frequent culprit for blotchy grout. These salts can come from the grout itself, the thin-set underneath, the mortar bed, or even the concrete slab. When moisture moves through the subfloor and up through the tile joints, it carries these salts with it. As the water evaporates at the surface, the salt stays behind. This is why floor leveling and proper moisture barriers are non-negotiable. If you skip the vapor retarder on a basement slab, your grout will never look uniform because it will be a constant chimney for rising salts.
The 1/8 inch that ruins everything
Thin-set mortar must be allowed to cure for at least 24 to 48 hours before grout is applied to prevent moisture entrapment. Many fast-track installers try to grout the same day. This is a recipe for disaster. The moisture still trapped in the thin-set has nowhere to go but up through the grout. This creates wet spots that cause the grout to dry at different rates. If the thin-set was applied with a heavy hand and squeezed up into the 1/8 inch gap intended for grout, the color will be thin and patchy in those spots. You need a clean, deep channel for the grout to sit in so it has a consistent mass. A floor with varying depths of grout will always have varying shades of color.
“Consistency in the mixing and cleaning process is the only way to ensure color uniformity in cementitious grout systems.” – TCNA Handbook Principles
How your sponge is destroying the pigment
Using a dripping wet sponge to clean the grout film off the tile face is the leading cause of surface discoloration. This is the part of the job where most people fail. After you smear the grout into the joints, you have to wipe the excess off. If your sponge is not wrung out until it is nearly dry, you are adding fresh water to the surface of the grout while it is trying to set. This washes the pigment right out of the top layer. It leaves the grout looking faded or chalky. You should only be using a damp sponge, and you should change your wash water every twenty square feet. Dirty water equals dirty grout. It is a simple law of physics.
Comparison of Grout Performance Factors
| Grout Type | Drying Time | Moisture Resistance | Pigment Stability |
|---|---|---|---|
| Standard Cement | 24-48 hours | Low | Variable |
| High Performance | 12-24 hours | Moderate | High |
| Epoxy | 4-8 hours | Absolute | Superior |
The technical checklist for a uniform finish
- Measure the water with a graduated cylinder to match the manufacturer specifications exactly.
- Allow the mixed grout to slake for ten minutes to let the chemicals fully activate.
- Check that the thin-set in the joints is cured and cleaned out to at least two-thirds of the tile depth.
- Use distilled water if the local tap water has a high mineral content.
- Wring the cleaning sponge until no water can be squeezed out by hand.
- Avoid using high-powered fans to dry the floor quickly as this causes uneven evaporation.
The regional humidity factor
The climate where you live dictates how you handle the installation. In high-humidity areas like the Gulf Coast, grout can take twice as long to reach its initial set. If you are working in a swampy environment, you must account for the moisture already present in the air. Conversely, in the bone-dry heat of the desert, grout can flash-dry. This means the surface hardens before the chemical reaction is complete, leading to weak, crumbly joints that look dusty. You might need to lightly mist the joints with water twenty-four hours after installation to ensure a proper cure in dry climates. No two rooms are the same. A bathroom with a window will dry differently than a windowless basement. You have to read the room and adjust your speed accordingly.
The truth about sealer and blotchiness
Applying a sealer to blotchy grout will not fix the color; it will only lock in the imperfection forever. Some people think a wet-look sealer will even out the tones. It won’t. It usually highlights the dark spots even more. If the grout is blotchy after it has fully dried for 72 hours, your only real fix is a grout colorant or an acid wash. An acid wash can strip the top layer of efflorescence off, but it is risky. It can eat away at the cement binder if you aren’t careful. The better path is to use a high-quality grout stain that acts like a concrete paint. It penetrates the pores and provides a single, solid tone across the whole floor. But the best path is to mix it right the first time. Stop guessing and start measuring.