The ‘Trowel’ secret for spreading floor leveler evenly
The myth of the self-leveling miracle
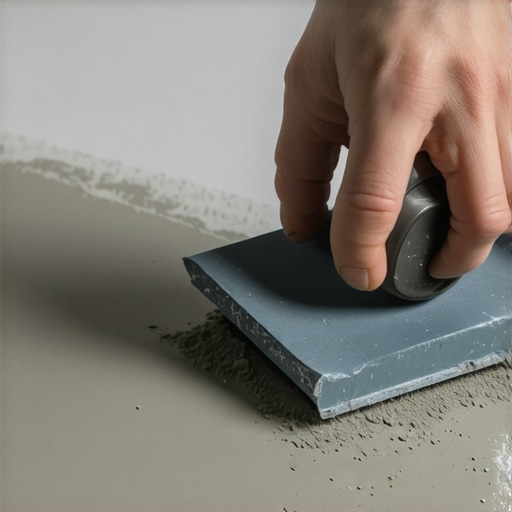
The trowel secret for floor leveler involves using a specialized gauge rake to set depth and a stainless steel pool trowel to break surface tension. This combination ensures the self-leveling underlayment moves fluidly across the concrete substrate without leaving ridges or low spots in the subfloor preparation process.
I spent three days grinding concrete on a job last month just so the floor wouldn’t click like a castanet. Most guys skip the leveling compound. They think the underlayment will hide the dip. It won’t. I was in a high-rise downtown where the slab looked like the surface of the moon. The contractor before me tried to fix it with extra padding. Within two weeks, the locking mechanisms on the laminate were snapping. I had to rip out fifteen hundred square feet of material, get on my knees with a diamond-blade grinder, and create a cloud of dust that smelled like old wet stones and industrial failure. That is the reality of the trade. You either respect the subfloor or it will humiliate you. Most people hear the term self-leveling and think they can just pour a bucket of soup on the floor and walk away. That is a lie. Gravity is a partner, but it is a lazy one. Without the right mechanical agitation and tool selection, that expensive bag of polymer-modified cement will just sit there and lump up. You need to understand the molecular tension of the mix. You need to know how the primer interacts with the thirsty pores of the concrete. If you do not seal the slab first, the concrete will suck the water out of the leveler like a sponge, leaving it brittle and full of pinholes.
The grinding job that saved a thousand clicks
Successful floor leveling requires a substrate that is clean, sound, and dry to prevent debonding. You must remove all drywall mud, paint, and oil before applying a high-quality acrylic primer. This primer seals the concrete straws to prevent air bubbles from rising through the wet leveling compound.
When I talk about the trowel secret, I am talking about the pool trowel. Not your standard square-edged masonry trowel. A pool trowel has rounded ends. This is vital because square corners leave tracks. When you are working with a material that has a working time of maybe twenty minutes, you cannot afford to be chasing trowel marks. I remember a job in a basement where the humidity was ninety percent. The leveler was taking forever to set, but the surface tension was so high it wouldn’t flow into the corners. I used a long-handled gauge rake to pull the bulk of the material to the 1/8 inch height I needed, then I followed behind it with the pool trowel to kiss the surface. It is a dance of physics. You are not pushing the mud. You are guiding it. The chemistry of these products is fascinating. Most modern levelers use calcium aluminate cement rather than Portland cement. This allows for rapid strength gain. Within four hours, you can usually walk on it. Within twenty-four, you can lay your floor. But if your mix is off by even a few ounces of water, the chemistry breaks down. Too much water and the polymers separate, leaving a chalky white film on top. Too little, and it won’t flow.
“A floor is only as good as the subfloor beneath it; deflection is the enemy of every joint.” – Master Flooring Axiom
The gauge rake and the flat trowel dance
A gauge rake is the most efficient tool for spreading large volumes of leveler at a consistent depth. It uses adjustable pins to maintain a specific height above the substrate. Following this with a spiked roller or a pool trowel removes trapped air and eliminates surface tension.
| Material Property | Value Range | Impact on Installation |
|---|---|---|
| Compressive Strength | 4000 to 6000 PSI | Determines point load resistance |
| Working Time | 15 to 30 Minutes | Limits the size of the pour |
| Water Ratio | 5 to 6 Quarts per Bag | Controls flow and final strength |
| Maximum Thickness | 1 to 5 Inches | Determines if deep fill is possible |
| Drying Time | 4 to 24 Hours | Dictates when flooring can begin |
The secret is in the agitation. When you pour the leveler, it wants to stay in a pile. The gauge rake breaks that initial inertia. But the real pro move is the spiked roller. Imagine a paint roller covered in long plastic spikes. As you roll it through the wet leveler, it pops the thousands of tiny bubbles that form from the mixing process. If you leave those bubbles, you end up with a surface that looks like Swiss cheese. In a shower install, this is even more dangerous. If you are leveling a shower subfloor before a mud bed or a waterproof membrane, those pinholes are points of failure. I have seen laminate floors fail because the leveler underneath was too soft. People buy the cheapest bag they can find at the big box store. They do not realize that carpet install requirements are different from floating floor requirements. Carpet is forgiving. You can have a 1/4 inch dip over ten feet and the carpet will hide it. Laminate will not. It will bounce. It will squeak. It will eventually break.
Physics of the perfect polymer bond
Mechanical bonding occurs when the leveler flows into the open pores of the concrete slab. Chemical bonding is facilitated by the acrylic or SBR primers that bridge the gap between the old concrete and the new underlayment. Without proper priming, the leveler will eventually delaminate and crack.
- Check subfloor for flatness using a 10-foot straightedge
- Grind down high spots and fill deep holes with a ramp-up patch
- Vacuum the entire surface with a HEPA filter to remove all dust
- Apply two coats of primer according to manufacturer instructions
- Mix leveler using a high-speed drill and a specialized mixing paddle
- Pour the leveler starting from the furthest corner and move backward
- Use a gauge rake to set the height and a pool trowel to feather edges
The chemistry of the primer is the unsung hero. I always tell my apprentices that the primer is the anchor. If you skip it, you are building on sand. I have a specific memory of a kitchen remodel where the homeowner insisted on skipping the primer to save fifty dollars. Three months later, they called me back because the floor sounded like it was covered in potato chips. The leveler had detached from the plywood subfloor and was breaking into small shards under the weight of the refrigerator. Plywood is even trickier than concrete. It expands and contracts with the seasons. You need a leveler with high polymer content to allow for that slight movement. In a carpet install, you might get away with a cheaper patch, but for any hard surface, the bond is everything. The smells of the job stay with you. The sour tang of the acrylic primer, the dusty weight of the cement bags, the metallic zing of the grinder. It is a sensory experience that tells you when the job is being done right.
“Surface preparation is the single most important phase of any floor installation.” – NWFA Technical Manual
Why your laminate hates your subfloor
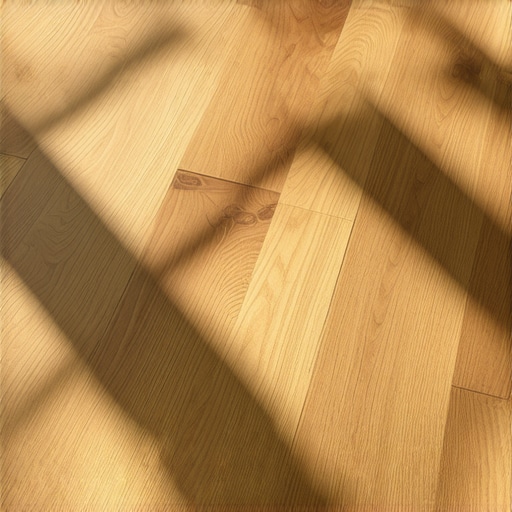
Laminate flooring requires a subfloor flatness of 1/8 inch over a 10-foot radius to prevent joint failure. When the subfloor is uneven, the tongue-and-groove system is subjected to vertical deflection. This stress causes the HDF core to crack and the floor to separate over time.
I have seen it a thousand times. A beautiful laminate floor ruined by a lazy installer. They think the underlayment is a magic carpet. It is not. Most underlayments are only 2 or 3 millimeters thick. They cannot compensate for a subfloor that looks like a roller coaster. The ‘trowel’ secret comes into play here when you are feathering out the edges of your pour. You want the transition from the leveler to the existing slab to be invisible. If you have a hump, your laminate will bridge over it, creating a hollow sound when you walk. If you have a dip, the floor will sink. Both scenarios end in a phone call to my shop and me explaining why the whole thing needs to come up. In the humid regions of the country, this is even more critical. Moisture makes everything grow. If your leveler is not fully cured, that moisture will get trapped under the laminate and cause the edges to peak. It is a slow-motion disaster. You need to use a moisture meter. Do not guess. If the slab is over 3 percent moisture, you need a vapor barrier. These are the rules of the trade. They are not suggestions.
The 1/8 inch that ruins everything
Precision leveling prevents the trampoline effect in floating floors and ensures proper drainage in shower installations. The industry standard for flatness is often 3/16 inch over 10 feet, but high-end installers aim for 1/8 inch. This precision requires constant checking with a laser level.
The secret is also about the mix. When you use a five-gallon bucket, you need to be precise. I use a dedicated measuring pitcher for the water. I never use a garden hose to guess the volume. If the mix is too thin, the sand in the leveler will sink to the bottom and the top will be nothing but weak resin. If it is too thick, it won’t find the low spots. When you pour, you need a helper. One person mixes, one person pours. You must maintain a wet edge. If the first bucket starts to set before the second bucket is poured next to it, you will get a cold joint. That joint will be a ridge that you’ll have to grind down later. I hate grinding. It is the loudest, dirtiest part of the job. I would much rather spend the extra time on the pour than an extra day on the grinder. The ‘trowel’ secret is about control. It is about using the tool to feel the floor through the handle. You can feel the high spots. You can feel the drag. It is an instinct you develop after your first ten thousand bags. When you see a pro work, it looks like they are just walking around with a rake. But they are watching the light reflect off the wet surface. They are looking for the slight shimmer that indicates a low spot. They are managing the physics of the pour in real time. This is how you create a floor that lasts fifty years instead of five.
Article Schema JSON-LD: {“@context”: “https://schema.org”, “@type”: “TechArticle”, “headline”: “The trowel secret for spreading floor leveler evenly”, “author”: {“@type”: “Person”, “name”: “Master Floor Installer”}, “description”: “Detailed technical guide on using gauge rakes and pool trowels for professional floor leveling.”, “keywords”: “floor leveling, carpet install, laminate, showers”}