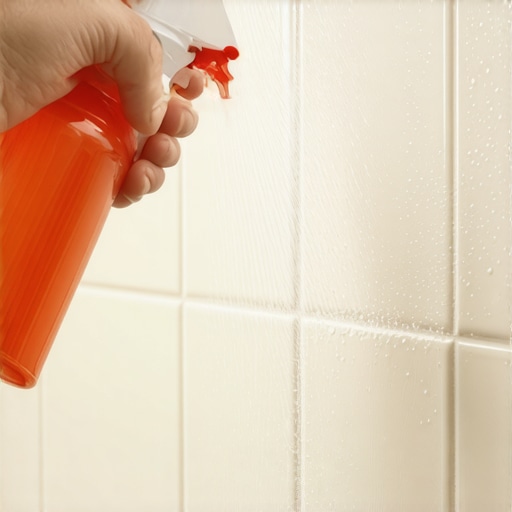
The ‘Spray Bottle’ Hack for Testing Grout Porosity
I smell like oak dust and the sharp chemical bite of low-VOC adhesives. My knees have the permanent calluses of a man who has spent twenty five years chasing a perfectly flat plane. Most people walk into a room and see a pretty floor. I walk into a room and see a structural engineering challenge waiting to fail. If you think flooring is just about picking a color at a big box store, you are already in trouble. I have seen fifteen thousand dollar wide plank walnut floors turn into potato chips because some guy didn’t check the humidity in the crawlspace. You cannot cheat the physics of moisture. You cannot negotiate with a concrete slab that is still off-gassing vapor. Most guys skip the leveling compound. They think the underlayment will hide the dip. It won’t. I spent three days grinding concrete on a job last month just so the floor wouldn’t click like a castanet. That is the difference between a floor that lasts and a floor that becomes a liability. We are going to talk about the spray bottle hack, but we are actually talking about the invisible war between water and your home.
The hidden reality of grout saturation
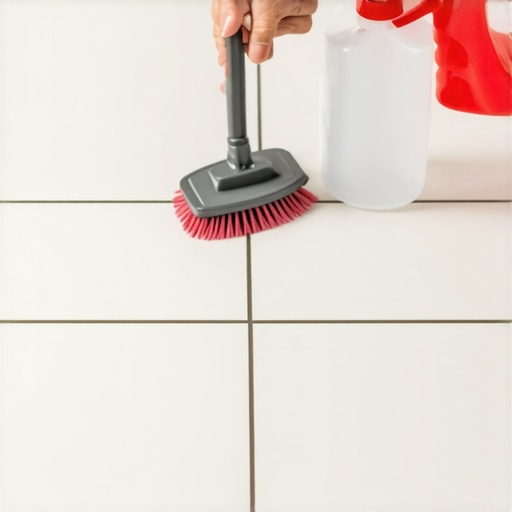
Grout porosity is the measure of how easily a cementitious material absorbs liquids through capillary action which can lead to structural rot. When you apply water to a grout line, the speed at which it darkens indicates the health of your sealer. If the water beads up like a freshly waxed car, your moisture barrier is intact and your shower is protected. If the water vanishes into the joint within seconds, your grout is acting like a wick, pulling moisture into the thin-set and potentially the wall board. This simple test is the first line of defense against mold growth and tile delamination. Most homeowners ignore their grout until they see black spots or cracked joints. By then, the damage is already done. A spray bottle filled with simple tap water can save you ten thousand dollars in remediation costs. You are looking for surface tension. You want to see that water sitting proud on the surface of the grout joint. If it disappears, the molecular structure of the grout is open to the environment.
“A floor is only as good as the subfloor beneath it; deflection is the enemy of every joint.” – Master Flooring Axiom
The physics of the spray bottle test
To understand the spray bottle hack, you have to understand the molecular reality of Portland cement. Grout is essentially a mixture of cement and sand. It is naturally porous. It has tiny microscopic voids that are created when the water used during the mixing process evaporates. Think of it like a sponge that has been frozen in time. When you spray water on unsealed grout, those voids pull the water in through capillary action. This is the same force that pulls water up from the roots of a tree. In a shower, this is a disaster. If your shower is used daily, the grout never has a chance to dry out. The moisture stays trapped behind the tile. It feeds the microbes. It weakens the bond between the tile and the substrate. When I perform the spray bottle test, I am looking for the contact angle of the water droplet. A high contact angle means the sealer is working. A low contact angle means the water is wetting the surface and preparing to dive deep. I always use distilled water if I am being precise. Tap water has minerals that can slightly alter the results, but for a quick check, any spray bottle will do. You spray a fine mist across a three foot section of the wall. Wait sixty seconds. If the grout has darkened, it is thirsty. It needs a silane or siloxane based sealer to clog those pores.
Floor leveling and the click of death
While we are talking about moisture, we have to talk about levelness. You might be planning a laminate or carpet install after you fix your shower. The biggest mistake people make is thinking that a thick underlayment will fix a wavy floor. It is a lie. If your subfloor has a dip of more than an eighth of an inch over ten feet, your laminate will fail. I call it the click of death. Every time you walk over that dip, the tongue and groove joint of the laminate flexes. It was not designed to flex. Eventually, that plastic or HDF locking mechanism snaps. Now you have a gap. Now moisture from your mop gets into the core. The floor swells. It is a chain reaction of failure. I spend more time with self leveling underlayment and a floor grinder than I do actually laying planks. A floor must be flat, not just level. You can have a floor that is sloped but flat and the laminate will survive. If you have a floor that is level but has a hump in the middle, you are in for a bad time. You need to use a straight edge. Not a four foot level. A ten foot straight edge. Mark the high spots. Grind them down. Fill the low spots. It is dusty, miserable work, but it is the only way to sleep at night knowing the floor won’t fail in two years.
| Grout Type | Porosity Level | Acclimation Time | Best Use Case |
|---|---|---|---|
| Sanded Grout | High | 24-48 Hours | Joints wider than 1/8 inch |
| Unsanded Grout | High | 24-48 Hours | Polished stone and thin joints |
| Epoxy Grout | Zero | 72 Hours | Showers and high moisture areas |
| Acrylic Grout | Low | 24 Hours | Commercial floors and backsplashes |
The ghost in the expansion gap
People treat laminate and engineered wood like they are static objects. They are not. They are breathing, moving organisms. In a place like the humid South, a floor will grow significantly during the summer. In the dry winters of the North, it will shrink. If you don’t leave an expansion gap at the perimeter, the floor will find a way to move. It will buckle in the center of the room. It will push against the baseboards until it rips the nails out of the wall. I always leave at least a half inch. I don’t care what the instructions on the box say. The box is written by lawyers who want to sell more floor. I am the guy who has to fix it. I have seen floors that were installed tight against the door jambs that actually lifted the trim off the floor. You need to respect the movement. This is why you must acclimate the material. Don’t bring the laminate from the truck and start clicking it together. It needs to sit in the room for forty eight to seventy two hours. It needs to reach equilibrium with the house. If you skip this, you are gambling with the owner’s money. I once saw a carpet install where they tried to transition to a laminate floor that hadn’t acclimated. Within a month, the laminate pushed so hard against the transition strip that it buckled the carpet. It looked like a mole was burrowing under the living room.
“Waterproof laminate is a marketing term, not a scientific reality; the core is still susceptible to vapor pressure from below.” – TCNA Technical Bulletin
The moisture management checklist
- Test the concrete slab moisture content using a calcium chloride test or an in-situ probe before any laminate install.
- Check the grout in the shower every six months using the spray bottle hack to ensure the sealer hasn’t degraded.
- Ensure the subfloor deflection does not exceed L/360 for ceramic tile or L/720 for natural stone to prevent grout cracking.
- Never install a heavy kitchen island on top of a floating floor as it pins the material and prevents necessary expansion.
- Verify that the crawlspace has a 6-mil polyethylene vapor barrier to prevent ground moisture from rising through the subfloor.
The chemistry of grout sealers
When you use the spray bottle hack and find that your grout is porous, you need to understand what you are putting on it. There are two main types of sealers: topical and penetrating. Topical sealers are like a coat of paint. They sit on top. They look shiny. They are also garbage for high traffic areas because they wear off and trap moisture underneath. I only use penetrating sealers. These are molecules that are small enough to dive into the pores of the grout. They chemically bond to the silica in the cement. They create a hydrophobic environment. This means they actually repel water at a molecular level. It is the difference between wearing a raincoat and being made of plastic. A good penetrating sealer won’t change the look of the grout, but it will make it nearly impossible for water to enter. This is essential for showers. If you are doing a new install, wait at least three days before sealing. The grout needs to fully hydrate. If you seal it too early, you trap the mix water inside and the grout will never reach its full compressive strength. It will be soft and chalky. I have seen guys seal grout the same day they installed it. Those floors usually need to be raked out and redone within a year. It is a waste of time and a waste of material.
The truth about waterproof flooring
The term waterproof has become a catch-all in the flooring industry that leads to a lot of heartbreak. When a manufacturer says a laminate or LVP is waterproof, they mean the material itself won’t be damaged by water. They do not mean your subfloor is protected. If you have a flood, the water goes through the joints. It sits on the subfloor. It grows mold. It rots the plywood. I have pulled up waterproof floors that were only two years old and found a literal swamp underneath. The floor looked fine from the top, but the smell was unbearable. This is why floor leveling is so vital. If the floor is level and the joints are tight, less water can get through. But you still need a moisture barrier. You still need to understand that a floor is a system. The spray bottle hack works on grout because tile is a different beast, but with laminate, your only defense is a perfect install and immediate cleanup of spills. Don’t let the marketing fool you. You cannot turn your bathroom into a wet room just because the box says waterproof. Unless you are using a topical membrane like Kerdi or RedGard under your tile, you are playing with fire. Flooring is an honest trade. If you cut corners, the house will tell on you. It might take six months, or it might take two years, but the failure is coming. My job is to make sure that failure doesn’t happen on my watch. I use the spray bottle, I use the level, and I use my ears. If a floor clicks when I walk on it, it’s not done. If the water soaks in, it’s not sealed. It’s as simple as that.{“@context”:”https://schema.org”,”@type”:”Article”,”headline”:”The ‘Spray Bottle’ Hack for Testing Grout Porosity”,”author”:{“@type”:”Person”,”name”:”Master Floor Installer”},”description”:”A deep dive into grout porosity, the spray bottle test, and the structural engineering of subfloors and laminate installation.”,”articleSection”:”Flooring and Subfloor Management”}