The Secret to Tiling a Shower Floor Without Those Annoying Toe-Stickers
The Secret to Tiling a Shower Floor Without Those Annoying Toe-Stickers
Most guys skip the leveling compound. They think the underlayment will hide the dip. It won’t. I spent three days grinding concrete on a job last month just so the floor wouldn’t click like a castanet. That is the reality of a professional floor install. When it comes to showers, those little toe-stickers, or lippage, are not just an eyesore. They are a failure of geometry and prep. I have spent 25 years on my knees with a moisture meter and a level. I view a floor as a performance surface, not a decoration. You cannot treat a shower like a living room carpet install. In a shower, the physics of water and the chemistry of the bond are the only things keeping your joists from rotting into mulch.
The anatomy of a shower failure
Shower floor lippage and toe-stickers occur when adjacent tile edges are not flush, usually caused by improper subfloor leveling, incorrect thin-set troweling, or warped tile planks. To prevent this, installers must use mechanical leveling systems and ensure a flat substrate that meets TCNA DL151 standards for deflection and surface regularity.
When you walk into a bathroom and feel that sharp, jagged edge of a tile hitting your pinky toe, you are feeling a lack of respect for the subfloor. A shower pan is a complex piece of engineering. It requires a 1/4 inch per foot slope toward the drain. If your subfloor has a dip, that slope is compromised before you even open a bag of mortar. I have seen guys try to build up the thin-set to fix a low spot. That is a recipe for disaster. Thin-set is an adhesive, not a filler. As it cures, it shrinks. If one tile has a 1/2 inch of mortar under it and the next has 1/8 inch, they will dry at different rates and pull to different heights. You end up with a toe-sticker that stays there until the day you sledgehammer the room.
The geometry of the perfect slope
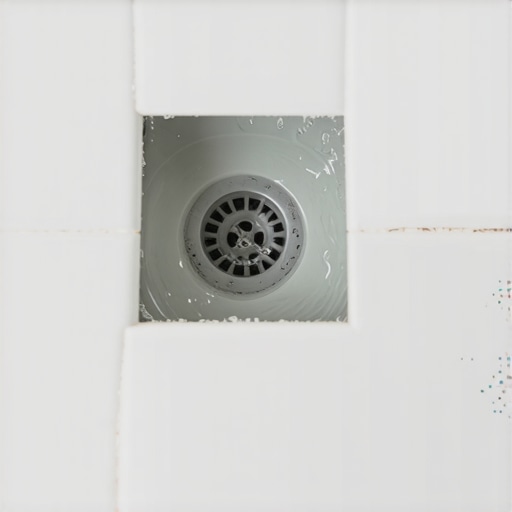
Achieving a perfect shower slope requires a precise one-quarter inch per foot drop toward the waste outlet to ensure hydrostatic pressure does not build up. This is managed through pre-sloped mortar beds or integrated foam pans which provide a uniform substrate for the final ceramic or porcelain tile application.
Physics does not care about your aesthetic preferences. Water follows the path of least resistance. If you have even a slight variation in the height of your tiles, water will pool against those edges. This leads to mold, mildew, and the eventual degradation of the grout joints. We use the term envelope cut for a reason. When you are using larger tiles on a shower floor, you have to cut them diagonally from the corners of the drain to the corners of the room. This allows the flat planes of the tile to follow the pitch of the floor without creating those sharp ridges. If you try to force a large format tile to bend, you are going to get lippage. It is inevitable.
“A floor is only as good as the subfloor beneath it; deflection is the enemy of every joint.” – Master Flooring Axiom
Why your subfloor is lying to you
Subfloor preparation for showers involves checking for deflection and moisture content using an ASTM F2170 in-situ probe or a calibrated moisture meter. A subfloor must be rigid enough to support the weight of the mortar bed and tile without flexing, which is the primary cause of grout cracking and tile delamination.
I have walked onto jobs where the homeowner thought they were ready for tile. I put a straightedge down and find a 3/8 inch gap in the middle of the room. They want to know why I am bringing out the grinder or the self-leveling underlayment. It is because wood moves and concrete breathes. If your subfloor is not flat to within 1/8 inch over 10 feet, your tile install is doomed. This is especially true with modern trends like laminate and LVP that people are now trying to run into bathrooms. While those products claim to be waterproof, the subfloor requirements are just as strict. If you have a dip, the locking mechanisms on those floors will snap under the weight of a person walking. In a shower, that same dip means your tile will crack or pop loose.
The chemical reality of modified thin-set
Modified thin-set mortars utilize polymer additives to increase bond strength and flexibility, meeting ANSI A118.4 or A118.15 standards. These chemicals allow the mortar to adhere to waterproof membranes while resisting the thermal expansion and contraction cycles common in wet environments and radiant heating systems.
The chemistry inside a bag of high-end mortar is incredible. You have portland cement, fine sand, and a cocktail of polymers. These polymers are what allow the tile to stay stuck when the house shifts. But here is the thing: you have to mix it right. I see guys using a high-speed drill and whipping air into the mix. That is a mistake. You are creating micro-bubbles that weaken the bond. You need to mix it slow, let it slake for ten minutes to let the chemicals fully hydrate, and then mix it again. If you skip the slake, you are working with a product that has not reached its full potential. It will skin over too fast, and you will not get the 95 percent coverage required for wet areas. Without that coverage, you get voids. Voids trap water. Water grows things you do not want in your home.
| Tile Category | Janka Hardness / Durability | Max Lippage Allowed | Acclimation Time |
|---|---|---|---|
| Porcelain | High (50+ on C scale) | 1/32 inch | 24 Hours |
| Ceramic | Medium | 1/32 inch | 24 Hours |
| Natural Stone | Variable (Hard to Soft) | 1/64 inch | 48-72 Hours |
| Laminate (Non-Shower) | Surface Hardness High | N/A (Flush Lock) | 48 Hours |
The mechanics of mechanical leveling systems
Mechanical tile leveling systems consist of clips and wedges designed to interlock tile edges during the mortar curing process. These tools ensure that vertical alignment is maintained across the entire floor surface, effectively eliminating lippage and the sharp toe-stickers that plague traditional manual installations.
Some old-school guys call these systems a crutch. I call them insurance. Even the best installer in the world cannot fight the physics of a tile that wants to bow as it dries. Large format tiles are notorious for having a slight crown in the middle. If you do a 50 percent offset, you are putting the lowest part of one tile next to the highest part of another. That is a recipe for a toe-sticker. The leveling clips pull the tiles into a single plane and hold them there while the thin-set sets up. It is the only way to get a truly flat floor in a modern shower. It is the difference between a floor that looks okay and a floor that looks like it was carved out of a single block of stone.
The 1/8 inch that ruins everything
Expansion gaps in tile are mandatory at the perimeters and plane changes to accommodate the natural movement of the building structure. According to TCNA EJ171, these gaps must be filled with 100 percent silicone sealant rather than rigid grout to prevent tenting or stress-induced cracking.
I have seen entire floors tent up like a mountain range because the installer ran the tile tight against the wall. You need that 1/8 inch gap. In a shower, that gap is at the change of plane where the floor meets the wall. If you grout that joint, it will crack within six months. Houses breathe. They expand in the summer and shrink in the winter. If your tile has nowhere to go, it will push against itself. That pressure has to go somewhere, and usually, it goes up. Use silicone. It stays flexible. It keeps the water out. It handles the movement. It is the boring part of the job that actually makes the job last 30 years.
The regional climate reality
In humid regions like the Gulf Coast or the Pacific Northwest, vapor management is the most critical part of a shower install. You cannot just use a liquid-applied membrane and hope for the best; you need a complete system that includes integrated drain flanges and vapor-tight seals to prevent wicking into the wall cavity.
The swampy humidity of Houston means solid wood is a death wish for most bathrooms. You need engineered cores or, better yet, a properly waterproofed tile assembly. The dry heat of Phoenix will shrink your baseboards until they show a gap, but in the South, things swell. If you do not account for the moisture vapor drive coming through the slab, your shower floor will delaminate. I always use a topical waterproofing membrane. It is not enough to just have a liner under the mud bed. You want the water to stop at the tile, not soak into the mortar and sit there like a wet sponge for a week. A wet sponge grows mold. A dry floor stays clean.
The Master Floor Checklist
- Verify subfloor deflection meets L/360 for ceramic and L/720 for stone.
- Ensure subfloor is flat within 1/8 inch over 10 feet.
- Check moisture content of wood subfloors (should be within 2-4% of flooring).
- Use a 100% silicone sealant at all change-of-plane joints.
- Ensure 95% mortar coverage for all tiles in wet areas.
- Always slake your thin-set for at least 10 minutes.
While most people want the thickest underlayment, too much cushion actually causes the locking mechanisms on LVP to snap under pressure. The same logic applies to tile. You want a solid, unyielding base. You are building a structure. You are not just laying down a rug. If you respect the subfloor, the tile will respect your feet. No more toe-stickers. No more cracked grout. Just a floor that performs exactly the way it was engineered to perform. Do not let a discount big-box retailer tell you that a bag of cheap mortar and a plastic bucket is all you need. You need patience, the right chemistry, and a obsession with the flat plane. That is how you build a floor that outlasts the house around it.