The ‘Screen-and-Coat’ Method for Refreshing Dull Hardwood Floors
I once walked into a house where a $15,000 wide-plank walnut floor was cupping so bad it looked like a potato chip because the installer didn’t check the crawlspace humidity. It was a tragedy of engineering. The owner thought they needed to rip the whole thing out, but the reality was a subfloor moisture issue that had permeated the lignin of the wood. This is why I treat flooring as a structural challenge first and an aesthetic choice second. Most people see a dull floor and assume they need to rent a drum sander and take it down to the bare grain. That is often a massive mistake. If your floor has the integrity of the original structure but lacks its luster, the screen and coat method is the surgical intervention you need. It requires an understanding of chemical bonds and surface tension that most big box retailers will never tell you. I have spent twenty-five years with sawdust under my nails and a moisture meter in my pocket, and I can tell you that the secret to a lasting finish is not in the wood itself but in the mechanical tooth you create in the existing polyurethane.
The chemistry of the mechanical bond
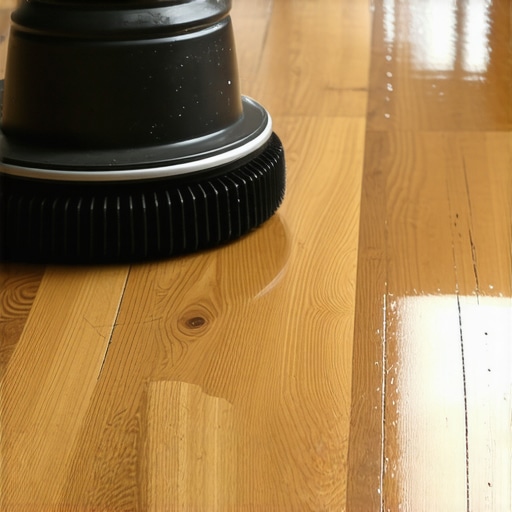
The screen and coat method relies on abrasive pads to create mechanical tooth in the existing polyurethane finish. This process allows a new topcoat to achieve molecular adhesion without the need for full sanding or removing the lignin-rich surface of the wood planks. You are essentially scuffing the surface at a microscopic level. Imagine the existing finish as a sheet of glass. A new layer of liquid plastic will not stick to glass; it will bead up and peel off in sheets. By using a buffer and a high-grit screen, you create thousands of tiny valleys in that glass. When the new finish is applied, it flows into these valleys and anchors itself. This is the essence of a mechanical bond. It is different from the chemical bond of a site-finished floor where the layers are applied within a specific window of time while the underlying coat is still off-gassing and chemically active. In a refresh, the old finish is fully cured and inert, so you must rely on physics to make the new layer stay put.
Why your subfloor ruins your finish
A stable subfloor is the foundation of any refinishing project because floor leveling issues or subfloor deflection will cause the wood to flex and crack the new finish. If the joists are weak, even the best high-traffic finish will eventually fail due to structural movement. You might think that because you are only working on the surface, the subfloor does not matter. You are wrong. If the floorboards are rubbing together because the subfloor is uneven, they create friction. Friction creates heat and movement. That movement will eventually shear the bond between the old finish and the new coat. Before I ever touch a buffer to a floor, I walk the entire surface. I listen for squeaks. I look for vertical movement between planks. If I find a dip that exceeds 1/8 inch over a 6-foot span, I know we have a problem that a simple screen and coat won’t fix. The physics of the floor require a rigid plane to support the brittle nature of a cured finish.
“A floor is only as good as the subfloor beneath it; deflection is the enemy of every joint.” – Master Flooring Axiom
The ghost in the expansion gap
The expansion gap is a perimeter requirement that allows hardwood planks to expand and contract with relative humidity changes without buckling or cupping. Many installers fail to leave enough room at the walls. When you apply a new coat of finish, you are introducing a small amount of moisture and a new layer of tension. If your floor is already tight against the drywall, that new coat can be the tipping point that causes a failure. I have seen floors pop off the subfloor like a spring because they had nowhere to go. You need at least 1/2 inch of space hidden under your baseboards or shoe molding. This gap is the lungs of the floor. It allows the wood to breathe. If you have replaced your baseboards and nailed them through the flooring, you have locked the floor in place and invited disaster. The floor must be a floating island of wood, even if it is nailed down to the subfloor.
| Abrasive Grit | Micron Level | Resulting Surface Profile | Best Use Case |
|---|---|---|---|
| 60 Grit | 250 Microns | Heavy Scratches | Full Sanding Only |
| 100 Grit | 150 Microns | Visible Swirls | Initial Leveling |
| 120 Grit | 125 Microns | Fine Scratches | Standard Screen and Coat |
| 150 Grit | 100 Microns | Polished Tooth | Final Coat Preparation |
The 1/8 inch that ruins everything
The buffing process must be uniform and precise because any variation in depth will result in sheen inconsistencies across the refreshed hardwood surface. If you linger too long in one spot with the buffer, you create a depression. It might only be 1/16 of an inch, but when the light hits it from a window, it will look like a pothole. You must maintain a steady, walking pace. I use a 175 RPM buffer. Anything faster risks burning the old finish. Burning creates a waxy residue that prevents the new coat from sticking. You also have to be careful about the edges. A buffer is a round tool in a square room. You will have to do the corners by hand. If you skip the hand-scrapping in the corners, the new finish will peel there first. It is the most common sign of a lazy installer. Every square inch of the old finish must be abraded, or the new coat is just sitting on top like water on a duck’s back.
The threat of wax and silicone contamination
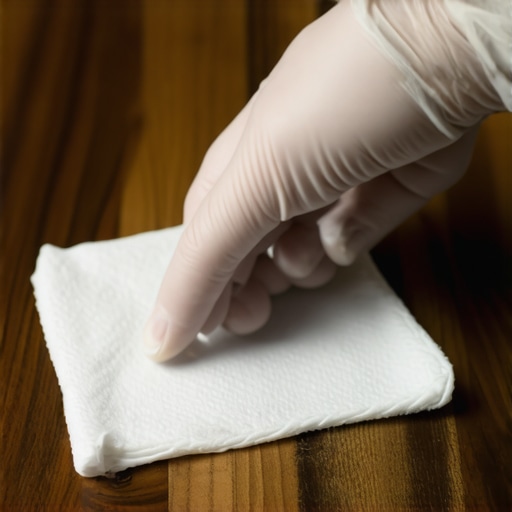
Before screening a floor, you must test for wax residues or silicone-based cleaners because these contaminants will cause fish-eyes in the new polyurethane topcoat. This is the silent killer of the screen and coat method. If a homeowner has been using those spray mops from the grocery store that promise a quick shine, they have likely coated their floor in a thin layer of paraffin or silicone. No amount of screening will fully remove that if it has worked its way into the grain. I always take a white rag with a bit of mineral spirits and rub a small area in a closet. If the rag comes up yellow or gray, I know there is wax. If I try to coat over that, the new finish will pull away from the contaminated spots, creating small craters known as fish-eyes. At that point, the job is ruined. You have to sand the whole thing down to bare wood. You cannot shortcut chemistry.
- Inspect for deep gouges that require wood filler
- Perform a wax contamination test in multiple areas
- Remove all base shoe molding to expose expansion gaps
- Vacuum the floor with a HEPA filter to remove micro-dust
- Tack the floor with a microfiber mop and denatured alcohol
- Check the moisture content of the wood planks
The science of moisture and acclimation
The moisture content of hardwood flooring must be within 2 to 4 percent of the subfloor moisture before any finish work begins. This is not a suggestion; it is a law of physics. Wood is hygroscopic. It absorbs water from the air and the ground. If you apply a finish when the wood is at 12 percent moisture and the air is at 6 percent, the wood will shrink. As it shrinks, it pulls at the finish. On a new install, you let the wood sit in the room for two weeks. On a screen and coat, you have to ensure the HVAC system has been running at normal living conditions for at least five days. If the house has been closed up without air conditioning in a humid climate like New Orleans, the wood is swollen. If you coat it then, the finish will crack when the owner turns the AC back on and the wood contracts. I never start a job without my Delmhorst moisture meter. It is the only tool that doesn’t lie.
“Wood flooring will perform best when the environment is controlled to stay within a relative humidity range of 30 to 50 percent.” – NWFA Technical Guidelines
The difference between oil and water based finishes
Choosing between oil-modified polyurethane and waterborne finishes involves balancing VOC emissions, ambering effects, and curing times for the refreshed surface. Oil-based finish is the old school choice. It smells like a refinery and takes 24 hours to dry between coats. It gives the wood a warm, amber glow. But it is high in VOCs and is being banned in more and more states. Water-based finishes have come a long way. The high-end ones, like Bona Traffic HD, are actually harder and more durable than oil. They dry in hours, not days. However, they are clear. If you want that rich oak look, you have to use a sealer first. For a screen and coat, you usually want to stay with the same chemistry that was there before. Putting water over oil is possible if the oil is fully cured and screened perfectly, but putting oil over water can sometimes lead to adhesion failures if the chemistry doesn’t align. I prefer the water-based resins because they don’t yellow over time. Your white oak stays white instead of turning the color of a school bus.
The final tack and the dustless reality
Achieving a professional finish requires a dust-free environment which is only possible through intensive tacking and the use of sealed vacuum systems. You can screen a floor perfectly, but if there is a single grain of dust left on the surface, it will be magnified by the finish. It will look like a boulder in a lake. After I screen, I vacuum three times. Then I tack the floor. Tacking is the process of using a damp cloth to pick up the microscopic particles that the vacuum missed. I use a pole with a microfiber head and a mix of water and alcohol. I walk backward toward the exit, making sure I never step on the cleaned area. If a pet runs across the floor after I tack it, I start over. The purity of the surface determines the quality of the reflection. A floor is a mirror. Any flaw in the substrate or the cleanliness will be visible to anyone standing near a window. It is about discipline and the refusal to accept a single speck of grit.