Designing a Zero-Entry Shower That Actually Keeps Water In
The subfloor secret that contractors wont tell you
Most guys skip the leveling compound. They think the underlayment will hide the dip. It wont. I spent three days grinding concrete on a job last month just so the floor wouldnt click like a castanet. When you are building a zero entry shower, that level of obsession is not just a preference, it is a requirement. If your subfloor is out of plane by even a quarter inch across ten feet, your transition from the bathroom floor to the shower pan will fail. I have seen fifteen thousand dollar marble installs crack within six months because the installer thought they could compensate for a sagging joist with extra thin set. It does not work that way. Water follows the path of least resistance, and if your slope is not mathematically perfect, it will find its way into your wall plate and rot your home from the inside out.
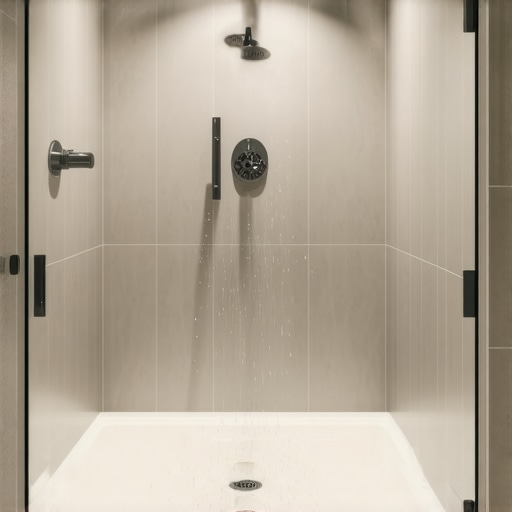
Creating a shower without a curb is a structural engineering challenge that requires you to rethink the entire floor assembly. You are not just laying tile, you are managing fluid dynamics and capillary action. The primary goal is to ensure the wet area is recessed into the floor structure so the finished tile sits flush with the dry area. This often requires sistering joists or using a recessed subfloor kit. If you are working on a concrete slab, you are looking at several days of jackhammering or intensive grinding to create the necessary pitch toward the drain. Every millimeter matters. I once saw a guy try to transition a laminate floor directly to a curbless shower without a proper moisture barrier. The laminate sucked up the humidity like a sponge and peaked at the doorway within a week.
The physics of the invisible slope
A zero entry shower requires a minimum slope of one quarter inch per foot toward the drain to ensure gravity overcomes the surface tension of the water. This is where most people fail because they try to achieve this slope in a small space without considering the tile size. Large format tiles are the enemy of a multi directional slope. Unless you are using a linear drain, you are forced to use small mosaic tiles that can follow the contours of a four way pitch. If you insist on those big forty eight inch porcelain slabs, you must use a single plane slope toward a wall to wall linear drain. Anything else is just asking for standing water and slippery soap scum buildup.
“A floor is only as good as the subfloor beneath it, deflection is the enemy of every joint.” – Master Flooring Axiom
When you zoom into the chemistry of the installation, you have to look at the bond coat. Using a standard unmodified thin set is a recipe for disaster in a wet room. You need a polymer modified mortar that meets ANSI A118.15 standards. This stuff creates a chemical bond that can handle the microscopic expansion and contraction of the subfloor. When you apply this mortar, you need to use a directional troweling technique. Swirling your trowel creates air pockets. Those air pockets trap moisture and eventually lead to mold or tile de-bonding. You want full coverage, which means collapsing the ridges to ensure no voids exist beneath the ceramic or stone surface.
Why your subfloor is lying to you
Wood subfloors are living, breathing entities that react to every change in humidity. If you are in a high moisture region like the Pacific Northwest, your plywood subfloor is going to expand. If you lock it down too tight without an uncoupling membrane, the stress will transfer directly to your grout lines. This is why I always advocate for a cementitious backer unit or a high density polyethylene membrane. These layers act as a shear break. They allow the subfloor to move independently of the tile surface. Without this, your zero entry dream will become a cracked nightmare. In dry climates like Arizona, the danger is different. The wood shrinks, pulling away from the vanity and the shower transition, creating gaps that water will inevitably fill.
While most people want the thickest underlayment possible for comfort, too much cushion actually causes the locking mechanisms on LVP or laminate to snap under pressure. This is a contrarian truth in the flooring world. A soft floor feels good on the feet, but it kills the integrity of the joints. For a bathroom transition, you need a rigid core. If you are coming from a carpet install in the bedroom to a tiled zero entry bathroom, the height management is the hardest part. You have to calculate the thickness of the tack strip, the pad, and the pile height against the thin set, membrane, and tile. If you miss this by an eighth of an inch, you are stuck using a bulky T-molding that ruins the minimalist aesthetic you were going for.
Technical Specifications for Waterproofing Membranes
| Membrane Type | Vapor Permeance | Application Method | Best Use Case |
|---|---|---|---|
| Liquid Applied | 0.50 perms | Roller or Brush | Complex Geometries |
| Sheet Membrane | 0.01 perms | Thin-set Bonded | Maximum Vapor Protection |
| Curb-less Pan Kit | 0.00 perms | Integrated Flange | Guaranteed Slope Consistency |
The moisture vapor emission rate (MVER) is a metric most residential installers ignore, but it is the reason why floors fail. If you are over a concrete slab, you need to perform a calcium chloride test. If your slab is off-gassing more than three pounds of moisture per one thousand square feet, your adhesive will emulsify. You will walk into the bathroom one day and realize the tiles are floating on a layer of grey sludge. This is especially true if you are trying to install a laminate floor or wood-look tile in a basement bathroom. You must use a moisture barrier that can withstand high hydrostatic pressure.
The chemical bond that holds the line
The transition between the wet zone and the dry zone is the front line of the battle against water damage. In a zero entry setup, you cannot rely on a curb to stop the flood. You are relying on the capillary break. This is a small gap filled with a high grade silicone sealant rather than hard grout. Grout is porous. It will wick water from the shower floor out into the dry area where your carpet or laminate starts. Silicone is non-porous and flexible. It stops the water in its tracks and allows for the structural movement that occurs when you step on the transition. If your installer uses grout at the threshold, fire them on the spot. They do not understand the physics of a wet room.
“Waterproofing must be a continuous system from the drain flange to the top of the wall, any break is a point of failure.” – TCNA Handbook Standards
Let us talk about the linear drain. It is the gold standard for curbless showers, but it requires a deeper understanding of floor leveling. The floor must be perfectly flat across the width of the shower to meet the drain. If there is a hump in the middle, the water will divert to the corners and sit there until it grows slime. You need to use a high flow self leveling underlayment that can reach five thousand PSI. This creates a glass like surface that you can then pitch accurately. If you are transitioning from a carpet install, you need to ensure the subfloor height is adjusted long before the first tile is buttered. This often involves shaving down the tops of the floor joists or using a thinner subfloor material in the dry area, which requires an engineer to sign off on the load bearing capacity.
Essential Checklist for Zero Entry Installation
- Verify subfloor deflection meets L/360 for ceramic or L/720 for stone.
- Install a bonded flange drain to ensure a watertight seal at the waste pipe.
- Perform a twenty four hour flood test before laying any decorative tile.
- Apply waterproofing membrane at least six feet outside the immediate shower zone.
- Ensure the linear drain capacity exceeds the GPM of the shower head.
- Check that all transitions use a flexible sealant rather than rigid grout.
The regional climate plays a massive role in how these materials behave. In the swampy humidity of Houston, solid wood near a zero entry shower is a death wish. You need engineered cores or luxury vinyl that can handle the ambient moisture. In those environments, the slab is always damp. You need a topical moisture mitigation system before you even think about floor leveling. Conversely, in the high desert of Santa Fe, the air is so dry that it will suck the moisture out of your thin set before it has a chance to hydrate the cement. You have to dampen the substrate and use extended open time mortars just to get a decent bond. If you do not adapt to the local atmosphere, the floor will tell on you within the first year.
The ghost in the expansion gap
Every floor needs to breathe, but in a curbless bathroom, those expansion gaps are vulnerabilities. When you are doing a laminate or LVP install adjacent to the shower, you need a quarter inch gap at the perimeter. But you cannot leave that gap open to water. The trick is to use a backer rod and a color matched silicone. This provides the expansion room the floor needs while creating a waterproof dam. Most people skip the backer rod and just jam silicone in there. That creates a three sided bond that will tear as the floor moves. A two sided bond is the only way to ensure the sealant stays intact over years of seasonal shifting.
Ultimately, the success of a zero entry shower is determined by the work you do before the tile arrives. It is the grinding of the concrete, the sistering of the joists, and the precise application of the waterproofing membrane. It is a technical discipline that leaves no room for error. If you treat it like a decoration project, you will end up with a moldy subfloor and a ruined home. Treat it like a structural engineering project, and you will have a floor that performs for a lifetime. Stop looking at the color of the grout and start looking at the mil thickness of your wear layer and the PSI of your leveling compound. That is where the real quality lives.