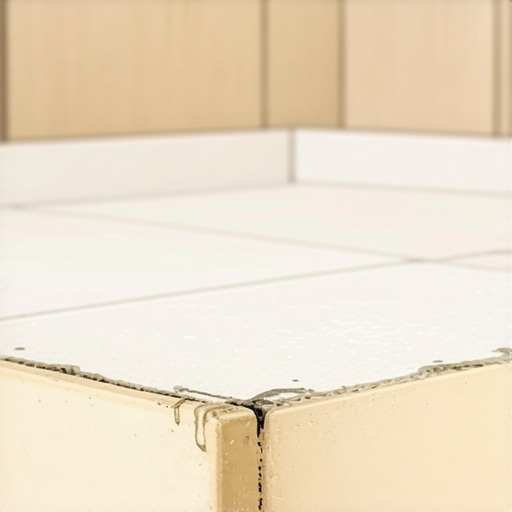
The ‘Marble Test’ for Finding Hidden Dips in Your Bathroom Floor
I’ve spent 25 years on my knees with a moisture meter and a level. You view a floor as a decoration, but I view it as a performance surface that will fail you if you do not respect the physics of the subfloor. Most guys skip the leveling compound. They think the underlayment will hide the dip. It won’t. I spent three days grinding concrete on a job last month just so the floor wouldn’t click like a castanet. That is the reality of modern flooring. You see a beautiful 12 by 24 porcelain tile and you think about the grout color. I see the subfloor. I see the 3/4 inch plywood and the joist spacing. I see the invisible dips that will eventually snap the tongue and groove of your laminate or crack your grout lines until they look like a spiderweb. If you want a floor that lasts, you stop looking at the top and start looking at the bottom. This is the structural engineering of the home, not a craft project. You need to understand that the surface you walk on is only as reliable as the substrate it bonds to. When a floor fails, it is rarely the fault of the material. It is the fault of the man who ignored the level. You cannot hide a valley with a piece of foam underlayment. You cannot fix a slope with extra glue. You fix it with the truth. That truth is found with a bag of marbles and a straightedge.
The physics of a failing bathroom floor
Floor leveling requires a flat substrate defined by TCNA standards as no more than 1/8 inch deviation over 10 feet for large format tile. A subfloor dip creates hollow spots, deflection, and joint failure in laminate or vinyl plank. Without proper leveling compound, the floor will flex under foot traffic. This mechanical stress is the primary cause of clicking sounds in floating floors and the eventual delamination of thin-set in ceramic tile applications. When you step on a high point, the floor pivots. When you step over a low point, the floor bows. This constant movement fatigues the locking mechanisms. In a bathroom, where humidity is high, these gaps allow moisture to penetrate the core of the material. Laminate is particularly susceptible to this. Even the waterproof varieties often only protect the top surface. If moisture gets into the joints because the floor is bouncing over a dip, the HDF core will swell. Once that happens, the floor is junk. You are looking at a full tear-out because you didn’t want to spend an afternoon with a bag of self-leveler and a mixing paddle. The marble test is the fastest way to see these sins before they are covered up by expensive materials.
“A floor is only as good as the subfloor beneath it; deflection is the enemy of every joint.” – Master Flooring Axiom
Why your subfloor is lying to you
Subfloors are rarely flat because wood is a living material that reacts to the environment. Even a concrete slab in a new build is not a mirror finish. It has humps from the troweling process and dips from the settling of the house. In a carpet install, you can get away with these imperfections because the pad and the pile absorb the variations. The carpet stretches over the dips like a trampoline. But when you switch to a hard surface like tile or laminate, those dips become structural hazards. The subfloor lies to you because it looks flat to the naked eye. Light hits the surface and hides the shadows. You need a mechanical way to find the trouble spots. I have seen homeowners spend five figures on exotic hardwoods only to have the entire installation ruined because the joists were spaced 24 inches on center without adequate blocking. This leads to deflection. Deflection is the technical term for the floor bouncing. If your subfloor bounces more than L/360 of the span, your tile will crack. It is not a matter of if, but when. You must verify the structural integrity of the plywood. Check for 3/4 inch thickness. Check for the stamp of the APA (Engineered Wood Association). If you find a soft spot, you don’t just cover it. You cut it out and replace it. You screw it down every six inches on the edges and every twelve inches in the field to stop the squeaks. Only then can you begin the leveling process.
The 1/8 inch that ruins everything
Surface flatness is measured using a straightedge and feeler gauges to ensure compliance with NWFA guidelines. Any subfloor dip exceeding 3mm will cause locking failure in click-lock flooring and grout cracking in showers. Precision is the difference between a floor that lasts forty years and a floor that fails in four months. When I walk a job site, I am looking for that 1/8 inch. It seems small. It is the thickness of two pennies. But over a ten-foot span, that dip creates a pocket of air. When you walk over that pocket, the flooring material is forced to bridge the gap. Think about the physics of a bridge. A bridge is designed to support weight between two points. A floor plank is not a bridge. It is designed to be fully supported by the substrate. When it bridges a gap, the tongue and groove are under constant tension. Eventually, the plastic or wood fibers in the lock will shear. You will feel it as a soft spot. You will hear it as a click. In a bathroom, this is even more dangerous. Bathroom showers and tub surrounds are areas of high moisture. If the floor is flexing, the caulking at the base of the tub will pull away. Water will find that gap. It will travel under the floor and rot the subfloor from the inside out. You won’t see it until the mushrooms start growing out of your baseboards. This is why I am a stickler for the marble test. It finds the dips that your eyes miss.
The ghost in the expansion gap
Floors need to breathe. If you pin a floor against a wall or under a heavy kitchen island, you kill its ability to expand and contract with the seasons. This is especially true for laminate and LVP. In a bathroom, the humidity fluctuates wildly every time someone takes a hot shower. The floor will grow. If it has nowhere to go, it will buckle. It will lift off the subfloor and create a false hump. Many people mistake this buckling for a subfloor dip, but it is actually a failure of the installer to leave a proper expansion gap. You need a 1/4 inch to 1/2 inch gap around the entire perimeter. You cover this with baseboard or shoe molding. Do not nail the molding into the floor. Nail it into the wall. If you nail it into the floor, you have locked the floor in place. It will eventually pull the baseboard off the wall or break its own joints. I have seen beautiful bathrooms ruined because the installer wanted a tight fit against the vanity. They thought it looked cleaner. Within six months, the floor was peaked like a mountain range in the middle of the room. Wood is hygroscopic. It absorbs water from the air. In a place like Houston or New Orleans, that floor is going to expand significantly. In a dry climate like Phoenix, it will shrink and show gaps. You have to account for the regional climate. You have to acclimate the material to the room for 48 to 72 hours before you even open a box. If you skip acclimation, you are asking for a disaster.
The chemical reality of floor leveling
Self-leveling underlayment is a calcium aluminate cement that creates a flat surface for hard flooring. It requires a polymer primer to ensure a mechanical bond to the substrate. Improper water ratios will lead to chalking and structural failure of the leveling layer. Mixing leveler is a science. You cannot eyeball it. You need a graduated measuring bucket. If you add too much water, the polymers will float to the top and the sand will sink to the bottom. The result is a brittle surface that will turn to dust under your floor. If you add too little water, the product will not flow. It will leave humps and ridges that are harder to remove than the original dip. You also have to consider the moisture vapor transmission rate (MVTR) of the concrete. If the slab is pushing out too much moisture, it will pop the leveler right off the floor. I always perform a calcium chloride test or use an in-situ RH probe. If the moisture is too high, you need a moisture vapor barrier. This is a specialized epoxy coating that seals the concrete. It is expensive. It is time-consuming. But it is the only way to guarantee that your floor leveling doesn’t fail. People want the cheap way out. They want to pour the leveler and walk away. But the subfloor doesn’t care about your budget. It only cares about the laws of chemistry and physics.
| Subfloor Type | Max Deflection | Prep Requirement | Testing Method |
|---|---|---|---|
| Concrete Slab | 1/8 inch in 10 feet | Grinding or SLU | RH Probe (ASTM F2170) |
| Plywood (Wood Joists) | L/360 of Span | Sanding and Blocking | Moisture Meter (Pin-type) |
| Radiant Heated Floors | 1/16 inch in 6 feet | Thermal SLU | Thermal Imaging |
Why carpet installers get away with murder
A carpet install is the most forgiving floor in the world. You can have a 1/2 inch dip in the corner of a room and once the 8-pound pad and the plush nylon carpet go down, you will never know it is there. This has made many general contractors lazy. They think that every floor is like carpet. They get used to