The ‘Credit Card’ Trick for Checking Laminate Expansion Gaps Under the Baseboard
The structural reality of laminate expansion
Laminate flooring expands and contracts with changes in relative humidity and temperature because it is a wood-based product. This movement occurs across the entire surface area of the floor, requiring a perimeter gap of at least a quarter inch. Without this space, the floor hits the wall and buckles upward at the weakest joints.
Homeowners always ask why their waterproof vinyl or laminate is buckling. Usually, it is because they locked it under a heavy kitchen island or pinned it down with baseboards, killing the floor’s ability to breathe. I remember a job where a homeowner called me screaming because their floor was peaking like a mountain range in the center of the room. They had installed the baseboards so tight against the planks that the laminate was essentially clamped to the subfloor. When the humidity rose, the floor had nowhere to go but up. I spent three hours removing the trim just to give the planks the breathing room they should have had from day one. This is where the physics of flooring meets the reality of installation. Laminate is a floating floor, meaning it is not glued or nailed to the subfloor. It exists as a single, massive plate of material that grows and shrinks. If you interrupt that movement, you destroy the locking mechanisms. The core of these planks is typically high-density fiberboard, or HDF. HDF is made of wood fibers saturated with resin and compressed under extreme pressure. Despite this density, those fibers remain hygroscopic. They will absorb microscopic water molecules from the air, causing the cell walls to swell. This is not a defect, it is the nature of the material.
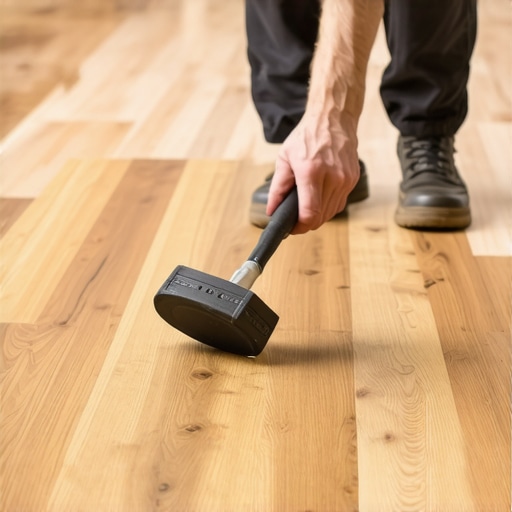
How to use the credit card test correctly
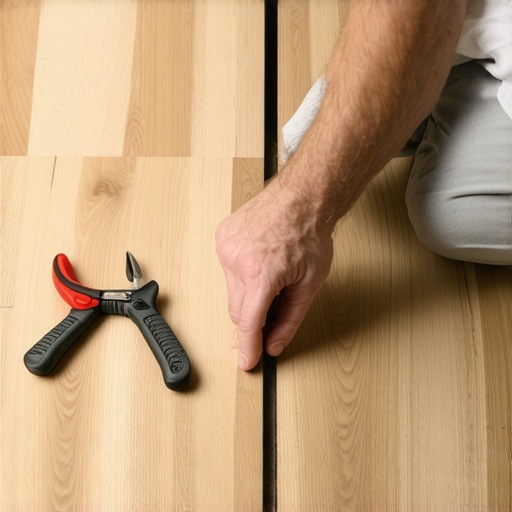
Use a credit card to check the clearance between the bottom of the baseboard and the top of the laminate plank. The card should slide freely beneath the molding without catching. This ensures the baseboard is not pinning the floor to the subfloor, which prevents necessary lateral movement.
The credit card trick is a favorite among old-school installers because a standard credit card is approximately 0.03 inches thick. This tiny gap is the difference between a floor that lasts twenty years and one that fails in two seasons. When you install your baseboards or shoe molding, you must never nail them through the laminate. You nail them into the wall studs. However, even if you nail into the wall, pressing the molding down too hard creates friction. This friction acts like a brake. When the floor tries to expand, the molding holds it back. By sliding a credit card under the molding as you set it, you create a microscopic buffer. This buffer allows the floor to slide underneath the trim as the seasons change. It is a simple mechanical solution to a complex thermodynamic problem. Most DIY installers think they want a tight, seamless look between the wood and the trim. That is a mistake that leads to snapped tongues and grooves. You want the appearance of a tight fit without the physical pressure. The credit card provides that exact tolerance. It is especially vital in long spans where the cumulative expansion can be half an inch or more across the room.
“A floor is only as good as the subfloor beneath it; deflection is the enemy of every joint.” – Master Flooring Axiom
The chemistry of subfloor prep and floor leveling
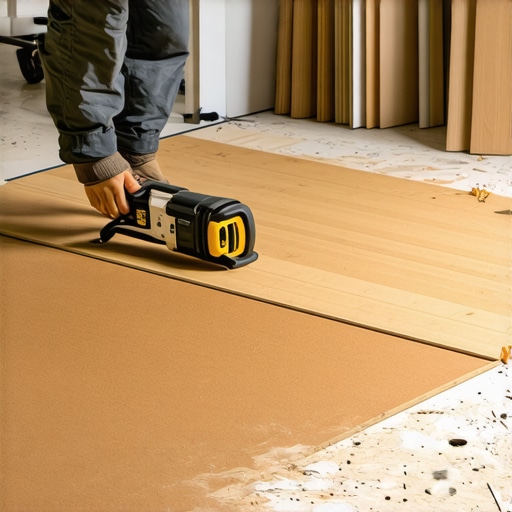
Floor leveling is the process of removing dips and humps in the subfloor to meet a tolerance of three-sixteenths of an inch over a ten-foot radius. This is achieved using self-leveling underlayment or grinding down high spots in concrete. Proper leveling prevents the laminate joints from flexing and breaking.
Most guys skip the leveling compound. They think the underlayment will hide the dip. It won’t. I spent three days grinding concrete on a job last month just so the floor wouldn’t click like a castanet. If the subfloor is not flat, every time you walk across the room, the laminate planks deflect into the hollow space. This vertical movement puts immense stress on the click-lock joints. Over time, the plastic or wood-fiber tongue will shear off. Once that bond is broken, the floor is ruined. You cannot glue it back together effectively. You have to understand the chemistry of the leveling compounds too. Using a high-quality, polymer-modified self-leveling underlayment is the only way to ensure a bond to the existing slab. You must also use a primer. Without a primer, the dry concrete slab will suck the moisture out of the leveling compound too fast, preventing the chemical hydration process and leaving you with a brittle, chalky mess that will crack under the weight of your furniture.
| Material Type | Expansion Gap Requirement | Acclimation Time | Janka Hardness Rating |
|---|---|---|---|
| Laminate HDF | 1/4 Inch to 3/8 Inch | 48 to 72 Hours | N/A (Wear Layer Varies) |
| Solid White Oak | 3/4 Inch | 7 to 14 Days | 1,360 lbf |
| Engineered Maple | 1/2 Inch | 48 Hours | 1,450 lbf |
| SPC Luxury Vinyl | 1/4 Inch | 24 Hours | N/A (Rigid Core) |
Integrating transitions for showers and carpet install zones
Transitions between laminate and wet areas like showers or soft surfaces like carpet require specific moisture protection and mechanical anchoring. For showers, a waterproof silicone sealant must be used in the expansion gap to prevent topical water from reaching the HDF core. Carpet transitions require a T-molding or reducer.
When you move from a laminate hallway into a bathroom with showers, the risk factor triples. Water is the natural enemy of the high-density fiberboard core. Even if the top wear layer is waterproof, the joints and the expansion gaps are vulnerable. In these areas, the credit card trick is still relevant for the trim, but you must also fill the gap with a 100 percent silicone caulk. This allows the floor to expand because silicone is flexible, but it keeps water from seeping under the baseboards and rotting the floor from the bottom up. For a carpet install, the transition usually involves a metal track and a transition strip. You must ensure the track is screwed into the subfloor and not the laminate. I have seen too many installers run the carpet tack strip right up against the laminate, leaving no room for the floor to move. This creates a hard pinch point. The same rules apply to doorways. You should always undercut your door jambs so the floor can slide underneath the wood. If you cut the laminate around the jamb, you are asking for a gap to show up or for the floor to bind against the casing.
“Moisture at the perimeter is the silent killer of all floating systems; sealing the gap is not optional in wet zones.” – TCNA Technical Bulletin
The essential installation checklist
- Calibrated moisture meter for checking concrete and wood subfloors.
- Self-leveling compound and primer for subfloor prep.
- Expansion spacers for maintaining a consistent perimeter gap.
- Tapping block and pull bar to avoid damaging the click-lock edges.
- 100 percent silicone sealant for transitions near showers and kitchens.
- High-quality underlayment with a built-in vapor barrier.
- A standard credit card for checking baseboard clearance.
The thermal expansion coefficient of laminate cores
The thermal expansion coefficient determines how much the material grows per degree of temperature change. For laminate, the humidity expansion usually outweighs the thermal expansion, but both must be accounted for in large open-plan spaces. Large rooms may require T-moldings in the middle of the floor to create extra expansion joints.
While most people want the thickest underlayment, too much cushion actually causes the locking mechanisms on laminate and LVP to snap under pressure. This is a contrarian point that many big-box retailers ignore. They sell you thick, squishy foam because it feels good underfoot. However, that vertical compression is the enemy of the mechanical joint. You want a high-density underlayment that provides sound dampening without allowing more than a millimeter or two of vertical deflection. This stability is what protects the tongue and groove system during the expansion cycles. Think of the floor as a living organism. In the summer, it breathes in humidity and grows. In the winter, the dry heat from your furnace sucks that moisture out and the floor shrinks. If you have not used the credit card trick to ensure your baseboards are not pinching the floor, you will see gaps opening up in the winter or peaking in the summer. It is a predictable cycle of physics. You have to respect the material or it will fail you. Always check the manufacturer’s instructions for the maximum run length. Most laminate floors cannot exceed 30 feet in any direction without an intermediate expansion break. If you ignore this, the cumulative expansion will exceed the capacity of your perimeter gaps, and the floor will eventually tear itself apart at the seams. Flooring is not just about aesthetics, it is about managing the forces of nature within the confines of your four walls.