The ‘Chalk Line’ Trick for Getting Your Carpet Pattern Straight
Why your subfloor is lying to you
Floor leveling and subfloor preparation are the foundations of every successful carpet install. To achieve perfect carpet pattern alignment, you must first address the flatness of the substrate using self-leveling underlayments and high-compression floor primers. A dip in the floor of more than one eighth of an inch over ten feet will cause pattern skewing that no amount of power stretching can fix.
I spent three days grinding concrete on a job last month just so the floor wouldn’t click like a castanet. The homeowner thought they could save a few bucks by skipping the floor leveling compound. They were wrong. When I arrived, the slab looked like the surface of the moon. If I had laid that patterned carpet over those craters, the geometric design would have looked like a funhouse mirror. You cannot hide a bad slab with a thick pad. The physics of tension won’t allow it. When you pull a carpet tight across a low spot, the pattern dips and stretches at an angle. I had to break out the heavy duty diamond grinders and vacuum systems to get that floor within TCNA and NWFA tolerances. My hands were vibrating for hours after I finished, but that is the price of a professional finish. Most guys will just throw down some cheap felt and hope for the best. That is how you end up with a floor that fails in six months. I do not do that kind of work. I smell like oak dust and concrete slurry because I do the jobs that require actual skill.
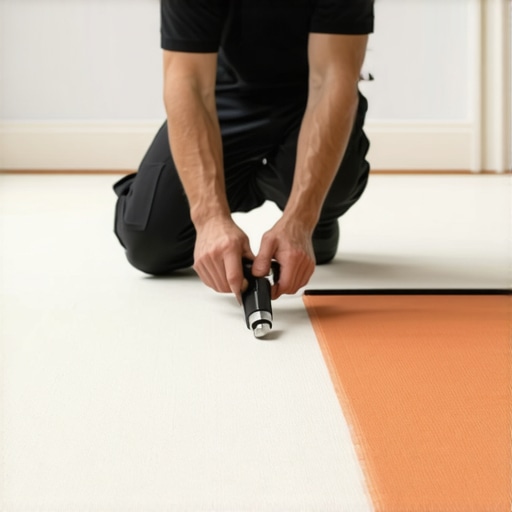
The physics of the geometric chalk line
Snapping a chalk line creates a Euclidean reference point across a concrete or plywood subfloor. This line acts as the primary axis for your carpet installation, ensuring that patterned carpets run parallel to the structural walls. Without a chalk line, installers rely on wall-tracing, which is inherently flawed due to non-perpendicular framing.
“A floor is only as good as the subfloor beneath it; deflection is the enemy of every joint.” – Master Flooring Axiom
When we talk about the molecular reality of a chalk line, we are looking at the deposition of calcium carbonate or calcium sulfate particles into the microscopic pores of the substrate. For carpet, you want a blue or white chalk. Never use red. Red chalk is permanent. It contains iron oxide that will bleed through your carpet backing and stain the fibers if any moisture ever hits it. You pull the string taut, creating a high amount of potential energy. When released, that energy converts to kinetic force, slamming the string against the floor and depositing a crisp, straight line. This line is your truth. It doesn’t matter if the wall is bowed or if the room is out of square. The line stays straight. I use this line to measure my pattern repeat. If the pattern is a two inch square, I check my distance from the line every three feet. If I am off by a sixteenth of an inch, I adjust the tension on my power stretcher. It is a game of millimeters. Most people think carpet is soft and forgiving. It isn’t. It is a rigid grid of woven polypropylene and latex. It has a memory. If you force it into a curve, it will spend the next ten years trying to pull itself back, which leads to wrinkles and premature wear.
The hidden danger of moisture near showers
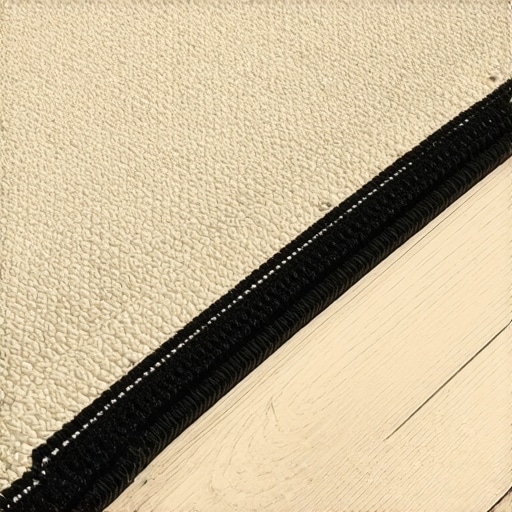
Bathroom flooring transitions and showers represent the highest risk zones for carpet and laminate failure. Moisture from steam and splashes can penetrate the carpet tack strip or the laminate core, leading to mold growth and structural delamination. Proper moisture barriers and silicone-based sealants are mandatory at every wet-zone transition.
I see it all the time. Someone wants carpet right up to the edge of the master bathroom. They think it feels nice on their feet when they step out of the shower. What they don’t see is the wood tack strip rotting underneath. It becomes a breeding ground for bacteria. If you are doing a carpet install near showers, you need to use a synthetic tack strip and a moisture-proof pad. Even better, you should be installing a hard surface like tile or high-end laminate with a waterproof core. But even laminate has its limits. If the homeowner thinks waterproof laminate means they can leave a puddle on the floor for three hours, they are in for a surprise. The chemistry of the clicking joint is the weak point. Most laminate uses a high-density fiberboard core. Even if the top is resin-infused and tough as nails, the tongue and groove are vulnerable. Once water gets in there, the core swells and the edges peak. You get that telltale bump at every seam. I tell my clients that if they want a floor that can survive a flood, they need to buy a boat. For everything else, we use 100 percent silicone caulk at the perimeter and under the transitions.
| Material Type | Expansion Coefficient | Moisture Tolerance | Installation Method |
|---|---|---|---|
| Patterned Carpet | Low | Moderate | Power Stretch |
| Waterproof Laminate | Medium | High | Click Lock |
| Solid Hardwood | High | Low | Nail Down |
| Engineered Wood | Medium | Moderate | Glue or Float |
The master checklist for pattern alignment
- Verify the subfloor levelness using a ten foot straight edge to ensure no gaps exceed one eighth of an inch.
- Apply a high-quality floor leveling compound to any low spots and grind down any high ridges in the concrete.
- Acclimate the carpet or laminate to the room temperature and humidity for at least forty eight hours prior to installation.
- Establish a primary control line using a blue chalk line snapped from the center of the longest unobstructed wall.
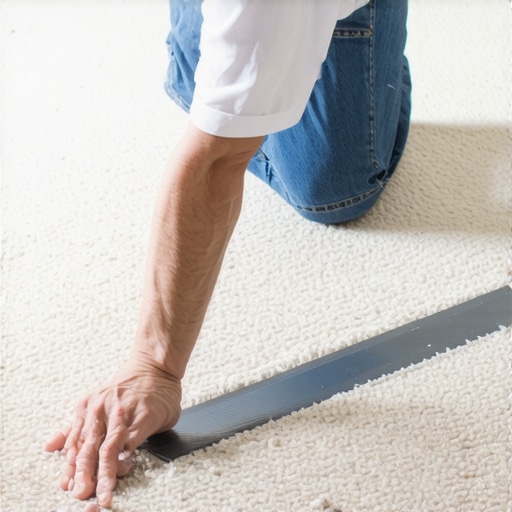
- Use a power stretcher rather than a knee kicker for all patterned carpet to ensure uniform tension across the weave.
- Measure the pattern repeat at the beginning, middle, and end of the roll to identify any manufacturing bow or skew.
The chemical bond of floor leveling compounds
Floor leveling compounds rely on a chemical reaction between portland cement and polymer additives to create a high-strength substrate. These materials provide a compressive strength of over 4,000 PSI, which is necessary to support the point loads of heavy furniture on carpet or laminate. Without proper priming, the substrate will suck the moisture out of the leveler, causing it to crack and delaminate.
“Moisture vapor emission rate must not exceed three pounds per one thousand square feet over twenty four hours.” – NWFA Technical Manual
When you pour a bag of leveler, you are initiating a hydration process. The polymers in the mix are there to give it flexibility and better adhesion. But if you don’t prep the floor, you’re wasting your time. I’ve seen guys pour leveler over dusty concrete. It just peels up like an orange skin. You have to get down on your knees and scrub that floor. You need to open up the pores of the concrete so the primer can bite. I use a soft-bristle brush to work the primer into the surface. It should look like a wet sidewalk. Once that gets tacky, then you pour. And don’t overwater it. Adding an extra quart of water might make it flow easier, but it ruins the chemical structure. It becomes brittle. You end up with a chalky mess that won’t hold a tack strip. I treat the floor like a piece of precision machinery. Every step has a reason. Every chemical has a job. When I’m done, the floor is so flat you could play billiards on it. That is the only way to ensure the carpet pattern stays straight for the life of the product. If you skip these steps, you are just a handyman with a hammer. I am an architect of the walking surface.