The ‘Bucket Weight’ Trick for Keeping Large Format Tiles Flat
Most guys skip the leveling compound. They think the underlayment will hide the dip. It won’t. I spent three days grinding concrete on a job last month just so the floor wouldn’t click like a castanet. The client wanted those massive 24 by 48 inch porcelain slabs. You try putting those on a floor that has a quarter inch dip over ten feet. You will have lippage that could trip a horse. It is a structural failure waiting to happen. People look at a finished floor and see a color or a texture. I see a battle against gravity and moisture. I see the chemical bond of the mortar and the deflection of the joists. If you do not respect the physics of the substrate, the floor will eventually punish you. This is the reality of the trade. It is messy. It is loud. It is unforgiving.
The ghost in the expansion gap
Floor leveling is the process of creating a perfectly flat plane across a substrate to prevent tile lippage and structural cracking in large format installations. You must understand that flat is not the same as level. A floor can be slanted like a ramp but still be flat enough for tile. However, if that surface has waves, your tiles will act like seesaws. When you step on one end, the other end lifts. This breaks the bond of the thin-set. It creates a hollow sound. Eventually, the tile snaps. This is why floor leveling is the most ignored step by amateurs and the most obsessed over by pros. You cannot fix a bad subfloor with more glue. You fix it with a grinder and self-leveling underlayment.
The physics of lippage in large format tiles
Large format tiles are defined as any tile with at least one side longer than 15 inches. These things are heavy. They are also surprisingly brittle when they are not fully supported. When you lay a 12 by 24 or a 24 by 48 inch tile, the thin-set mortar underneath acts as a hydraulic cushion. As the water evaporates from the mortar, the material shrinks. This is a chemical certainty. If the mortar thickness is inconsistent because the floor is not flat, the shrinkage will be inconsistent. One corner of the tile stays high while the other sinks. This creates a vertical offset between adjacent tiles. We call this lippage. It is the enemy. It makes showers dangerous and living rooms look like a DIY disaster. To combat this, we use the bucket weight trick during the first four hours of the cure cycle.
“A floor is only as good as the subfloor beneath it; deflection is the enemy of every joint.” – Master Flooring Axiom
The bucket weight trick and why it works
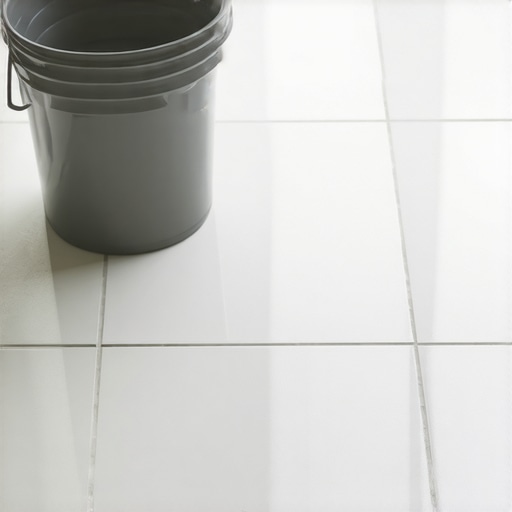
The bucket weight trick involves placing weighted Five-Gallon buckets or sandbags over tile leveling clips at the intersection of four tiles to ensure the polymer-modified mortar cures at a uniform compression rate. Why do we do this. We do it because even the best leveling clips can stretch. Plastic has memory. If a tile is particularly heavy or the mortar is mixed slightly too thin, the tile can sag in the middle. By placing a bucket filled with about two gallons of water or thin-set over the intersection, you are forcing the tiles into a singular plane. You are overriding the internal tension of the mortar. You are making the floor obey you. It is about controlling the hydration process. As the C-S-H (Calcium Silicate Hydrate) crystals form in the cement, they lock the tile into the position it was held in during that critical initial set. If you hold it flat with weight, it stays flat forever.
Why your subfloor is lying to you
Wood subfloors are alive. They breathe. They expand when the humidity hits 60 percent and they shrink when the furnace kicks on in the winter. If you are doing a carpet install, you might not notice a slight dip in the plywood. The padding hides the sins of the builder. But if you are moving from a carpet install to a hard surface, you are in for a shock. The laminate or tile you want to put down has no flexibility. I have seen laminate floors bounce like a trampoline because the installer didn’t check the joist spacing. You need to know the L/360 rating of your floor. This is the industry standard for deflection. It means the floor should not bend more than the length of the span divided by 360. For natural stone, it is L/720. That is twice as stiff. If your floor is bouncy, your tile will pop off like a scab.
| Material Type | Janka Hardness | Expansion Gap Requirement | Moisture Tolerance |
|---|---|---|---|
| Solid Red Oak | 1290 | 3/4 Inch | 6 to 9 Percent |
| Engineered Maple | 1450 | 1/2 Inch | Higher Stability |
| Laminate Core | Varies | 3/8 Inch | Low Humidity Only |
| Porcelain Tile | N/A | 1/8 Inch (Grout) | 100 Percent |
The math of thin set and chemical bonds
Mortar is not just wet sand. It is a complex chemical soup. High-quality mortars contain ethylene-vinyl acetate or other polymers that allow the cement to flex slightly without losing its grip. This is vital for large tiles. The larger the tile, the more stress is placed on the bond. Think about it. A 48 inch tile covers a lot of ground. If the house shifts a millimeter, that tile has to absorb that movement over its entire surface. Cheap, unmodified thin-set will just shear off. You need the stuff that smells like a chemistry lab. You also need to back-butter the tile. This means applying a thin layer of mortar to the back of the tile with the flat side of your trowel before you set it. This ensures 100 percent coverage. If you have air pockets, you have weak spots. If you drop a heavy pot on a tile with an air pocket, it will shatter. If it is fully bonded, the energy transfers into the slab. The tile survives.
The checklist for a perfect surface
- Check the substrate for flatness using a 10-foot straight edge.
- Grind down any high spots in the concrete until they are flush.
- Apply a primer specifically designed for self-leveling compounds.
- Pour the leveling compound and use a spiked roller to remove air bubbles.
- Test the moisture content of the slab using a calcium chloride test.
- Ensure the room temperature is between 65 and 80 degrees Fahrenheit for curing.
- Back-butter every tile regardless of size to ensure 100 percent bond.
From showers to laminate transitions
Every floor has a transition point. Maybe it is where the tile of the showers meets the laminate of the bedroom. These are the places where most installers fail. They use those cheap, plastic T-moldings. They look terrible. A real pro knows how to scribe a transition. If the heights don’t match, you don’t just put a hump in the floor. You ramp the subfloor. You use a floor leveling compound to create a gentle slope over four or five feet. This makes the transition invisible to the foot. It also prevents the laminate locking mechanism from snapping. Laminate is a floating floor. It needs to move. If you pin it down with a heavy transition strip or a kitchen island, it will buckle in the middle of the room. It is like a rug that is too big for the space. It has nowhere to go but up.
“Large format tile requires a substrate flatness of 1/8 inch in 10 feet; anything less is an invitation to failure.” – TCNA Handbook Standards
The chemistry of moisture and concrete
Concrete looks solid but it is a sponge. It is full of microscopic pores. If you live in a place like New Orleans or Houston, the humidity is your primary enemy. The moisture moves through the slab via capillary action. If you trap that moisture under a non-breathable surface like laminate or LVP without a proper 6-mil poly vapor barrier, it will grow mold. It will rot your baseboards. The glue on your tiles will emulsify and turn back into mush. I always tell people to wait. If you just poured a new slab, you cannot floor it next week. You need to wait at least 28 days for the concrete to hydrate. And even then, you test it. If the moisture vapor emission rate is too high, you need a moisture mitigation epoxy. It is expensive. It is also cheaper than replacing the entire floor in two years when it starts to smell like a swamp.
The final word on flatness
Installing a floor is a sequence of precision events. It starts with the heavy work of floor leveling and ends with the delicate work of grouting. The bucket weight trick is just one tool in the kit. It represents the extra mile. It is the difference between a floor that lasts ten years and a floor that lasts fifty. Don’t listen to the salesman who tells you that the underlayment will fix a bad subfloor. He is trying to sell you a product. I am trying to save your house. Clean your substrate. Prime it. Level it. Weight your tiles. Respect the chemistry. If you do those things, your floor will be as solid as the foundation beneath it. Anything less is just a temporary decoration that you will eventually have to rip out with a crowbar. That is the cold, hard truth of the trade. Stick to the standards and the standards will protect you.