The ‘Blue Chalk’ Method for Checking Floor Leveler Flatness
Why flat floors are non negotiable for laminate
Floor leveling and subfloor preparation are the foundations of any successful laminate or carpet install. If the substrate is not within a 1/8 inch tolerance over a 10 foot radius, your locking mechanisms will snap, your joints will separate, and your showers will leak through the pan. Most guys skip the leveling compound. They think the underlayment will hide the dip. It won’t. I spent three days grinding concrete on a job last month just so the floor wouldn’t click like a castanet. The homeowner saw a flat surface. I saw a topographical map of the Swiss Alps. If you ignore the peaks and valleys, you are building on sand. I have seen fifteen thousand dollar wide-plank installs fail because the subfloor had a crown that nobody bothered to shave down. This is why the blue chalk method is the only way to verify a surface before the expensive materials come off the truck. It removes the guesswork and provides a visual map of where the work needs to happen.
The physics of the straightedge and the high spot
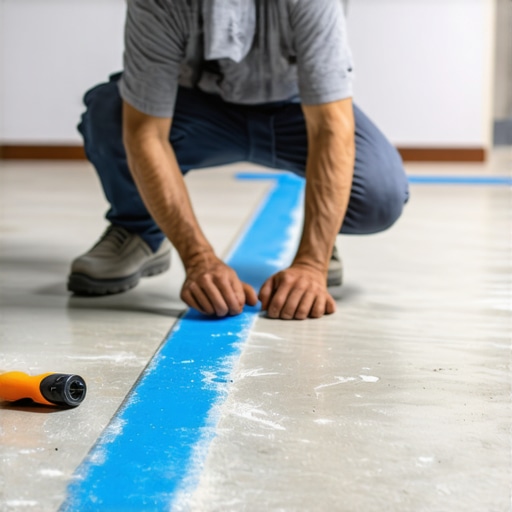
A straightedge does not lie, but it can be hard to see where the light passes through. When you are on your knees in a dimly lit basement, a 3/16 inch dip can look like a flat plane. This is where the chalk comes in. By coating the contact edge of an 8 foot or 10 foot professional grade magnesium straightedge with blue carpenter’s chalk, you create a transfer medium. As you slide that tool across the concrete or plywood, the chalk only sticks to the high points. It is essentially a giant version of a machinist’s bluing agent. The chalk particles are finely ground minerals, usually calcium carbonate mixed with pigment, and they have a natural affinity for the abrasive surface of a cured floor leveler or raw concrete slab. When the magnesium bar hits a peak, the friction transfers the pigment. When it passes over a valley, the bar stays suspended in the air, leaving the dip clean and unmarked. It gives you a literal blueprint of where to grind and where to pour.
“A floor is only as good as the subfloor beneath it; deflection is the enemy of every joint.” – Master Flooring Axiom
The blue chalk strategy for professional installers
Blue chalk for leveling involves applying a heavy layer of marking pigment to a straightedge to identify high spots on a concrete or plywood subfloor. This technique ensures that laminate flooring or tile will not flex or crack over time due to substrate irregularities. You start by cleaning the floor until it is hospital-grade clean. Any dust will act as a lubricant and prevent the chalk from sticking. Once the floor is vacuumed, you take your straightedge and run it in a star pattern across the room. You aren’t just looking for one dip. You are looking for the relationship between the highest point in the room and the lowest. Often, a room that looks level is actually sloping toward a floor drain or a settling foundation wall. The chalk marks out the ridges like a highlighter on a document. It is the difference between a floor that lasts thirty years and one that fails in three months.
The chemistry of the bond and moisture barriers
Before you even think about the chalk, you have to understand the molecular reality of the slab. Concrete is a sponge. It breathes moisture vapor continuously. If you use a calcium aluminate-based self-leveling underlayment, you are dealing with a chemical reaction that requires a specific pH balance in the substrate. If the slab is too alkaline or too wet, the leveler will delaminate. I always run a calcium chloride test or use an in-situ probe to check the Relative Humidity (RH) levels. If the RH is over 75 percent, you are looking at a potential failure. The leveler needs a primer that can penetrate the pores of the concrete to create a mechanical bond. If the primer sits on top like a skin, it will peel. Once that leveler is poured and cured, that is when the blue chalk comes out to verify the work. Even the best self-levelers can have surface tension issues that create small ridges or “birdbaths” near the edges of the pour.
The 1/8 inch rule and NWFA standards
National Wood Flooring Association standards dictate that a subfloor must be flat within 1/8 inch over a 10 foot span to prevent flooring failure and squeaks. This technical requirement is the benchmark for high-end laminate and hardwood installations. If you are outside this tolerance, the tongue and groove joints of your floor will be under constant vertical stress. Every time someone walks across the room, the joint flexes. Over a few thousand cycles, the wood fibers or plastic locking tabs fatigue and snap. You will hear a clicking sound. That is the sound of your investment dying. The blue chalk method is the only way to be 100 percent sure you have met the NWFA or TCNA requirements for flatness. It is a binary test. Either the chalk is there, or it isn’t.
Why carpet install hides sins that showers expose
Carpet is the great liar of the flooring world. You can have a half-inch dip in the subfloor and the pad will soak it up, leaving the homeowner none the wiser. But try that in a bathroom where you are doing a shower renovation. If the floor under the tile isn’t flat, the water will pool instead of heading for the drain. Worse, the large format tiles used in modern bathrooms will “lip,” meaning one corner sticks up higher than the next. It is a tripping hazard and it looks amateur. In a shower area, the floor leveler needs to be checked with the blue chalk to ensure the slope is consistent. You cannot fix a bad subfloor with thin-set. Thin-set is an adhesive, not a structural filler. If you try to build up a half-inch of mud under a tile, it will shrink as it cures, pulling the tile down with it and creating a hollow spot. Hollow spots lead to cracked grout and, eventually, leaked membranes.
“Substrate preparation is 90 percent of the job; the remaining 10 percent is just showing off.” – Tile Council of North America Guide
Equipment list for the blue chalk ritual
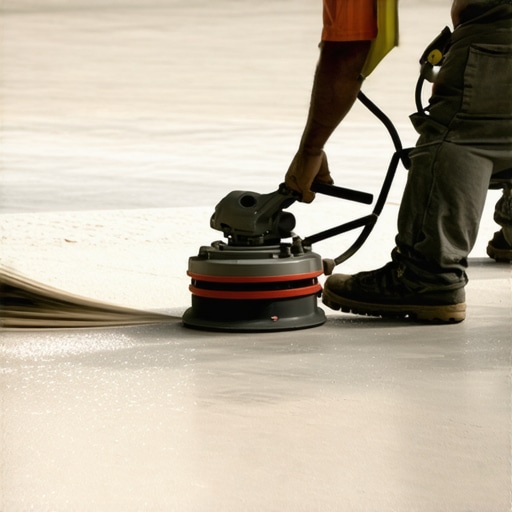
Professional flooring tools required for this method include a 10 foot straightedge, marking chalk, and a concrete grinder. Using these specialized instruments allows the installer to achieve a perfectly flat subfloor for any material. Do not use a cheap level from a big box store. Those are often bowed right off the shelf. You need a magnesium or heavy-duty aluminum screed bar. You also need a vacuum with a HEPA filter because once the blue chalk shows you the high spots, you are going to be grinding. Grinding concrete creates a cloud of crystalline silica that will ruin your lungs and your client’s HVAC system. Always use a shroud and a high-suction vacuum.
| Flooring Type | Tolerance (per 10ft) | Consequence of Failure |
|---|---|---|
| Laminate / LVP | 1/8 inch | Joint failure and clicking |
| Large Format Tile | 1/8 inch | Lippage and cracking |
| Solid Hardwood | 3/16 inch | Squeaking and cupping |
| Carpet | 1/2 inch | Visible pooling and wear |
The ghost in the expansion gap
Every floor needs to breathe. I see guys run their leveler right up to the drywall. That is a mistake. Concrete and wood expand and contract with the seasons. If you don’t leave a 1/4 inch gap at the perimeter, the floor will eventually crown in the middle of the room. It has nowhere else to go. The blue chalk method should extend to the very edges of the room to ensure there is no buildup of material at the walls. Often, the leveler will “creep” up the baseplates due to surface tension. This creates a ramp. When you install your baseboards, they will look crooked, and your flooring will have a hollow sound at the edges. Use a foam expansion strip before you pour your leveler. It is a small step that prevents a massive headache later. The chalk will show if you have any high spots near the walls that need to be addressed with a hand stone.
The blueprint for a perfect pour
Self-leveling underlayment requires precise water-to-powder ratios and proper priming to create a flat substrate. Failure to follow the manufacturer’s technical data sheet results in soft spots and bubbles. I always use a spiked roller. After the leveler is poured, the spiked roller breaks the surface tension and allows the trapped air to escape. If you don’t do this, you get tiny pinholes. Those pinholes are weak points. When the floor is cured, usually after 24 hours, you run the blue chalk straightedge over it. If you see circles of blue with no chalk in the middle, you have a dip. If you see a long line of blue, you have a ridge. It is a visual report card of your work.
- Sweep and vacuum the subfloor twice.
- Identify and seal all holes to prevent leveler leakage.
- Apply the recommended primer with a nap roller.
- Mix leveler with a high-torque drill and paddle.
- Pour in a continuous wet-line to avoid cold joints.
- Use a spiked roller to release air.
- Check flatness with blue chalk after 24 hours.
Why your subfloor is lying to you
Plywood subfloors are notorious for being uneven. The joists underneath them can twist or crown as the lumber dries out over the years. If you are installing over wood, you have to check the deflection. If the floor bounces, the leveler will crack. You might need to add a second layer of plywood or use a fiber-reinforced leveler. The blue chalk will show you if the plywood seams are peaking. If they are, you take a belt sander to them. You don’t just pour leveler over a moving target. You fix the structure first. The chalk is the final judge. It tells you when the surface is ready for the finish material. I have seen guys try to use cardboard or shingles to shim up low spots under laminate. That is hack work. Shingles compress. Cardboard rots. Leveling compound and a straightedge are the only tools for a professional. The floor is a performance surface. It has to handle the weight of refrigerators, pianos, and heavy traffic. If the foundation is weak, the whole system collapses. Don’t be the guy who gets a callback because the floor feels like a trampoline. Use the chalk. Gritty, dusty work now means a quiet, solid floor for the next few decades. The blue marks on the floor are the signs of a craftsman who cares about the invisible details. In the end, the floor is a foundation, not a finish.”