Why Your Floor Leveler Feels Sandy and Weak
I have spent over twenty five years on my knees with a moisture meter and a level. My hands smell like a permanent mix of WD-40 and oak dust. I have seen every shortcut taken in this industry. Most guys skip the leveling compound. They think the underlayment will hide the dip. It won’t. I spent three days grinding concrete on a job last month just so the floor wouldn’t click like a castanet. That job was supposed to be a simple laminate install, but the slab was a mountain range. When you walk onto a job site and see a leveler that you can scratch with your fingernail, you know someone messed up the chemistry. A floor is not just a decoration. It is a performance surface. It is a structural engineering challenge that starts at the molecular level. If your floor leveling project feels sandy, weak, or brittle, you have a failure in the hydration process or a total lack of mechanical bond.
The science of the sandy surface
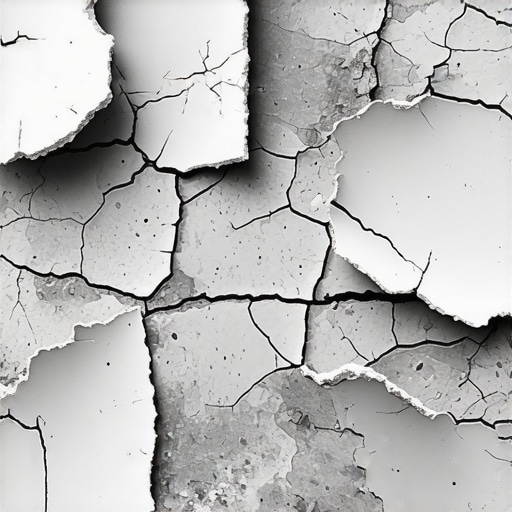
A sandy floor leveler usually indicates over-watering or a lack of primer. When you add too much water, the cement particles stay in suspension too long, allowing the fines to rise to the surface while the heavy aggregate settles at the bottom, creating a weak layer of laitance. This layer, known as laitance, is a thin, milky accumulation of gelatinous cement and sand that rises to the top during the curing process. It has zero structural strength. If you try a carpet install or a laminate floor over this, the friction of daily walking will turn that top layer back into dust. The floor will crunch. The air will fill with silica. You cannot simply sweep it away. You have to understand that floor leveling is a chemical reaction, not a drying process. When you mix the powder with water, you are initiating a hydration cycle where ettringite crystals grow and interlock. If you drown those crystals in excess water, they cannot find each other to bond. You end up with a pile of wet sand that happens to be grey. I have seen installers dump a five gallon bucket of water into a mix that only required six quarts because they wanted it to flow faster. That is laziness, and it ruins the integrity of the slab.
“A floor is only as good as the subfloor beneath it; deflection is the enemy of every joint.” – Master Flooring Axiom
The myth of the self leveling label
Self leveling compounds do not actually level themselves without human intervention and proper tool usage. The gravity based flow of the material is limited by its viscosity, which means you must use a gauge rake and a spike roller to achieve a truly flat surface. Many homeowners believe they can just pour a bag of compound and walk away. That is a lie. The surface tension of the liquid prevents it from reaching every corner perfectly. You need a gauge rake set to the specific depth of your lowest dip. More importantly, you need a spike roller to break the surface tension and release trapped air bubbles. Those bubbles are tiny voids. Each void is a point of failure. If you are preparing for laminate, those voids will cause the clicking sound that drives people crazy. I have seen slabs in showers where the leveler was poured without a slope, leading to standing water under the tile. This is why the TCNA standards are so strict about subfloor preparation. You are building a foundation, not just a cosmetic cover.
Why your primer choice matters more than the leveler
Primer acts as the bridge between the old concrete and the new leveler, preventing the substrate from sucking the water out of the mix too quickly. If the subfloor is too porous, it steals the hydration water, leaving the leveler brittle and prone to delamination. Think of a concrete slab as a giant sponge. If you pour wet leveler onto a dry, unprimed sponge, the leveler loses its moisture before the chemical reaction finishes. This leads to “flash drying.” The result is a surface that looks flat but has the strength of a graham cracker. You need an acrylic or epoxy primer to seal those pores. In my twenty five years, I have never seen a successful pour done without a primer that has been given the proper tack time. Some guys try to use watered down wood glue. Do not do that. It is a recipe for disaster. Use the primer recommended by the leveler manufacturer. They are engineered to work together at a molecular level. The primer creates a mechanical tooth that the cement crystals can grab onto as they grow.
The physics of water to powder ratios
The water to powder ratio is the most vital measurement in the entire flooring process, as even a few extra ounces can decrease the compressive strength of the leveler by half. High quality levelers are rated at 4,000 to 6,000 PSI. That is stronger than the concrete of your driveway. But that rating only holds if you follow the recipe. I use a graduated cylinder on my jobs. I do not guess. If the bag says 5.75 quarts, I give it 5.75 quarts. Too much water causes segregation. Segregation is where the sand and cement separate like oil and vinegar. This is where your sandy surface comes from. The sand is heavy. It falls. The cement fines and water stay on top. This also causes shrinkage cracks. As the excess water evaporates, it leaves behind empty space. The leveler pulls away from the walls and the floor. It curls. In a shower environment, this shrinkage can break the waterproof membrane. It is a chain reaction of failure.
| Product Type | Typical PSI | Acclimation Time | Best Use Case |
|---|---|---|---|
| Gypsum Based | 2500 | 24 Hours | Carpet Install |
| Cementitious | 5000 | 12 Hours | Laminate and Tile |
| Rapid Set | 6000 | 3 Hours | Commercial Repair |
Preparing for a carpet install over rough patches
Carpet may seem forgiving, but a sandy or uneven leveler will eventually telegraph through the padding and cause the fibers to wear out prematurely in high spots. People think carpet hides sins. It doesn’t. It just delays the reckoning. When you walk on carpet, the pad compresses. If the leveler underneath is sandy, it will break apart under that pressure. That sand then acts like sandpaper on the underside of your carpet backing. It will literally eat the floor from the bottom up. I have pulled up ten year old carpet and found piles of grey dust where the leveler failed. This is why I treat a carpet prep job with the same respect as a hardwood job. You need a solid, dust free base. If you are working in a region with high humidity, like Houston or Miami, the moisture can reactivate the salts in a poorly mixed leveler, leading to efflorescence. That white crusty powder is the death of any adhesive. You must ensure the slab is dry and the leveler is fully cured before the tack strips go down.
How moisture ruins leveler in showers
In wet areas like showers, the leveler must be cement based and specifically rated for submerged or high moisture conditions to prevent the growth of mold and the breakdown of the binder. Gypsum based levelers will turn into mush the moment they get wet. If you used the wrong product in a bathroom, you are looking at a total tear out. Even cement based levelers can fail if the moisture vapor emission rate from the slab is too high. You need to test your slab. I use Calcium Chloride tests or RH probes. If that slab is breathing out too much water vapor, it will push the leveler right off the floor. I once saw a $20,000 bathroom floor lift up in one solid piece because the installer didn’t check the moisture levels in the crawlspace. The leveler was sandy because the moisture from below was constantly interfering with the cure. You cannot fight physics. You have to work with it.
“The installer shall ensure the substrate is free of dust, oil, and laitance prior to any application of leveling compounds.” – TCNA Handbook excerpt
The 1/8 inch that ruins everything
Most modern floor locking systems for laminate and LVP require a subfloor flatness of 1/8 inch over a 10 foot radius to prevent the joints from snapping. This is a very tight tolerance. Most house slabs are out by an inch or more. When you pour leveler to fix this, and it ends up sandy and weak, you have gained flatness but lost stability. When a heavy person walks across a laminate floor, the boards flex. If the leveler underneath is soft, it will crush. Now you have a void where there used to be support. The tongue and groove joints of your expensive laminate will now have to carry the entire weight of the person. They are not designed for that. They will snap. The floor will separate. You will see gaps. All because you didn’t mix your leveler correctly. While most people want the thickest underlayment, too much cushion actually causes the locking mechanisms on LVP to snap under pressure. You need a flat, hard, and stable surface. Not a soft, sandy one.
The Leveler Checklist
- Vacuum the subfloor three times to remove every speck of dust.
- Test the concrete porosity with a drop of water.
- Apply the manufacturer primer with a soft bristle broom.
- Use a mixing paddle specifically designed for levelers to avoid folding in air.
- Measure water with a graduated cylinder, not a bucket line.
- Use a spike roller to eliminate laitance and bubbles.
- Verify the cure with a scratch test before installing flooring.
Why your subfloor is lying to you
A subfloor might look solid and clean, but invisible contaminants like old adhesive residue or wax will prevent the leveler from ever forming a permanent bond. You have to be a detective. I smell the floor. I look for the ghost of old linoleum patterns. If there is old cutback adhesive, the leveler won’t stick. If there is oil from a leaky appliance, the leveler won’t stick. You have to mechanically scrape or grind the floor down to virgin concrete. This is the hard work that most people skip. They want the easy pour. But the easy pour is the one that fails. I treat every floor as if my reputation is on the line, because it is. If your leveler is sandy, you might be able to save it with a surface hardener or a deep penetrating primer, but usually, the best fix is to grind it off and start over. It is a painful lesson, but it is the only way to ensure the floor doesn’t fail. Do it right the first time, or don’t do it at all. The physics of the floor do not care about your schedule or your budget. They only care about the bond.