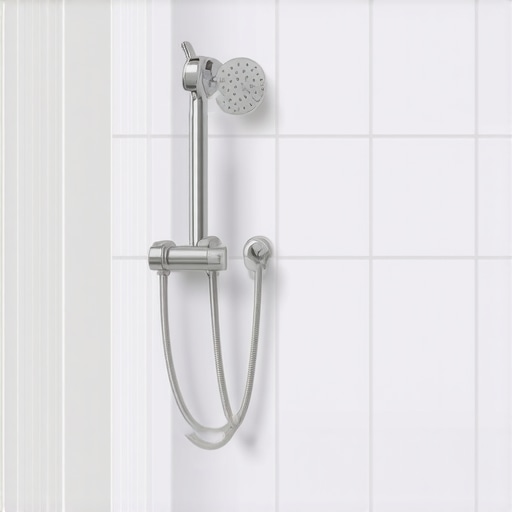
Stop 2026 Shower Grout Discoloration with This One Sealing Rule
I spent three days grinding concrete on a job last month just so the floor wouldn’t click like a castanet. Most guys skip the leveling compound. They think the underlayment will hide the dip. It won’t. I walked into a bathroom last week where the homeowner was crying over dark orange stains in her brand new marble shower. She spent twelve thousand dollars on stone and zero dollars on understanding the chemistry of her grout. My hands still smell like the citrus solvent I used to strip the failed topical sealer some amateur wiped on there. Flooring is not a decoration. It is a structural engineering project that happens to be pretty. If you do not respect the physics of moisture and the molecular porosity of cement, your shower will look like a subway tunnel in eighteen months.
The porous chemistry of cementitious grout
Grout discoloration occurs because standard cementitious grout is a series of microscopic canyons that suck in minerals, body oils, and soap scum through capillary action. To stop 2026 grout stains, you must apply a high-solids penetrating sealer to the point of total saturation before the first drop of water hits the tile. This is the fundamental law of bathroom longevity. When you mix grout, you are hydrating Portland cement and sand. As the water evaporates, it leaves behind a network of pinholes. If these holes are not filled with a solid resin or silane-siloxane polymer, they will fill with dirty shower water. Once that pigment is inside the grout structure, you are not just cleaning a surface. You are trying to extract a stain from inside a rock. It is a losing battle every single time. I tell my clients that grout is basically a hard sponge. If you do not fill the sponge with sealer, it will fill itself with your bath water.
The one sealing rule that prevents permanent staining
The rule of saturation to refusal dictates that you must apply sealer until the grout can no longer physically absorb any more liquid, ensuring every internal void is chemically blocked. Most people wipe on a thin coat and call it a day. That is a mistake that leads to patchy colors and mold growth. You need to use a foam brush and keep the grout wet for at least ten to fifteen minutes. If the sealer disappears, the grout is still hungry. Feed it until the liquid sits on top. Then, and only then, you buff off the excess. This creates a hydrophobic barrier deep within the joint. We are talking about molecular protection. This rule applies whether you are working with a basic ceramic tile or a complex mosaic. If the sealer does not reach the bottom of the joint, moisture will migrate sideways from the subfloor or the wall cavity and pull minerals to the surface, causing efflorescence.
“A floor is only as good as the subfloor beneath it; deflection is the enemy of every joint.” – Master Flooring Axiom
Why floor leveling determines shower success
Proper floor leveling is the primary defense against standing water and grout erosion in the shower pan because it ensures the slope to the drain is mathematically perfect. If your subfloor has a dip, your thin set mortar will be thicker in some spots and thinner in others. As that mortar cures, it shrinks. This creates tension that can crack your grout lines. Once a grout line has a hairline fracture, the seal is broken. Water will get under the tile. I have seen laminate floors in adjacent hallways buckle because water traveled through the grout cracks, under the bathroom threshold, and into the wood fibers of the next room. You cannot fix a bad subfloor with more grout. You fix it with a level and a bag of high-flow self-leveling underlayment. If your floor is not flat within one eighth of an inch over ten feet, you are building on a foundation of sand.
The structural reality of carpet install transitions
A professional carpet install near a wet area requires a mechanical transition that prevents moisture wicking from the tile grout into the carpet pad and secondary backing. When we transition from a tiled bathroom to a carpeted bedroom, the tack strip must be set exactly at the right distance to allow for a clean tuck without touching the grout line. If the carpet fibers touch wet grout, they act as a wick. They will pull moisture and cleaning chemicals into the padding. This creates a dark line of filtration soiling that looks like grease. I always use a moisture-rated transition strip. It is the same logic we use when installing laminate. You need a gap. You need to respect the fact that different materials expand and contract at different rates. If you lock them together, something is going to snap.
The technical breakdown of sealer types
| Sealer Type | Molecular Action | Expected Lifespan | Best Use Case |
|---|---|---|---|
| Topical Acrylic | Forms a film on top | 1 to 2 years | Low traffic decorative walls |
| Penetrating Solvent | Deep pore saturation | 5 to 10 years | Natural stone and high moisture |
| Epoxy Grout | Non-porous solid | 20 plus years | Steam showers and commercial |
| Water Based Silane | Surface tension shift | 3 to 5 years | Standard ceramic and porcelain |
The checklist for a waterproof grout finish
- Verify the grout has cured for at least 72 hours before sealing.
- Clean the joints with a vacuum to remove all construction dust.
- Apply the first coat of sealer using a narrow applicator tool.
- Wait ten minutes and observe absorption rates.
- Apply a second coat to any areas that look dry.
- Wipe the tile faces clean within twenty minutes to prevent haze.
- Perform a water bead test after 24 hours of drying.
The ghost in the expansion gap
Expansion gaps are the most overlooked part of any flooring project and their absence is the leading cause of grout failure at the perimeter of the room. Whether you are doing a carpet install or laying down wide plank oak, you need space. In a shower, the change of plane where the wall meets the floor should never be filled with grout. It needs 100 percent silicone caulk. Why? Because houses move. They breathe. The wood studs in your walls swell when it is humid. If you have hard grout in those corners, it will crumble. That crumbled grout is where the pink mold starts. It is where the water finds a path to the subfloor. I tell people to think of their shower as a moving machine. You need gaskets, not just glue. If your installer filled the corners with grout, he is not a floor guy. He is a tile hanger. There is a big difference.
“Movement joints are not optional; they are the pressure relief valves of the tile assembly.” – Master Flooring Axiom
Molecular density and the 2026 standard
The industry is moving toward high-density pre-sealed grouts but these still require a secondary chemical bond to maintain color consistency across the entire surface. By 2026, we will see more reactive resin technologies in the residential market. Even then, the one sealing rule remains. You have to ensure the density is uniform. If you over-wash your grout during installation, you wash away the cement and leave only the sand. This makes the grout even more porous. It makes it weak. I see this on every cheap production home job. They use too much water to clean the tile and they ruin the grout before the homeowner even moves in. You want a stiff mix. You want a damp sponge, not a dripping one. If you see white streaks in your colored grout, that is the polymer being washed out. No sealer in the world can fix a grout joint that was drowned at birth.
The physics of sound and subfloor prep
Underlayment choice affects grout longevity because vertical deflection causes micro-movement that shatters the bond between the tile and the grout joint. When people talk about laminate or carpet install projects, they focus on the feel underfoot. In a tile setting, the feel doesn’t matter. The stiffness does. If your subfloor flexes when you walk, the grout is the first thing to break. I use a lot of uncoupling membranes now. They allow the subfloor to move horizontally without shearing the tile off. It is a brilliant piece of engineering. It creates a small air gap that manages vapor pressure. If you are laying tile over a concrete slab that is still green, that vapor will push the sealer right out of the grout. You have to test the moisture content. Use a calcium chloride test. Do not guess. If you guess, you are going to be back in six months with a hammer and a pry bar, tearing out a floor that should have lasted a lifetime.