It was late at night, and all I wanted was a smooth, flawless floor after weeks of a messy renovation. Instead, I stared at those stubborn, unwelcome ripples creeping across my carpet, each one a reminder of my oversight. I had thought I did everything right—precise measurements, quality materials, and a careful install—but those unsightly waves still appeared. That moment of frustration was my lightbulb moment: I needed a better way to handle those pesky ripples that seem to appear out of nowhere.
Why Carpet Ripples Drive Us Crazy—and How to Fix Them Fast
We’ve all been there. No matter how meticulously you prepare, threads of your flooring or carpet can develop ripples over time, messing up the sleek look you’ve worked so hard for. These aren’t just cosmetic; they can cause tripping hazards, damage your flooring, and even make your space feel less inviting. The good news? I discovered a simple, effective method—power stretching—that completely transformed my approach. Today, I’ll share how this hack can save you from the hassle of dealing with ripples, especially in 2026, when flooring innovations demand equally smart maintenance techniques.
Is Power Stretching Really the Gold Standard in Floor Repairs?
Early on, I made the mistake of trying to ignore the ripples, thinking they’d settle with time or through minor tweaks. Spoiler alert: they didn’t. That mistake taught me that addressing carpet ripples requires more than just patience. It requires action—and the right action. Power stretching has become my go-to method, and it’s backed by professionals who emphasize that proper tensioning is crucial to lasting results. In fact, experts at FloorCraft Store highlight that mastering floor tensioning techniques can significantly extend the lifespan of your flooring. If you’re tired of rework and want a smooth, durable finish, understanding this hack is a game-changer.
So, have you faced this very problem? Those stubborn ripples creeping across your carpet or laminate floor? If so, you’re not alone—and better yet, you’re in the right place to find a lasting solution. Let’s dive into how power stretching works and how you can tackle your flooring issues once and for all.
Start by Assessing the Damage Clearly
First, I laid out all my tools—power stretcher, knee kicker, and a pry bar—and cleared the room. I identified the ripples precisely, noting if they were localized or spread across large areas. This step is crucial because a thorough assessment helps determine the scope of work and ensures you’re not missing hidden issues like subfloor dips, which can mimic ripples.
Prepare Your Space to Maximize Efficiency
Next, I removed baseboards and furniture for full access. Wearing knee pads and gloves made the process comfortable. I also checked the floor for any nails or debris that could interfere with stretching. Proper preparation avoids setbacks and makes the process smoother, especially in tight corners or around fixed objects.
Learn and Apply Power Stretching Technique
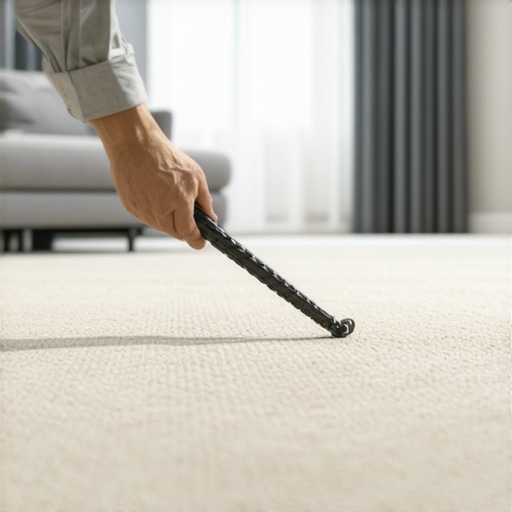
This is the core step. I attached the power stretcher to the wall opposite the ripple area, ensuring its bar was centered and secured. I then placed the head of the stretcher on the edge of the carpet, making sure it’s aligned properly. With a steady push, I engaged the tension, pulling the carpet tight. Think of it like pulling a tight sheet over a bed—consistent tension is key.
In my experience, starting from the far end and working toward the doorway prevents slack accumulation. When I faced stubborn sections, I used the knee kicker to tighten hard-to-reach spots before reapplying the power stretcher for maximum tension. Remember, over-stretching can damage the carpet, so carefully gauge the tension—it should be firm but not strained.
Fixing Edges and Seams
After stretching, I inspected the edges and seams, reattaching staple strips or tack strips as necessary. If seams started to show gaps, I used a seam roller and glue to secure them, preventing future ripples from reappearing. Properly securing the edges maintains the tension and prolongs the fix.
Finish with Reinstallation and Final Checks
Once the carpet was taut, I re-installed baseboards and checked for any remaining ripples. A quick walk-over confirmed the surface was smooth. If ripples persisted, I repeated the stretching process in that area, patient and methodical. The outcome was a perfectly flat floor, free of wrinkles—a satisfying transformation from my earlier frustration.
Throughout this process, I kept in mind that health of the subfloor is vital. If dips or humps are present, they must be leveled first, which may involve additional steps like applying self-leveling compounds or underlayments. For instance, if your subfloor shows signs of damage, consulting resources like this guide on fixing dips can help prevent reoccurring ripples.
Protect Your Improvements for Long-Lasting Results
Finally, I sealed edges and reattached baseboards securely. Regularly checking for early ripples and addressing them promptly can save time and hassle down the road. Remember, mastering these steps not only restores your floor’s appearance but also extends its durability—an investment in your space’s future.
Many homeowners and even some professionals harbor misconceptions about the intricacies of proper flooring installation and renovation. One widespread myth is that leveling a subfloor is always as simple as applying a self-leveling compound, but in reality, proper floor leveling involves meticulous diagnosis and preparation. Ignoring underlying issues like dips or cracks can lead to future problems such as cracking or buckling, which many overlook until it’s too late. Another common misconception is that laminate flooring is maintenance-free; however, many fail to account for expansion gaps and subfloor stability, leading to squeaks or buckling over time. It’s crucial to remember that inadequate ventilation and moisture control, especially under showers or in humid environments, significantly affect the longevity of both laminate and carpet installations.
Why Do People Overlook Subfloor Conditions and Moisture? Is It a Major Risk?
This oversight can be detrimental because, as documented by industry experts, subfloor moisture issues are often the silent killers of flooring longevity. Many assume that a smooth surface is enough, but if the subfloor isn’t level, stable, and dry, even the most high-quality materials will fail prematurely. For instance, unaddressed dips can cause laminate panels to bounce or create gaps, leading to creaking and unevenness—issues that are especially tricky to correct after installation. It’s advisable to conduct thorough tests—like moisture meters and visual inspections—before laying down any surface layer. This proactive approach can prevent costly repairs down the line and ensures a durable finish that lasts for years.
Moreover, misconceptions about shower waterproofing can lead to devastating damage. Many believe sealing the tile is sufficient, but neglecting hidden leak zones or improper drain installation can result in mold, rot, and structural damage. For detailed insights on avoiding these pitfalls, check out this guide on hidden shower leak zones. Proper waterproofing and installation techniques are essential for modern bathroom upgrades, especially with curbless showers becoming more popular.
In sum, understanding the nuances such as the importance of subfloor condition, moisture management, and tailored installation approaches is key. Don’t fall into the trap of oversimplification—taking the time to assess and prepare properly will save you time, money, and headaches in the long run. Have you ever fallen into this trap? Let me know in the comments.
Keep Things Running Smoothly: My Top Tool Picks for Flooring and Bathroom Projects
Maintaining beautiful, durable floors and showers isn’t just about initial installation—it’s about ongoing care and leveraging the right tools. Over the years, I’ve refined my toolkit to include equipment and methods that ensure longevity, easy troubleshooting, and efficient repairs. Investing in quality tools like a professional-grade power stretcher for carpets, a moisture meter for showers, and a high-precision floor leveler not only saves time but also extends the life of your surfaces. For instance, a reliable moisture meter helps detect hidden dampness that can cause laminate or carpet buckling over time, a critical step often overlooked in DIY projects.
How do I maintain my flooring and showers over time?
Regular inspections are vital. I recommend setting a schedule to check for early signs of issues, such as creaking laminate, loose grout in showers, or uneven spots in your floor. Use a laser level to verify flatness—this simple step can catch dips before they turn into major problems requiring extensive (and costly) repairs. Additionally, applying protective sealants around showers and in high-traffic areas guards against moisture intrusion and wear, extending your investment’s lifespan.
Furthermore, staying updated on industry innovations ensures your maintenance techniques keep pace with trends like water-efficient showers or moisture-resistant laminates. For tools, I personally favor brands like Gōer or Roberts, which offer durability and precision essential for scaling projects or routine upkeep. And consider supplementing hardware with software solutions, such as moisture mapping apps, to log and monitor your flooring condition over time.
What equipment makes long-term maintenance easier?
Beyond basic hand tools, I rely heavily on equipment designed for efficiency and accuracy. A few worth mentioning include:
- High-quality moisture meters: Devices like the Tramex HC-4 allow me to detect subtle dampness under tiles or in subfloors, preventing issues caused by unseen leaks or rising moisture. Proper detection means fewer surprises after installation and fewer repairs down the line.
- Rooted in precision levelers and self-leveling compounds: When preparing uneven concrete or subfloors, I turn to professional-grade self-leveling products, such as those outlined in expert guides, to establish a solid foundation (see this resource).
- Flooring-specific extraction and cleaning equipment: For ongoing maintenance, tools like steam cleaners or specialized vacuums keep your surfaces free of debris that can accelerate wear.
In the realm of shower renovation, tools to maintain waterproofing, such as silicone sealant guns and leak detection devices, are indispensable. These help ensure longevity of your watercourses and minimize the risk of mold or rot—issues that can quietly develop if not monitored correctly.
Future-Proof Your Flooring and Showers
Looking ahead, I believe the trend is moving towards smarter, self-monitoring materials integrated with IoT technology. Imagine having sensors that alert you to rising moisture levels or structural shifts before visible signs appear. This proactive approach could revolutionize how we maintain our homes, making long-term upkeep more manageable and less reactive.
For now, my advice is to adopt preventative tools like moisture meters and reinforce regular inspections with quality equipment. An added tip: invest in a versatile multi-tool like the Leatherman or Dremel with multiple attachments—these can handle small repairs or adjustments swiftly, saving you from costly overhauls later. Ready to take your maintenance routine to the next level? Try integrating a moisture mapping app with your existing tools, and experience firsthand how early detection can save you time and money. If you want a deep dive into precision leveling techniques, check out this guide for leveling concrete floors before your next laminate install—it’s a game-changer for professional results.
As I reflect on my experiences with flooring projects, one insight stands out: the importance of patience and attention to the intricate details that make or break a perfect finish. Early mistakes taught me that rushing through subfloor prep or neglecting moisture checks can lead to ripples, buckles, and endless frustrations. The deep personal lesson? No shortcut replaces thorough assessment and the right tools, especially as technology advances in 2026. These realizations have transformed my approach from reactive to proactive, ensuring my floors look flawless and last for years.
The Unseen Truths Behind Flawless Floors That No One Tells You
- Moisture Management Is Paramount: I once ignored hidden dampness, which caused a ripple effect—literally. Investing in a reliable moisture meter before installing laminate or carpet can save you from costly rework. Believe me, detecting moisture issues early is a game-changer. For insights, check out this comprehensive guide on waterproofing.
- The Subfloor’s Role Can’t Be Overstated: I learned that an uneven subfloor is the root cause of many surface problems. Rushing to lay flooring over dips or cracks just postpones the trouble. Using self-leveling compounds properly—guided by resources like this expert tutorial—ensures a stable foundation.
- Tools Make the Difference: I underestimated the power of quality equipment. From a professional-grade power stretcher to laser levels, these tools turned my repairs from guesswork into precision work. For my favorite picks, see this equipment guide.
How I Turned Setbacks into Learning Opportunities
Every mistake, like missing a moisture check or rushing the leveling process, became a lesson. Now, I approach each project with a checklist, thorough assessments, and patience. For example, I routinely inspect vulnerable spots for potential ripples and reinforce them before installing. This proactive mindset, combined with up-to-date knowledge on subfloor fixes for 2026, has elevated my craftsmanship. The key takeaway? Mastery doesn’t come from perfection but from resilience and ongoing learning.
Where To Turn When You Need a Trusted Partner
- Quality Tools That Empower DIYers: Investing in a moisture meter, laser level, and self-leveling compounds makes all the difference. I personally trust brands like Gōer and Roberts, known for lasting durability and precision.
- Expert Resources Are Gold: Resources like this expert guide on leveling and subfloor fixes for 2026 keep me ahead of common pitfalls and ensure my work endures.
- Community and Continuous Learning: Engaging with online forums and local professionals broadens my perspective and provides new solutions—critical as technology and standards evolve in 2026.
Your Next Step Towards Flooring Confidence
Embracing these lessons and tools has rekindled my passion for creating beautiful, durable floors. Remember, every project is a chance to learn and refine your craft. Whether you’re tackling carpet ripples or leveling a wavy concrete slab, the principles remain the same: patience, preparation, and the right resources. If you’re ready to elevate your home, I encourage you to start with thorough assessments and trusted supplies—your future floors will thank you.
Have you encountered unexpected challenges during your flooring projects? Share your story below—your experience might be the breakthrough someone else needs!