Ever stepped into a room and felt that unsettling, uneven ridge of carpet right at the doorway? That little rippling can feel like a small annoyance, but trust me, it’s often a sign of bigger issues down the line. I’ve been there—spending hours trying to stretch or re-secure carpet only to find that pesky raveling creeping back in weeks later. The frustrating part? Most folks don’t realize there are simple, effective hacks that can make those doorways stay smooth and professional-looking for good.
Why Stop 2026 Carpet Raveling at Doorways Matters
When carpet starts to fray or pull away at the thresholds, it’s not just about aesthetics; it can compromise the durability of your flooring, trap dirt, and even pose tripping hazards. If left unaddressed, those minor rips can expand, making your home look worn-out and inviting damage to the subfloor beneath. Early prevention and targeted fixes aren’t just cosmetic—they’re about protecting your investment and keeping your space safe.
Is It Really Worth the Effort to Fix Carpet Raveling?
I remember rushing through a carpet installation once, thinking I could skip the meticulous tuck-in steps, only to face a recurring wave of raveling threads. I unintentionally made a mistake early on—neglecting a proper, secure tuck—leading to more trouble later. This taught me a vital lesson: a small extra step during installation can save hours of frustration. If you’re wondering whether these hacks are worth your time, I promise—they absolutely are. They’re proven to prevent raveling, maintain a clean look, and save you money on repairs in the long run.
And here’s something surprising—according to experts at FloorCraft, many cases of recurring carpet issues stem from improper initial tuck-ins or inadequate seam finishing. Small details matter, and mastering these can dramatically extend the life of your flooring.
By the end of this post, I’ll share three professional tricks I’ve used countless times to keep doorways looking flawless. Ready to stop those raveling nightmares? Let’s dive into the hacks that can transform your space and boost your confidence in DIY or professional projects alike.
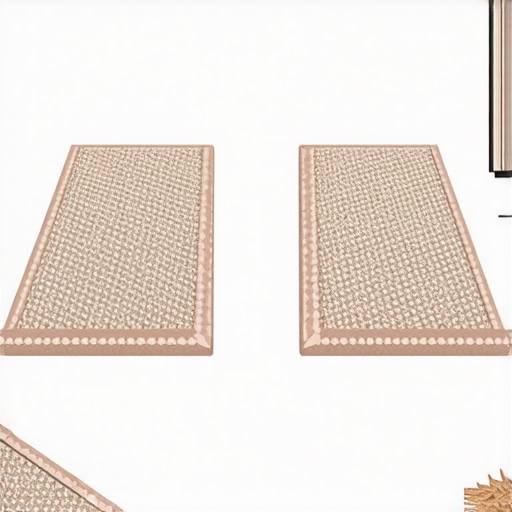
Secure the Edges Properly During Installation
When installing or repairing carpet at doorways, ensure that you firmly tuck in the edges with a stair tool or kicker to prevent raveling threads from loosening. I once tackled a project where I skipped this step with my cousin’s carpet, and within weeks, the edges started to fray again. Using a heavy-duty carpet kicker allows you to press the edges deep into the tack strip, creating a snug seal that resists pulling and raveling. This process might seem simple, but it’s crucial for long-term durability. Always double-check that the edges are tightly secured—remember, a small investment in proper tucking can save hours of future rework.
Replace or Reinforce Worn Tack Strips
If the tack strip guiding the carpet edge is loose or damaged, your carpet won’t stay secure, leading to ripples or fraying. I once found a loose tack strip in a rental unit; I removed it, cleaned the adhesive residue, and affixed a new strip using heavy-duty staples. Be sure to align the tack strip perfectly with the doorway’s edge and gently stretch the carpet as you press it into place. Reinforcing or replacing tack strips is a straightforward fix that provides a solid foundation, stopping the raveling at its source. For a comprehensive look at how tack strip issues can affect your flooring, visit this checklist.
Apply Sealants to Prevent Fraying
For added protection against unraveling threads, consider applying a specialized carpet sealant or binder along the edges. During a renovation, I used a clear, fast-drying carpet sealer along the doorway edges of a high-traffic hallway. It created a protective barrier that kept threads from fraying and raveling, even with frequent foot traffic. Use a small brush to carefully apply the sealant along the perimeter, especially where the fibers are most exposed. This step acts as a barrier, locking fibers in place and extending the lifespan of your carpet edges.
Maintain and Check Regularly
Regular inspections can catch early signs of edge distress. I recommend pulling back the carpet at doorways every few months to look for loose sections or frayed threads. If you notice early raveling, quickly reinforce with tucking or sealant before it worsens. Maintaining your carpet may seem minor, but it prevents small issues from escalating into significant damage that’s costly and time-consuming to fix. Consistent care keeps your doorways looking neat, professional, and safe for years.
Utilize Professional Tools for Precision
Investing in proper tools like the tapping block and knee kicker can make a noticeable difference in your results. During a recent DIY upgrade, I used a tapping block to gently but firmly press the carpet edges into the tack strip—doing so avoided damaging the fibers while ensuring a tight seal. These tools give you better control and uniform pressure, drastically reducing the chance of raveling or loose edges. If you’re unsure about tackling these steps alone, consulting professional installation strategies online ensures your work stands the test of time without future issues.When it comes to home upgrades like showers, carpet, or laminate flooring, many assume that following standard procedures guarantees success. However, true mastery lies in understanding the subtle nuances that differentiate amateur work from professional results.
Why Do So Many DIY Projects Fail Despite Following Instructions?
Many homeowners rely solely on tutorials or product labels, but neglect the less obvious factors like subfloor conditions or moisture management. For example, a common myth is that using a quick-setting adhesive will ensure durability in shower installations. In reality, the adhesive’s curing process and compatibility with surrounding materials are critical for preventing leaks and mold. Experts at FloorCraft emphasize that understanding moisture barriers and proper sealing techniques dramatically reduces failure rates.
Beware the Trap of Overlooking Subtle Floor Leveling Issues
Another frequent oversight is ignoring minor subfloor imperfections. Even a slight dip or unevenness can cause laminate floors to develop squeaks or gaps over time. Many installers believe that a layer of underlayment can mask these flaws; however, this often leads to long-term problems like bouncing or premature wear. A more advanced approach involves running detailed floor leveling tests before laying down the final surface, ensuring a stable, long-lasting foundation.
What About Shower Drainage Systems That Seem Fine but Fail Later?
In high-end bathroom renovations, improper installation of the drain system can seem correct initially, but lead to leaks or standing water within months. Many presume that a standard slope ensures proper drainage, yet the subtlety lies in the self-leveling of the floor and the seamless integration of the drain assembly. Overlooking these details is a common, costly mistake that can compromise the entire project. Learning to identify the signs of improper leveling or drainage can save you money and frustration. For detailed guidance, see insights from shower waterproofing zones that are often neglected.
How Do Advanced Techniques Protect Your Investment?
Applying innovative methods like specialized sealants or precision leveling can seem unnecessary, but they offer significant benefits. For example, a careful application of sealants along laminate edges can prevent early fraying, extending the lifespan of your floors. Similarly, advanced subfloor preparation ensures that your investments in high-quality materials don’t succumb to preventable issues. As outlined in expert-level leveling tips, these nuances make the difference between a project that lasts and one that requires costly repairs.
Let’s keep this conversation going—have you ever fallen into one of these traps? Share your experience in the comments and how understanding these nuances could have changed your approach.
Keeping Your Installations in Top Shape with the Right Tools
Maintaining your flooring and shower setups isn’t just about fixing problems as they arise; it’s about proactive care using precision tools. For instance, I swear by a high-quality knee kicker—like the professional-grade knee kicker. It allows me to stretch carpeting evenly and tightly without damaging fibers, which is crucial for long-term durability. Additionally, investing in a reliable floor level laser—such as the DeWalt Line Laser—helps me identify subtle unevenness before installation, ensuring that laminate and tile floors stay flat and squeak-free over years. These tools are not just for pros; they’re becoming more accessible for DIY enthusiasts aiming for professional results.
Adopt a Routine Maintenance Program for Lasting Results
Consistency truly is key. Regular inspections of in-place flooring and shower seals can catch early signs of wear or leaks. For example, every few months, I pull back a corner of the carpet or examine the grout lines in my bathroom, looking for fraying edges or cracks. When I notice a tiny raveling or a pockmark in the grout, I address it immediately—applying a dedicated sealant or re-tucking the edges—preventing small issues from snowballing into costly repairs. This ongoing upkeep is supported by techniques outlined at this checklist, which emphasizes early detection as a cornerstone of maintenance.
Where Do I Go from Here: Scaling Up or Refining Techniques?
If you’re contemplating larger projects, scaling your tools enhances efficiency and quality. For instance, expanding your toolkit to include a self-leveling compound gun—like the self-leveling dispenser—can significantly improve the foundation for laminate or tile installations. This becomes especially beneficial in spaces with uneven subfloors, where a precise leveling approach preserves the integrity of your flooring over decades. The future of home renovations leans towards smart, integrated tools that not only speed up the process but also provide data-driven insights, like moisture meters integrated with digital app analytics, helping you maintain your installations proactively.
How do I maintain my flooring and shower systems over time?
Sound maintenance depends on understanding your materials’ specific needs. For example, sealing grout lines and applying protective sealants to laminate edges every 12-18 months can ward off moisture and prevent cracking. Incorporating regular inspections with tools like moisture meters can alert you to hidden leaks or subfloor issues before they escalate, as recommended in this expert guide. By establishing a routine with these targeted techniques, you ensure your investments look great and perform reliably for years to come. Why not try applying a new sealant along your shower’s grout lines this week? It’s a simple step that offers substantial long-term benefits.
Sometimes, the most overlooked details—like a smooth doorway transition—can make or break the overall look and longevity of your flooring project. After years of hands-on experience, I’ve uncovered some insider wisdom that often stays behind the scenes, yet has the power to elevate your results significantly.
Lessons I Learned from Unexpected Floor Failures
- Not all adhesives are created equal: Using the wrong type or application method can lead to early fraying and bubbling, even with meticulous installation. Trust me, investing in high-quality, compatible sealants and understanding their curing process has saved me countless repair hours.
- Skip the shortcuts, pay later: Rushing through edge sealing or tack strip replacement seemed tempting but resulted in recurring ripples and safety hazards. Small, deliberate steps during initial setup are priceless in preventing future headaches.
- Subfloor condition is king: Ignoring slight unevenness or moisture issues beneath the surface often manifests as visible flaws after installation. Regular testing with moisture meters and leveling far outweighs the cost of rectification later.
- The little details matter: Properly reinforcing seams, edges, and transitions with professional tools like knee kickers and laser levelers yields clean lines that last for years, not months.
Tools and Resources That Changed My Approach
- Premium carpet installation guides: These provided step-by-step strategies for flawless transitions and edge finishes, which I now recommend everyone follow.
- Floor leveling checklists: Vital for catching subtle imperfections before they become costly to fix.
- Waterproofing tutorials: Learning how to properly seal shower pans and wet areas has prevented countless leaks and mold issues in my projects.
- Expert tips from trusted professionals: Their insights often fill the gaps that DIY tutorials miss, especially for complex transitions and moisture management.
Your Next Step Towards Flawless Floors
Mastering the art of seamless transitions and durable edges in showers, carpet, and laminate flooring isn’t just about aesthetics; it’s about confidently protecting your investment and creating spaces that last. Every detail, from initial prep to finishing touches, deserves your focused attention. Now is the perfect time to apply these insider tips, refine your techniques, and elevate your home renovation game. Remember, even small improvements can lead to big results—so don’t hesitate to start today!
What’s the biggest flooring challenge you’ve faced in your projects? Share your story below—your experience might just inspire someone else to achieve perfection without the stress!