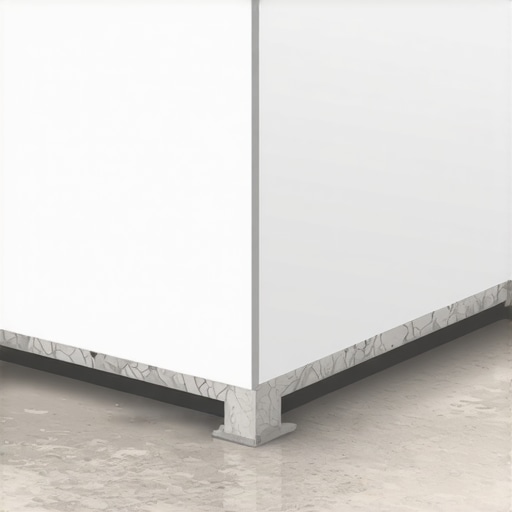
How to Stop Your Floor Leveler from Draining into Wall Cavities
The gravity problem in subfloor prep
Most guys skip the leveling compound because they think the underlayment will hide the dip. It won’t. I spent three days grinding concrete on a job last month just so the floor wouldn’t click like a castanet. When you finally decide to use a self-leveling underlayment or SLU, the biggest risk is the liquid finding a path of least resistance into your walls. This happens because the compound has a high flow rate designed to mimic the properties of water during its first twenty minutes of hydration. If your wall plates are not sealed, the leveler will migrate into the wall cavities, potentially damaging electrical wiring or filling the space between the floor and the sill plate. You must create a mechanical dam using closed-cell backer rod or spray foam to ensure the material stays on the horizontal plane. This is especially vital when prepping for a carpet install or laying laminate over an uneven slab.
The physics of the disappearing leveler
Self-leveling compound behaves like a viscous fluid with a specific gravity significantly higher than water. It exerts lateral pressure against your perimeter walls as it seeks its own level across the floor leveling zone. Without a watertight seal at the base of your drywall or the edge of the showers pan, the material will escape. This drainage leads to structural voids under the finished floor and a massive mess in the crawlspace or the room below. The chemical makeup of these compounds involves high-performance polymers and Portland cement that require a specific water ratio to maintain suspension. If the mix starts draining, the aggregate can separate, leaving you with a brittle surface that will fail under the weight of furniture.
“A floor is only as good as the subfloor beneath it, and deflection is the enemy of every joint.” – Master Flooring Axiom
Materials for a watertight perimeter
Stopping a leak requires a combination of physical barriers and chemical sealants that can withstand the weight of the wet SLU. You should look for materials that offer high adhesion to both the concrete or wood subfloor and the wood or metal wall plates. Using a high-quality polyurethane spray foam is the most common method for larger gaps. For smaller fissures, a paintable silicone or a dedicated floor damming tape works wonders. You must ensure the barrier is continuous around the entire room. Even a gap the size of a pencil can lead to the loss of several gallons of expensive compound before the material begins its initial set.
| Material Type | Best Application | Setting Time | Compression Resistance |
|---|---|---|---|
| Expanding Spray Foam | Large wall plate gaps | 15 minutes | Moderate |
| Silicone Caulk | Micro-fissures at edges | 30 minutes | High |
| Sill Sealer Foam | Long straight runs | Instant | Low |
| Damming Tape | Thresholds and stairs | Instant | High |
The chemistry of the bond and the barrier
The interaction between the primer and the substrate is the most overlooked part of the leveling process. Primer acts as a chemical bridge that prevents the dry subfloor from sucking the moisture out of the leveler too quickly. If the moisture is lost to a porous slab, the leveler will pinhole and crack. When you seal the wall cavities, you are also preventing the airflow from the wall from creating bubbles in your finish. The polymer chains in the leveler need time to cross-link properly. If the leveler is constantly moving or draining through a hole in the floor, those chains never form a stable lattice. This results in a floor that sounds hollow and eventually breaks apart under a carpet install or hard surface flooring.
Preparation steps for a successful pour
Before you even think about mixing a bag, you need to conduct a thorough inspection of the perimeter. This is where the experienced guys separate themselves from the weekend warriors. You need to identify every possible exit point for the liquid. This includes HVAC vents, plumbing penetrations, and the gap under the drywall. Use a bright light and look for shadows at the base of the wall. If you see a dark space, that is a drain for your money. You must treat every room like a swimming pool that needs to hold two inches of water without a single drop escaping. This level of obsession is what prevents a disaster that involves jackhammering out dried leveler from inside a wall.
- Vacuum the entire perimeter to remove dust that prevents foam adhesion.
- Apply a bead of sealant to the junction of the floor and the wall plate.
- Install a foam expansion strip if the room is larger than 200 square feet.
- Block off heat registers with plywood and high-tack tape.
- Check the moisture content of the subfloor using a pin-type meter.
The expansion gap at the perimeter
One of the biggest mistakes in floor leveling is filling the expansion gap completely with a rigid material. Wood floors and even some laminate products need room to move as the seasons change. When you seal the wall cavities to stop the leveler, use a compressible material like foam. This serves two purposes. It stops the leak and it provides a soft joint for the floor to expand into. If you pour the leveler right up against a rigid wall, the floor will eventually buckle when the humidity rises. This is particularly true in regions with high seasonal swings where the wood fibers expand significantly across the grain. By using a foam dam, you create a buffer that protects the structural integrity of the installation.
“Subfloor flatness tolerances for nail-down hardwood must not exceed 3/16 of an inch over a 10 foot radius.” – NWFA Technical Guidelines
Dealing with plumbing and shower drains
In bathrooms or near showers, the drainage points are everywhere. The area around a toilet flange or a drain pipe is a prime candidate for a leveler leak. You should use a plastic collar or a thick ring of plumber’s putty to create a dam around these penetrations. If the leveler gets into the drain lines, you are looking at a plumbing bill that will dwarf the cost of the floor. I once saw a guy ruin a whole stack of cast iron pipe because he didn’t tape off the shower drain. The leveler set up inside the trap and the whole thing had to be cut out. Wrap your pipes in foam insulation first. This protects the pipe from the heat generated by the exothermic reaction of the curing cement and creates a space for the pipe to move without cracking the floor.
The importance of the primer coat
A good primer does more than just help the leveler stick. It seals the pores of the subfloor and helps the leveler flow better. If you have a very porous concrete slab, it will act like a sponge. It can pull the water out of the mix so fast that the leveler stops moving before it gets flat. This is called a flash set. By applying two coats of primer, you create a smooth surface that allows the compound to glide into the corners and up against your wall dams. This ensures that you don’t have to over-work the material with a rake or a spiked roller. The less you touch it, the better it will look. Let the gravity and the chemistry do the work for you.
Testing the seal before the pour
If you are nervous about your dams holding, you can do a dry run with a small amount of water or a very thin mix in a specific area. However, the best way is to use a smoke pencil or a bright flashlight. If you can see light through the gap at the wall, the leveler will find its way through. I always tell my crew to double-check the corners. That is where the sill plates usually have a gap. Use a bit of extra spray foam in the corners and then trim it back with a utility knife after it cures. This gives you a clean, square edge to pour against. It might seem like overkill, but it is much better than watching five hundred dollars of product disappear into the abyss under your house.