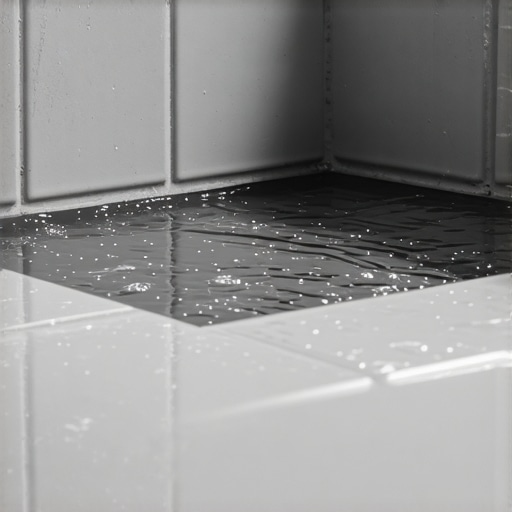
How to Seal a Linear Drain Without Leaving a Lip
I spent three days grinding concrete on a job last month just so the floor wouldn’t click like a castanet. Most guys skip the leveling compound. They think the underlayment or the tile mud will hide the dip. It won’t. When you are dealing with a linear drain, that 1/8 inch dip is the difference between a high-end curbless entry and a trip hazard that collects stagnant water. I have seen fifteen thousand dollar bathrooms ruined because the installer did not understand the physics of a recessed flange. You cannot just slap a drain on top of a subfloor and expect it to be flush. You have to engineer the transition from the substrate to the drain body with surgical precision. If you smell the oak dust and WD-40 on my clothes, you know I have been in the trenches fixing these mistakes. We are going to talk about the molecular reality of waterproofing and the structural requirements of a flush finish.
The physics of the recessed drain flange
To seal a linear drain without a lip you must recess the drain body into the subfloor so the top of the flange sits exactly flush with the waterproofing membrane. This requires removing subfloor material or building up the surrounding area with a dedicated sloped mortar bed to create a transition. Most installers fail because they treat the drain as an afterthought rather than the primary benchmark for the entire floor height. If the flange is higher than the floor, water will pool at the edge. If the flange is too low, the tile will have a sharp edge. You need to calculate the thickness of your tile, the compressed height of your thin-set, and the thickness of your waterproofing membrane before you ever touch a saw. A standard 3/8 inch tile with a 1/4 inch notched trowel will result in a finish height of roughly 1/2 inch. Your drain must be set to accommodate this exact math.
“A floor is only as good as the subfloor beneath it; deflection is the enemy of every joint.” – Master Flooring Axiom
The 1/8 inch that ruins everything
The margin for error in a curbless shower is zero. If your subfloor has a crown or a dip, the linear drain will accentuate it. I have seen guys try to use floor leveling compound to fix a bad pitch after the drain is set. That is a recipe for failure. The leveling compound will flow into the drain throat or create a cold joint that cracks under the weight of the user. You must grind the concrete or sister the floor joists until the perimeter is perfectly level. Only then do you start the pitch toward the drain. The TCNA guidelines state that the slope must be 1/4 inch per foot. If you miss this, the water stays on the floor. It sits there. It breeds mold. It smells like a locker room. I use a 6-foot level and a digital protractor. I do not trust my eyes. I trust the physics of the bubble. You should too.
| Drain Component | Required Precision | Material Choice |
|---|---|---|
| Drain Body | Recessed 3/4 inch | Stainless Steel 314 |
| Bonding Flange | Sub-flush with mortar | Integrated Fleece |
| Membrane | 0.5mm thickness | Polyethylene or Liquid |
| Thin-set | ANSI A118.15 | High-Bond Polymer |
Why your subfloor is lying to you
Subfloors are rarely flat and never level which means the installer must mechanically intervene to create a stable plane for the linear drain. Wood subfloors flex under load while concrete slabs can wick moisture up into the thin-set through capillary action causing bond failure over time. You have to check the moisture content. If you are on wood, use a pin meter. If you are on concrete, use a calcium chloride test. I never install a drain on a slab with more than 3 pounds of moisture vapor emission. If the slab is wet, the waterproofing will delaminate. Then you have a lip because the membrane is lifting the tile. It is a chain reaction of failure. You must use a moisture barrier. You must ensure the subfloor is rigid. Deflection will snap the grout lines at the drain throat. It will make the drain look like it is sinking when in reality the floor is rising around it.
The ghost in the expansion gap
Thermal expansion is a real thing. Metal drains and ceramic tiles expand at different rates. If you pack the grout tight against the metal edge of a linear drain, it will pop. You need a movement joint. This is where most people leave a lip. They use too much caulk and it mushrooms out. Or they use grout and it cracks. Use a high-quality 100 percent silicone sealant that matches the grout color. Leave a 1/16 inch gap between the tile and the drain. This allows the materials to breathe. I have gone back to jobs ten years later where the silicone is still holding. The grout guys? They are always back fixing cracks within six months. The chemistry of the bond matters more than the look of the joint.
- Verify the subfloor deflection meets L/360 for ceramic or L/720 for stone.
- Recess the drain body by notching the joists or using a plywood shim method.
- Apply a primer to the subfloor to prevent the mortar from drying too quickly.
- Check the drain for level in both directions using a precision spirit level.
- Apply a flood test for 24 hours before installing any tile.
“Slope to drain is a functional requirement, not a suggestion; water follows the path of least resistance.” – Master Flooring Axiom
The chemistry of the unbroken seal
The bond between the linear drain flange and the waterproofing membrane is the most critical point of failure in a modern shower system. Using a polymer-modified thin-set that meets ANSI A118.15 standards ensures the chemical cross-linking is strong enough to resist the hydrostatic pressure of standing water. When you apply the membrane to the flange, you are creating a monolithic structure. If there is a wrinkle, you have a leak. If there is a bubble, you have a lip. I use a flat trowel to burn the thin-set into the flange. I want to see the fleece of the membrane fully saturated. If you use a cheap multi-purpose mud, you are gambling with the homeowner’s house. The thin-set needs to be creamy, not chunky. It should have the consistency of peanut butter. If it is too dry, it will skin over and you will not get a bond. That is how you end up with a tile that sticks up higher than the drain.
The final inspection of the plane
You have to look at the floor from a low angle. I get down on my knees with a flashlight. I shine the light across the floor toward the drain. If I see a shadow, there is a lip. That shadow is a tripping hazard. It is a place where dirt will collect. It is a sign of a lazy installer. You can use a stone to rub down any minor high spots in the tile before the grout sets, but the goal is to be perfect from the start. Linear drains are the peak of flooring architecture. They require a mind that thinks in three dimensions. You are not just laying tile. You are managing water. You are defeating gravity. If you follow the math and respect the materials, you will have a floor that is as flat as a billiard table and a drain that disappears into the design. Do not cut corners. Do not trust the builder-grade shortcuts. Build it to last a lifetime. [{“@context”:”https://schema.org”,”@type”:”HowTo”,”name”:”How to Seal a Linear Drain Without Leaving a Lip”,”step”:[{“@type”:”HowToStep”,”text”:”Assess the subfloor for levelness and grind high spots or fill low spots with a high-strength leveler.”},{“@type”:”HowToStep”,”text”:”Recess the linear drain body into the substrate so the flange sits 1/16 inch below the expected finished tile height.”},{“@type”:”HowToStep”,”text”:”Install a sloped mortar bed or pre-sloped foam tray at a consistent 1/4 inch per foot toward the drain.”},{“@type”:”HowToStep”,”text”:”Bond the waterproofing membrane to the drain flange using a high-performance modified thin-set, ensuring no air bubbles or wrinkles exist.”},{“@type”:”HowToStep”,”text”:”Perform a 24-hour flood test to verify the integrity of the seal before tiling.”},{“@type”:”HowToStep”,”text”:”Lay tile using a small-notch trowel near the drain to ensure a flush transition between the tile surface and the drain grate.”}]}]