How to Remove Old Carpet Glue from Concrete Without Using Acids
How to Remove Old Carpet Glue from Concrete Without Using Acids
I spent three days grinding concrete on a job last month just so the floor wouldn’t click like a castanet. That job started with a floor covered in thick, crusty carpet glue that the previous owner tried to dissolve with muriatic acid. They turned the house into a toxic cloud and etched the slab so deep it looked like the moon’s surface. Most guys skip the leveling compound. They think the underlayment will hide the dip. It won’t. My hands still smell like WD-40 and the dust of a thousand renovations, but that experience taught me one thing. You do not need harsh acids to clear a slab. You need physics, the right chemistry, and a massive amount of stubbornness. A clean concrete substrate is the foundation of any professional flooring project, whether you are prepping for a walk-in shower or a high-end laminate install.
The sticky truth about legacy adhesives
Removing old carpet glue from concrete requires understanding that most legacy adhesives are either synthetic rubber-based or asphaltic mastics. These substances bond to the porous surface of the concrete slab at a molecular level, filling the microscopic voids and capillaries. To remove them without acids, you must use heat, mechanical force, or non-toxic soy-based solvents to break the bond without damaging the integrity of the concrete floor itself. Most carpet glue from the late twentieth century is a yellow or tan synthetic resin. It is brittle when old but turns into a gummy nightmare when heated or wet. If you see black adhesive, stop. That is likely cutback adhesive containing asbestos, which requires professional abatement rather than DIY scraping. For the standard yellow stuff, we are looking at a battle of surface tension and mechanical shear. If the glue remains, your new floor leveling compound will not stick. It will delaminate, and your expensive new flooring will fail within a year.
“A floor is only as good as the subfloor beneath it; deflection is the enemy of every joint.” – Master Flooring Axiom
Why acids destroy your slab integrity
Acidic cleaners for concrete glue removal are a recipe for structural disaster because they react with the calcium hydroxide in the cement paste. This reaction, known as etching, weakens the surface layer of the concrete, creating a soft, chalky residue that prevents new adhesives or self-leveling underlayments from bonding properly. When you pour acid on a slab, you are not just targeting the glue. You are eating the very binder that holds the aggregate together. This creates a profile that is too aggressive and inconsistent. I have seen slabs where acid was used to the point that the steel reinforcement was at risk of corrosion due to the pH shift in the concrete. Furthermore, the fumes from muriatic or phosphoric acid are dangerous in enclosed spaces, especially in residential areas with poor ventilation. You want a slab that is pH neutral and structurally sound. Acids move you in the opposite direction, forcing you to spend more on remedial floor leveling to fix the damage you caused while trying to be fast.
The boiling water saturation technique
Boiling water for glue removal is the most cost-effective method for softening water-based carpet adhesives and multi-purpose glues. By applying high-temperature moisture to the adhesive residue, you trigger a re-emulsification process that turns the hardened resin back into a pliable sludge that can be scraped with minimal effort. This is not just about heat. It is about the molecular vibration of the water molecules penetrating the glue. You want to work in small sections, roughly three feet by three feet. Pour the boiling water and let it sit for ten minutes. You will see the glue start to turn opaque or milky. That is your window. If it dries, it re-bonds even tighter. Use a long-handled floor scraper with a fresh carbon steel blade. This method is slow, but it avoids the dust associated with grinding and the toxicity of chemicals. It is particularly effective before a carpet install where you need a relatively flat surface but do not need the slab to be pristine for a thin-set bond.
Mechanical scraping for the stubborn remnants
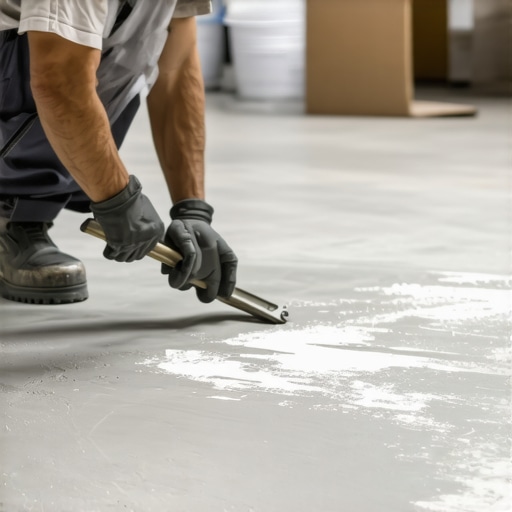
Mechanical floor scrapers and razor tools are the primary weapons for removing thick layers of carpet adhesive without introducing liquid contaminants into the slab. Using heavy-duty blades and physical leverage, you can shear the glue away from the concrete surface profile, ensuring that the capillaries of the concrete remain open for future bonding agents. I prefer a four-inch scraper with a telescoping handle. You have to keep the angle low. If you go too steep, you gouge the concrete. If you go too shallow, you just slide over the top of the glue. This is where the physics of shear force comes into play. You are looking to get under the edge of the glue and pop it off the surface. If you are prepping a floor for laminate, you need to be especially careful about the small ridges left behind. Even a sixteenth of an inch of glue can cause a laminate plank to bounce, which eventually snaps the locking mechanism. This is a labor-intensive process, but it is the cleanest way to handle a residential job without creating a slurry mess.
Citrus and soy as molecular solvents
Non-toxic soy-based adhesive removers work by using esters derived from soybean oil to penetrate the glue and break the long-chain polymers. These green chemistry solutions have a low evaporation rate, allowing the solvent to stay in contact with the glue for hours, which is necessary for the chemical breakdown of heavy-duty adhesives. Unlike acids, these solvents do not eat the concrete. They are surfactants. They lower the surface tension between the glue and the slab. You apply the gel, walk away for four to six hours, and then come back to find the glue has turned into a jelly-like substance. The downside is the residue. You must wash the slab with a degreaser afterward. If you leave soy residue on the concrete, your next floor won’t stick. This is vital when you are preparing for a shower install where waterproofing membranes need to bond perfectly to the substrate. Any oil or residue is a bond breaker.
“Surface preparation is 90 percent of the success in any tile or stone installation.” – TCNA Handbook Perspective
Grinding the surface to a profile 2 standard
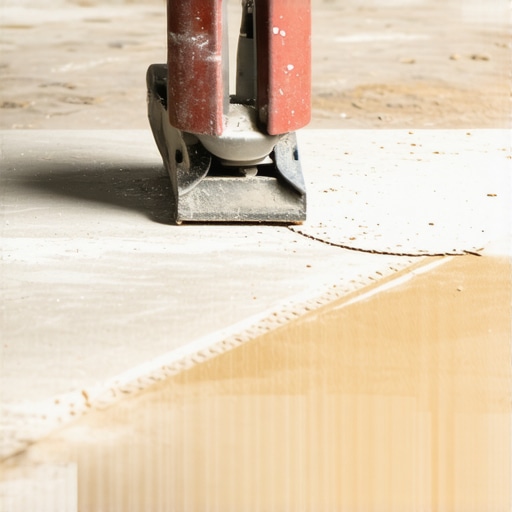
Concrete grinding for adhesive removal is the professional standard for creating a Concrete Surface Profile (CSP) of 2 or 3, which is the ideal texture for adhesives and self-leveling compounds. By using diamond-segmented grinding heads, you mechanically remove the top layer of glue and a microscopic layer of concrete, ensuring a perfectly clean and porous surface for the next phase of construction. This is where the zooming into the physics really happens. You are essentially sandblasting the floor with industrial diamonds. This opens up the pores of the concrete. If you do this, you must use a HEPA-shrouded vacuum. Crystalline silica dust is no joke. It will stay in the air for days and get into the ductwork. When I grind a floor, I am looking for that uniform, salt-and-pepper look. This is the only way to guarantee that a floor leveling product will stay put. If the slab is not ground, the leveler is just floating on top, and eventually, it will crack and crunch under your feet.
Removal Method Comparison Table
| Method | Labor Intensity | Equipment Cost | Drying Time Required | Safety Risk |
|---|---|---|---|---|
| Boiling Water | High | Low | 24 Hours | Low (Scalding) |
| Manual Scraper | Extreme | Low | None | Medium (Strains) |
| Soy Solvent | Medium | Medium | 48 Hours | Low (Slip hazard) |
| Floor Grinder | Low | High | None | High (Silica Dust) |
Essential Tool Checklist
- Heavy duty 4-inch floor scraper with replacement blades
- Soy-based adhesive stripper gel
- Industrial floor buffer with scraping attachment (optional)
- HEPA-rated shop vacuum
- Stiff-bristled scrub brush and degreaser
- N95 respirator and heavy-duty knee pads
- Moisture meter to check slab after liquid removal
Preparing for the next installation layer
Subfloor preparation after glue removal involves more than just a clean surface; you must address flatness and moisture vapor emission rates. If you are installing laminate or luxury vinyl planks, the slab must be flat within 3/16 of an inch over a 10-foot radius to prevent joint failure and floor noise. Most people want the thickest underlayment, but too much cushion actually causes the locking mechanisms on LVP to snap under pressure. You need a firm base. Once the glue is gone, I always check for dips. I use a straight edge and mark the low spots. Then I use a high-quality floor leveling compound. But here is the secret. You have to prime the concrete first. If you don’t, the dry concrete will suck the water out of the leveler too fast, and it won’t flow. It will just sit there like a clump of mud. If you are moving toward a shower installation, the prep is even more intense. You need to ensure the slab is not just clean, but that it can handle the weight of the mortar bed and the tile without shifting. The removal of the old carpet glue is just the first step in a long chain of engineering decisions. If you rush the removal or use acids that weaken the slab, every subsequent layer is a gamble. Take the time to scrape it right. Your knees will hurt, and your back will ache, but the floor will stay silent and solid for thirty years. That is the difference between a handyman and a master flooring architect. We don’t just lay floors. We build performance surfaces. The glue is the ghost of the old floor, and you have to exorcise it completely before the new one can live. Done correctly, your concrete will be thirsty for the next bond, ready to support whatever you lay on top of it without the risk of delamination or chemical interference. Use these methods to ensure a professional result every single time.