How to Fix Scratches in Laminate with a Crayon
I have spent twenty-five years on my knees with a moisture meter and a level. I have seen every hack job in the book. Most people treat their flooring as a cosmetic skin like paint on a wall. They are wrong. A floor is a structural performance surface that must withstand thousands of pounds of pressure and constant environmental shifts. When a homeowner asks me how to fix a scratch with a crayon, they are usually looking for a quick fix for a deeper problem. I spent three days grinding concrete on a job last month just so the floor wouldn’t click like a castanet. The homeowners thought a thick underlayment would hide the dips. It did not. They ended up with scratches because the floor deflected so much that the furniture legs caught the edges of the planks. If your subfloor is not flat to within 3/16 of an inch over a 10 foot radius, your laminate is going to fail. That movement is what causes the wear layer to break down. Fixing a scratch with a wax crayon is a legitimate technique, but you have to understand the chemistry of what you are doing. You are not just coloring in a line. You are attempting to bond a paraffin or carnauba based wax to a melamine resin surface reinforced with aluminum oxide. This is a mechanical bond, not a chemical one. If you don’t prep the site, that wax will pop out the first time you run a vacuum over it.
The wax stick solution for surface level damage
Fixing laminate floor scratches with a wax crayon requires a clean surface, a matching pigment stick, and a steady hand to fill the void. This process involves cleaning the scratch with isopropyl alcohol to remove oils, applying the wax in a perpendicular motion, and buffing the excess with a lint-free cloth to restore the visual integrity of the melamine wear layer.
[IMAGE_PLACEHOLDER_1]
When you look at a scratch in your laminate, you are looking at a fracture in the wear layer. Laminate is essentially a sandwich of materials. At the bottom, you have a balancing layer. In the middle, there is the High-Density Fiberboard (HDF) core. On top of that is the decorative paper, which is the photographic image of the wood or stone. Finally, there is the wear layer. This top layer is a transparent sheet of paper impregnated with melamine resin and aluminum oxide crystals. These crystals are incredibly hard. They rank high on the Mohs scale. However, they are brittle. When a sharp object or a heavy piece of furniture is dragged across the surface, it doesn’t just push the material aside. It shatters the crystalline structure. This creates a white or opaque line because the light is now refracting off the jagged edges of the broken resin instead of passing through to the image below. Using a crayon or a wax filler stick works by filling those jagged edges with a translucent material that has a similar refractive index to the original resin. This allows the light to pass through again, making the scratch disappear. But you cannot just use a Crayola from your kid’s toy box. Standard crayons are too soft. You need a hard wax floor filler. These sticks are formulated with a higher melting point so they do not smear when the room gets warm or when you are cleaning the floor with a damp mop.
The anatomy of an aluminum oxide wear layer
The wear layer of a laminate floor consists of melamine resin and aluminum oxide which provides extreme resistance to abrasion and impact. This protective coating is measured in AC ratings from one to five, determining the floor’s ability to withstand foot traffic, furniture movement, and the microscopic friction that leads to visible scratching over time.
“A floor is only as good as the subfloor beneath it; deflection is the enemy of every joint.” – Master Flooring Axiom
The manufacturing process of these floors is intense. The HDF core is created by breaking down wood chips into fibers and bonding them with synthetic resins under high heat and pressure. This core is what provides the impact resistance. If you buy a cheap laminate from a big box liquidator, that core is often less dense. When you drop a can of soup on a low density core, the core compresses. Even if the wear layer doesn’t shatter, the floor now has a permanent dent. This dent creates a localized stress point. Every time you walk over that spot, the melamine layer flexes. Eventually, it will crack. This is why I tell people to stop looking at the price per square foot and start looking at the density of the board. A 12mm board with a high density core is always superior to an 8mm board with a soft core. When you are filling a scratch in a high quality floor, you are working with a surface that is very dense and non-porous. This is why the cleaning step is so vital. Any residual floor wax, oils from skin, or dust from the subfloor will prevent the wax stick from grabbing onto the walls of the scratch. I always use a 70 percent isopropyl alcohol solution on a cotton swab to deep clean the scratch before I ever touch it with a repair kit. You have to get the grit out of the bottom of the trench.
Why your subfloor is lying to you
Subfloor leveling is the most overlooked aspect of laminate installation, leading to floor movement that causes surface scratches and joint separation. A subfloor that contains humps or valleys forces the locking mechanisms to flex, creating friction between planks that eventually results in micro-fractures in the wear layer and audible clicking sounds during use.
I have seen guys try to install laminate over old carpet padding or three layers of vinyl. It is a recipe for disaster. If you are doing a carpet install, you expect a certain amount of squish. That is the point of the pad. But laminate is a floating floor system. It needs a firm, flat base. If the base moves, the floor moves. Think about the physics of a lever. Every time you step on a spot where there is a dip in the subfloor, you are applying hundreds of pounds of pressure to the tongue and groove joint. This pressure causes the planks to rub against each other. This friction generates heat and mechanical stress. Over time, this stress migrates to the surface. You start seeing fine scratches at the edges of the planks. No crayon in the world will fix that if you don’t address the deflection. You could spend a fortune on the best wide-plank laminate, but if your installer skipped the floor leveling compound, you are just throwing money away. I use self-leveling underlayment (SLU) on almost every job. It is a cementitious product that flows like water and dries flat. It is expensive and it is a mess to work with, but it is the only way to ensure the floor stays quiet and scratch free. If you are fixing a scratch today, take a second to stand on the plank and see if it sinks. If it does, your scratch is just a symptom of a sick subfloor.
Comparing repair materials for laminate surfaces
| Material Type | Durability Rating | Application Ease | Best Use Case |
|---|---|---|---|
| Paraffin Crayon | Low | High | Hairline scratches in low traffic areas |
| Hard Wax Stick | High | Medium | Deep gouges and chips in the wear layer |
| Acrylic Filler | Medium | Medium | Filling gaps at the plank joints |
| Burn-in Stick | Very High | Low | Professional grade repairs requiring heat |
The chemistry of a proper wax bond
Bonding a repair wax to a melamine surface requires the wax to have a high melting point and sufficient tackiness to adhere to the non-porous resin. Professional grade repair kits use blended waxes that resist household cleaners and remain stable under the heat generated by friction from foot traffic and sliding furniture legs.
“Melamine resin surfaces provide high resistance to chemicals and heat, but their brittle nature requires precise filling techniques for structural repairs.” – NWFA Technical Standards
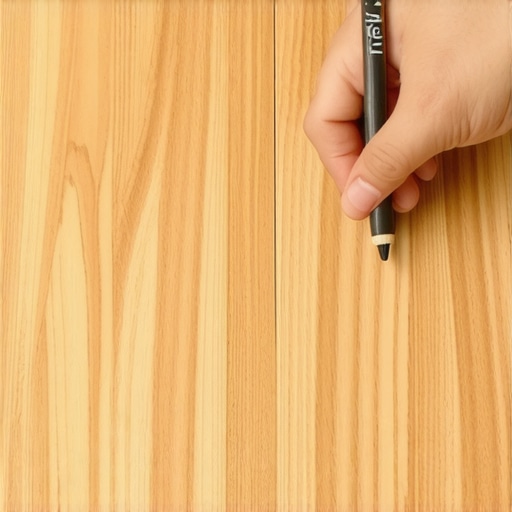
The process of using the crayon is more involved than just rubbing it on. You want to generate a bit of heat. I usually hold the wax stick in my hand for a few minutes to soften it. Then, I work it into the scratch using a cross-hatch pattern. Don’t just go along the scratch. Go across it. This forces the wax into the crevices of the broken melamine. Once the scratch is overfilled, I use a plastic scraper. Never use a metal putty knife. A metal knife will just create more scratches. I use a plastic credit card or a specialized flooring tool to shave the excess wax off so it is flush with the surface. Then comes the buffing. You want to use a microfiber cloth and rub briskly. This creates localized heat that smooths the transition between the wax and the floor. If you do it right, the repair should be almost invisible from a standing position. But remember, this is a soft material inside a hard material. It will wear down. You might have to reapply it in a year or two. If the scratch is deep enough to reach the HDF core, you have a bigger problem. The core is basically compressed sawdust. If water gets in there, the fibers will swell. Once HDF swells, it never goes back down. You get what we call telegrafing, where the edges of the scratch puff up. At that point, a crayon is useless. You are looking at a board replacement.
Checklist for a professional laminate repair
- Identify if the scratch has penetrated the decorative paper layer.
- Clean the area with 70% isopropyl alcohol to remove all contaminants.
- Select a wax color that is one shade darker than the lightest part of the wood grain.
- Apply the wax using firm pressure in a perpendicular motion to the scratch direction.
- Level the wax using a plastic straight edge to avoid marring the surrounding finish.
- Buff the area with a clean microfiber cloth to blend the sheen.
- Seal the repair with a drop of laminate floor sealer if the area is near a kitchen or bathroom.
The environmental impact on floor stability
Humidity and temperature fluctuations cause laminate floors to expand and contract, which can exacerbate existing surface damage and cause wax fills to dislodge. Maintaining a consistent indoor climate with a relative humidity between 35 and 55 percent is essential for preventing the mechanical stress that leads to joint failure and surface cracking.
I have seen floors in the desert of Phoenix shrink so much that the baseboards don’t even cover the gaps anymore. Conversely, in a swampy place like Houston, a laminate floor without a proper expansion gap will buckle and peak until it hits the ceiling. This constant movement is the enemy of any repair you make. If your house is not climate controlled, your laminate is living in a state of high stress. This stress manifests as surface tension. When you fill a scratch with a crayon, that wax is static. But the floor around it is dynamic. It is breathing. If the floor expands too much, it can actually squeeze the wax right out of the scratch. This is why professional installers focus so much on the perimeter expansion gap. You need at least a quarter inch, sometimes a half inch, around the entire room. I have seen homeowners caulk that gap because they didn’t like the look of it. That is a death sentence for the floor. The floor has to be able to slide under the baseboards. If you lock it down with caulk or heavy cabinets, the internal pressure has nowhere to go but up. That leads to crowning, which exposes the edges of the planks to more scratching. If you are fixing scratches in a kitchen where there are heavy appliances, check to see if the floor is pinned down. If it is, no amount of crayon will save you from the eventual failure of the locking system.
The final word on laminate maintenance
Proper maintenance of a laminate floor involves avoiding excessive water, using felt pads on all furniture legs, and keeping the surface free of abrasive grit that acts like sandpaper. While wax crayons can hide minor mishaps, the long term health of the floor depends on structural integrity and environmental control rather than topical cosmetic fixes.
At the end of the day, a laminate floor is a high tech product that requires a high tech approach to maintenance. Stop using those steam mops. The heat and moisture from a steam mop will delaminate the layers faster than anything else. I have seen $10,000 floors ruined in six months because someone thought steam was a deep clean. It is not. It is a wrecking ball for HDF cores. Use a damp microfiber mop and a dedicated laminate cleaner. Keep the sand out of the house. Sand is basically ground up rock, and it is harder than your floor. When you walk on sand, you are grinding it into the melamine. That is where those thousands of tiny scratches come from that make a floor look dull. Once the sheen is gone, you can’t get it back with a crayon. You can only fix localized damage. If the whole floor is dull, you are looking at a full replacement. Treat your floor like the piece of engineering it is. Keep it flat, keep it dry, and keep it clean. If you do get a scratch, use the right wax, prep the surface, and take your time. A rushed repair looks worse than the scratch itself. I have seen guys try to melt the wax with a lighter and drip it in. Don’t do that. You will carbonize the wax and leave a black soot mark on your floor. Use the friction method or a proper battery operated heating tool if you are serious about the repair. Your floor is the foundation of your home’s interior. Treat it with the respect a structural element deserves.