How to Fix a Scratched Laminate Plank Without Replacing It
The physics of surface tension in flooring repair
Laminate scratch repair relies on matching the refractive index of the original melamine resin while sealing the high density fiberboard core against moisture ingress. To fix a scratch properly, you must identify if the damage is a superficial scuff in the aluminum oxide wear layer or a deep gouge that has penetrated the photographic image layer. A shallow scratch reflects light differently than the surrounding area, creating a white line that is mostly an optical illusion caused by the jagged edges of the resin. A deep gouge, however, exposes the brown fiberboard, which will absorb humidity and swell if left untreated. Most guys skip the leveling compound. They think the underlayment will hide the dip. It won’t. I spent three days grinding concrete on a job last month just so the floor wouldn’t click like a castanet. That job taught me that even a surface fix is useless if the subfloor allows for vertical movement. If the floor flexes, your filler will crack. You have to treat the repair like a structural patch, not a cosmetic touch up.
The scientific reality of laminate surfaces
The wear layer of a laminate plank is composed of melamine resin and crystalline aluminum oxide which provides a hardness rating capable of resisting significant abrasion. This layer is what gives laminate its AC rating, or Abrasion Class. Most residential floors are AC3, while commercial spaces require AC4 or AC5. When a chair leg or a pebble under a shoe drags across this surface, it shears the crystalline structure. You are not just ‘scratching’ the floor. You are creating a microscopic canyon. This canyon traps shadows, which is why the scratch looks so prominent. Unlike a solid oak floor where you can sand away the damage, laminate is a finished product. You cannot sand it back. You have to fill the canyon with a material that has a similar Shore D hardness. If you use a material that is too soft, like basic candle wax, it will attract dirt. Within a week, your repair will be a black streak across the room. You need a hard wax or a specialized floor resin that can withstand the pressure of foot traffic without deforming.
“A floor is only as good as the subfloor beneath it; deflection is the enemy of every joint.” – Master Flooring Axiom
The wax versus resin debate for deep gouges
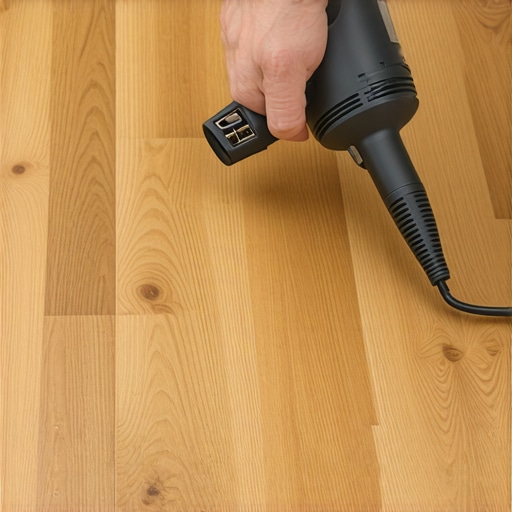
Choosing the right filler material depends on the depth of the damage and the location of the plank in relation to window light. For light scuffs, a simple floor polish or a specialized laminate touch up pen can suffice. These pens contain a stain and a sealer that fill the micro-grooves. However, for deeper gouges, you must use a burn-in stick or a hard wax kit. These tools require a heating element to melt the wax into the hole. The benefit of this method is the bond. The molten wax flows into the fibers of the HDF core and creates a mechanical lock as it cools. This is far superior to putty. Putty shrinks as it dries. When putty shrinks, it leaves a gap at the edges. Moisture from a damp mop will find that gap. Once the moisture hits the core, the floor is toast. It will buckle. It will peak. You will be tearing out the whole room. This is why I always tell people to avoid the cheap kits from big box retailers. They are basically crayons. You want something that requires heat to apply. It is the only way to ensure the repair stays put when the floor expands and contracts with the seasons.
| Material Type | Shore D Hardness | Durability Level | Moisture Resistance |
|---|---|---|---|
| Soft Wax Kits | 25 | Low | Moderate |
| Hard Wax Sticks | 45 | High | Excellent |
| Acrylic Resin | 75 | Very High | Superior |
| Epoxy Fillers | 85 | Maximum | Total |
The 1/8 inch rule for structural stability
A repair is only as permanent as the subfloor is level because any vertical deflection will eventually pop the filler out of the scratch. This is the hidden secret of laminate repair. If you walk across the floor and you feel it give even slightly, that movement is putting stress on every joint and every repair site. In my years of carpet install and floor leveling, I have seen thousands of dollars wasted because the installer didn’t check the slab. You need a floor that is flat within 3/16 of an inch over a 10 foot radius. If the subfloor has a hump or a dip, the laminate plank acts like a bridge. When you step on that bridge, it bends. Your hard wax repair is brittle. It does not bend. It will simply snap and fall out. Before you even think about fixing a scratch, put a level on the floor. If there is movement, you might need to pull the baseboards and check your expansion gaps. Often, a floor is buckling because it was installed too tight against the wall. It has no room to breathe. The pressure builds up and the planks start to arch. That is when scratches happen because the floor is no longer sitting flat on the subfloor.
How light refraction affects visibility of repairs
Properly blending a repair involves mimicking the wood grain pattern and matching the gloss level of the surrounding factory finish. Most people make the mistake of using one solid color. Real wood, and the photographic layer of laminate, has multiple tones. You need a kit that comes with at least three shades. Start with the lightest color as your base. Then, use a darker color to draw in the grain lines. This breaks up the flat look of the filler. If the repair is in front of a sliding glass door, the light will hit it at a low angle. This is the hardest repair to hide. Any height difference between the filler and the floor will cast a shadow. You must level the filler perfectly. Use a plastic scraper. Never use a metal putty knife. Metal will create more scratches. You want to shear the excess filler off so it is perfectly flush with the surface. Once it is flush, you can use a fine-grit abrasive pad to match the sheen. If your floor is matte, but your repair is shiny, it will stand out like a sore thumb. A quick spray of a matte lacquer can fix this, but you have to be careful with the overspray.
“Subfloor preparation is not a suggestion; it is a requirement for the survival of the finish.” – NWFA Technical Standard
The moisture ingress and fiberboard swelling crisis
An open scratch is a gateway for liquid that can lead to permanent structural failure of the laminate locking system. This is especially true near transition areas like showers or kitchen sinks. If you drop a glass and it chips the laminate, you have essentially opened a vein. High density fiberboard is basically compressed sawdust and glue. It is thirsty. If you spill water on an intact laminate floor, the melamine protects it. But if that water hits an open scratch, the HDF will soak it up like a sponge. It will swell. This swelling is irreversible. Once the fibers expand, they stay expanded. This causes the edges of the plank to lift, which then causes more scratches as people walk over the raised edges. This is a vicious cycle. Fixing a scratch is not just about aesthetics. It is about sealing the envelope. I have seen floors that needed total replacement because a small scratch under a dog’s water bowl was ignored for six months. The entire corner of the room had turned into a series of mini mountains. Don’t let that happen. Seal it the moment you see it.
The professional method for burning in a repair
- Clean the scratch with denatured alcohol to remove all floor wax and oils.
- Select a hard wax color that is one shade lighter than the darkest grain in the wood.
- Melt the wax into the gouge until it is slightly overfilled.
- Use a leveling tool or a plastic card to scrape away the excess while the wax is still warm.
- Buff the area with a white scotch-brite pad to remove any halo residue.
- Apply a graining pen to mimic the natural movement of the wood pattern.
- Seal the area with a light coat of floor-grade clear aerosol to lock in the color.
Final professional verdict
Fixing a floor is a technical challenge that requires patience and the right chemistry. You cannot rush the cooling time of a resin or the drying time of a sealer. If you treat your floor like a high-performance machine, it will last for decades. If you treat it like a cheap rug, it will fail you. Always keep a repair kit on hand that matches your floor’s specific AC rating and color profile. Most importantly, make sure your subfloor is stable. A rock-solid foundation is the only way to ensure your hard work doesn’t literally pop out the next time someone walks across the room. Laminate is a great product, but it is a system. Every part of that system, from the moisture barrier to the wear layer, has to work together. Take care of the small scratches now so you don’t have to deal with a buckling floor later. That is the only way to stay ahead of the game in this business. Skip the shortcuts. Use the heat. Level the surface. Your floor will thank you for it.