How to Clean Grout Without Stripping the Sealer
I spent three days grinding concrete on a job last month just so the floor wouldn’t click like a castanet. People think flooring is just about what looks pretty on the surface, but it is actually a battle against physics and chemistry. Most homeowners walk into my shop asking for the cheapest tile but then wonder why their grout looks like a swamp after six months. I remember a client who spent a fortune on hand-made Italian tile. She listened to some internet guru and used a mixture of vinegar and baking soda every single week. Within a year, the acid in the vinegar had eaten through the professional-grade fluoropolymer sealer I had painstakingly applied. The grout was so degraded it had become a sandy slurry that wiped away with a finger. It was a fifteen thousand dollar mistake born of bad advice. Grout is not just a filler. It is a porous, cementitious structure that requires a specific chemical environment to remain stable. When you strip a sealer, you are not just removing a coating. You are exposing the microscopic capillaries of the grout to every spill, drop of dirty mop water, and bit of skin cell that hits the floor. This guide is for the person who wants to do it right, not the person looking for a quick fix that ruins the installation.
The microscopic architecture of cementitious grout
Grout cleaning requires pH-neutral solutions to protect the integral bond of sealers like silane or siloxane treatments. Using alkaline cleaners or acidic descalers will immediately compromise the surface tension of the grout, leading to staining, moisture intrusion, and eventual structural failure of the tile assembly during showers or floor use.
Grout is essentially a mixture of Portland cement and sand. In the case of unsanded grout, it is cement and chemical pigments. When grout cures, it forms a lattice of crystals. This lattice is full of tiny voids called pores. A sealer works by filling these pores or by coating the surface of the crystals with a hydrophobic layer that repels water and oils. If you use a cleaner that is too high or too low on the pH scale, you trigger a chemical reaction. An acid, even a mild one like lemon juice or white vinegar, dissolves the calcium carbonate in the cement. This is why the grout bubbles when you put acid on it. That bubbling is the sound of your floor dissolving. Once that surface is etched, the sealer has nothing to hold onto. It peels away. You are then left with a raw, open wound in your floor that will suck up dirt like a vacuum. This is especially problematic in areas where floor leveling was not done correctly, as the slight movement in tiles can create micro-fractures in the grout, giving chemicals a deeper path into the subfloor. My shop is full of products that claim to be miracle cleaners, but the real secret is staying in the neutral zone of the pH scale.
“A floor is only as good as the subfloor beneath it; deflection is the enemy of every joint.” – Master Flooring Axiom
Why acidic cleaners are the enemy of your sealer
Acidic cleaning agents like vinegar and citric acid will etch the surface of cement-based grout and dissolve protective sealers instantly. These substances break down the molecular chains of penetrating sealers, leaving the tile joints vulnerable to mold growth and permanent discoloration in high-moisture environments like bathrooms.
Most people do not understand that a sealer is a thin film or a penetrating barrier that is only a few microns thick. When you introduce an acid, you are performing a controlled burn of that surface. The acid reacts with the alkaline nature of the cement. In my years of inspecting failed shower floors, the culprit is almost always a bottle of “daily shower spray” that contains phosphoric or sulfamic acid. These chemicals are great for removing hard water scale, but they do not know the difference between the lime on your tile and the lime in your grout. They eat both. If you are dealing with a laminate floor, you worry about swelling. With tile, you worry about the chemical erosion of the grout line. This erosion is permanent. You cannot just put more sealer on top of etched grout and expect it to look good. The texture will be rough, and the new sealer will not bond correctly to the compromised surface. It is a cascading failure that often leads to the need for a full regrout, which is a dusty, miserable job that costs five times as much as the original installation. In my shop, I tell people that if they want to use vinegar, they should save it for their salad and keep it away from their stone and tile.
The physics of the surface tension barrier
Surface tension is the primary mechanism that repels liquids from sealed grout lines in tile installations. Maintaining a high contact angle through proper cleaning protocols ensures that oils and water-based stains cannot penetrate the grout matrix, preserving the integrity of the subfloor and preventing delamination of the tile.
When a sealer is working, you will see water bead up on the surface of the grout. This is high surface tension. The liquid is more attracted to itself than it is to the grout. As soon as you use a harsh cleaner, you lower that surface tension. The sealer is still there in some capacity, but it has been damaged. The water no longer beads. It flattens out and begins to soak in. This is the first sign that your cleaning routine is killing your floor. I see this a lot in commercial settings where they use heavy-duty degreasers. Those degreasers are designed to break down oils, and since many sealers are oil-based or designed to repel oils, the degreaser attacks the sealer. It is a simple case of like-dissolves-like. You need a cleaner that is sophisticated enough to lift the dirt without recognizing the sealer as a target. This requires surfactants that are specifically engineered for stone and tile. These surfactants surround the dirt particles and lift them away from the surface, allowing you to wipe them up without any scrubbing that would mechanically abrade the sealer. I always tell my customers that a soft touch is better than a stiff brush. If you have to scrub that hard, your sealer has already failed or you are using the wrong chemical.
Cleaning agent pH comparison for grout safety
| Cleaning Agent Type | pH Level | Effect on Grout Sealer | Recommended Use |
|---|---|---|---|
| White Vinegar | 2.5 | Destructive | Never use on sealed grout |
| Lemon Juice | 2.2 | Destructive | Never use on sealed grout |
| Bleach (Sodium Hypochlorite) | 11-13 | Degrading | Occasional disinfection only |
| Professional Neutral Cleaner | 7.0 | Safe | Daily and weekly maintenance |
| Dish Soap (Standard) | 8-9 | Clogging | Avoid, leaves a film |
| Baking Soda Paste | 8.3 | Abrasive | Spot cleaning only |
Tools that destroy your investment
Abrasive cleaning tools such as wire brushes or stiff nylon bristles will mechanically strip grout sealer even if neutral cleaners are used. The physical friction exceeds the bond strength of the sealer film, leading to micro-scratches that trap dirt and bacteria, ultimately requiring a complete reseal of the flooring surface.
I have seen guys take a brass brush to a grout line because they wanted it white again. Sure, it got white, but they also took off the top millimeter of the grout. Now that grout is lower than the tile edge. This creates a valley where dirty mop water will sit and collect. In the flooring world, we call this a “dirt trap.” When you are cleaning, you want to use the softest tool possible that still gets the job done. A soft nylon brush or even a microfiber cloth is usually enough if you are using the right chemistry. If you are dealing with a shower, people often think they need to scrub the carpet install or the laminate nearby, but the tile is where the real moisture management happens. If you scrub away the sealer in a shower, you are inviting moisture to travel through the grout and hit the backer board. Even if you have a waterproof membrane, you do not want water sitting back there. It leads to mold and that musty smell that no amount of cleaning can remove. I always keep a stock of horsehair brushes in my shop. They are stiff enough to get into the texture of the grout but soft enough that they will not harm the sealer. It is the same logic as washing a car. You would not use a scouring pad on your paint. Why would you use one on your floor?
“Grout is the most vulnerable part of a tile installation; treat it with the same respect as the tile itself.” – TCNA Maintenance Guide
The professional protocol for grout maintenance
Effective grout maintenance involves vacuuming loose debris followed by a light application of pH-neutral cleaner and a clean water rinse. This three-step process prevents soil suspension from redepositing into the pores, ensuring the longevity of the sealer and the original color of the cementitious joints.
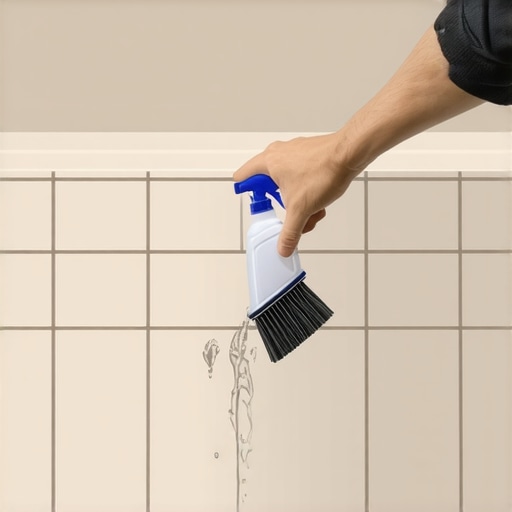
The first step is always to get the dry dirt off the floor. If you start mopping or wiping a floor that has loose sand and grit on it, you are just making liquid sandpaper. That grit will grind into the sealer as you move your cloth or mop. Use a vacuum with a hard floor attachment. No beater bars. Those beater bars are for carpet, and they will chip the edges of your tile and scuff the grout. Once the dry soil is gone, apply your neutral cleaner. I like to use a spray bottle rather than a bucket. A bucket of water gets dirty after the first three feet. You are then just spreading diluted filth around the room. By spraying the cleaner directly on the floor, you are always using fresh, clean product. Let it sit for a minute or two. This is called “dwell time.” It allows the surfactants to work their way under the oils and skin cells. Then, wipe it up with a clean microfiber. If you have a particularly stubborn spot, use your soft brush to agitate the area gently. Do not press hard. Let the chemistry do the heavy lifting. Finally, go back over the area with a cloth dampened with plain, distilled water. This removes any residual surfactant that might attract more dirt later. It sounds like a lot of work, but it is much faster than spending a weekend on your knees regrouting the whole bathroom because you were lazy with the maintenance.
Essential grout cleaning checklist
- High-quality vacuum with a soft brush attachment for dry soil removal.
- Professional-grade pH-neutral stone and tile cleaner.
- Distilled water for a final rinse to prevent mineral spotting.
- Clean microfiber cloths or a microfiber flat mop system.
- Soft-bristled nylon or horsehair brush for detailed agitation.
- White absorbent towels to check for soil transfer.
Measuring the health of your grout seal
Testing grout sealer integrity is achieved through the water drop test, which measures the hydrophobicity of the cementitious surface. If water absorbs into the grout joint within thirty seconds, the sealer has been compromised and must be reapplied to prevent damage to the subfloor or thin-set bond.
You should perform this test every six months. Go to a high-traffic area, like the spot right in front of the kitchen sink or the center of the shower floor. Drop a small amount of water onto the grout line. If it sits there in a tight bead, your sealer is doing its job. You can just wipe it up and go about your day. If the water starts to spread out and turn the grout a darker color, the sealer is thinning. If the water disappears instantly, the sealer is gone. This is your early warning system. Do not wait until the grout looks dirty to check the sealer. By then, it is too late. The dirt is already inside the grout. You have to clean it perfectly before you can reseal, and cleaning dirty, unsealed grout is a nightmare. I often see people try to seal over dirty grout, which just locks the stain in forever. It is like putting a clear coat over a dirty car. It looks terrible and it is a permanent mistake. If you catch the sealer failure early, you can give it a light cleaning with your neutral cleaner, let it dry for twenty-four hours, and then apply a fresh coat of sealer. This maintenance cycle will keep your floors looking brand new for decades. I have customers who installed tile thirty years ago and it still looks like it was put in yesterday because they followed this protocol and stayed away from the big-box store miracle cleaners.