Why Your Shower Corner Still Leaks After You Re-Caulked It
Why the shower corner leaks despite your new caulk
I have spent twenty five years on my knees with a moisture meter and a level. I smell like WD-40 and oak dust most days. My hands are calloused from handling thousands of square feet of tile and hardwood. I have seen every shortcut in the book. Homeowners often think they can solve a structural failure with a five dollar tube of hardware store caulk. It never works. They apply a fresh bead and three months later the mold returns or the water starts dripping through the kitchen ceiling below. You are likely treating the symptom while the disease remains untouched. Flooring is a performance surface. It is a structural engineering challenge. If you treat it like a cosmetic choice, you will lose every time. Most guys skip the leveling compound. They think the underlayment will hide the dip. It won’t. I spent three days grinding concrete on a job last month just so the floor wouldn’t click like a castanet. That same homeowner was baffled why their shower was still leaking. I had to show them that the subfloor beneath the pan was deflecting, causing the entire assembly to move every time they stepped inside. No amount of silicone can fight physics.
The failure of the surface fix
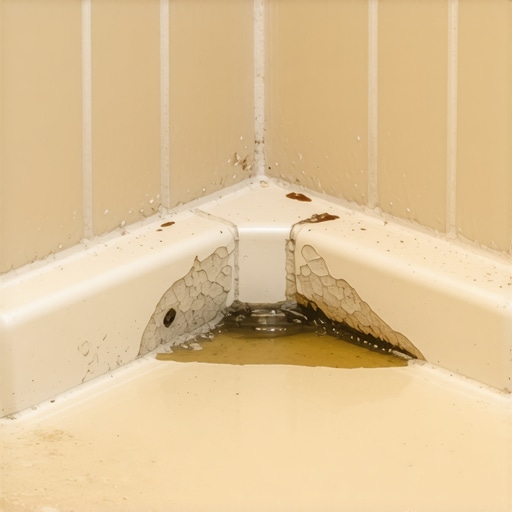
Applying new caulk over old caulk is the primary reason why shower corners continue to leak after a repair attempt. If you do not remove every microscopic trace of the previous sealant, the new bead cannot form a molecular bond with the substrate. You are essentially trying to glue a dirty window. The moisture trapped behind the old layer will immediately begin to degrade the new application from the inside out. This creates a hidden void where bacteria thrive. When I see a homeowner layering beads like a cake, I know they have already lost the battle. The shower corner is a change of plane. It is where two different structural elements meet. These elements move independently. If the bond is not perfect, that movement will tear the sealant away within weeks. I have seen it happen in million dollar homes and starter shacks alike. The physics of water does not care about your zip code. It only cares about the path of least resistance.
Gravity and the capillary trap
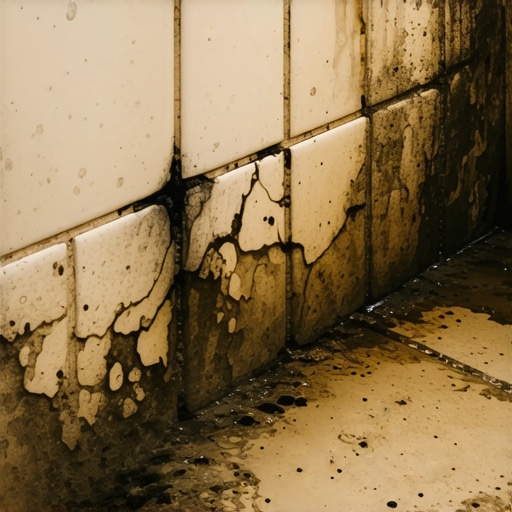
Water moves through capillary action which allows it to travel upward and sideways through tiny cracks in your grout and caulk. This is why a leak in the corner might actually be caused by a gap six inches away. The water enters a pinhole and then travels behind the tile via the mortar ridges. Once it hits the corner, it pools. Because the corner is the lowest point of the wall assembly, it bears the brunt of the hydraulic pressure. You might think your caulk is failing, but the water is actually coming from behind the tile. It is bypassing your seal entirely. This is why proper waterproofing membranes like those specified by the Tile Council of North America are required. If the installer did not use a liquid applied membrane or a sheet membrane like Schluter Kerdi, the cement board is soaking up water like a sponge. That moisture eventually rots the 2×4 studs. By the time you see the leak at the caulk line, the wood behind it might already be soft enough to poke a finger through. You are looking at the finish line of a long process of decay.
“A floor is only as good as the subfloor beneath it; deflection is the enemy of every joint.” – Master Flooring Axiom
The subfloor connection to your leaking pan
A leaking shower corner is often the result of subfloor deflection where the plywood or concrete moves too much under the weight of a person. If your floor leveling was not done correctly before the shower was installed, the pan will flex. This flex puts immense stress on the corner joints. Most residential floors are designed to a deflection limit of L over 360. This is the industry standard for ceramic tile. However, for natural stone or heavy glass enclosures, you really need L over 720. If your joists are undersized or your subfloor is only 5/8 inch thick, that shower is going to move. Every time you step in, the corner opens up. Every time you step out, it closes. This is a mechanical pump that sucks water into the wall. You can apply the most expensive silicone in the world, but it cannot act as a structural brace. It is a sealant, not a weld. If your floor clicks or creaks outside the shower, you can bet that movement is happening inside the shower too. This is why floor leveling is not an optional step for a professional. It is the foundation of the entire system.
Why floor leveling matters for wet areas
Floor leveling ensures that the shower base sits perfectly flat and prevents the twisting forces that cause grout and caulk to crack. When I walk onto a job site and see a floor that looks like a rolling sea, I know we have hours of grinding or pouring self-leveler ahead of us. If you ignore this, the shower pan will bridge the gaps in the subfloor. This creates air pockets. When you stand on those pockets, the pan dips. This dip pulls the tile away from the wall. This is a common failure in carpet install projects that are converted to tile. Carpet hides a lot of sins. Tile hides nothing. If your floor leveling is off by even 1/8 of an inch over ten feet, your shower corner is at risk. I have had to explain this to countless clients who just wanted the pretty tile. I tell them that the pretty tile will be on the floor in pieces if we do not fix the substrate first. You have to respect the chemistry of the bond. You have to respect the physics of the load.
Comparison of sealant chemistry
| Sealant Type | Adhesion Strength | Flexibility | Best Use Case |
|---|---|---|---|
| Acrylic Caulk | Low | Low | Baseboards only |
| Siliconized Acrylic | Medium | Medium | Dry area transitions |
| 100% Silicone | High | High | Wet area corners |
| Polyurethane | Extreme | High | Structural joints |
The choice of sealant depends entirely on the expected movement and moisture exposure of the joint. For a shower corner, anything less than 100 percent silicone is a waste of time. Acrylic caulks are water based. They shrink as they dry. This shrinkage creates internal tension before you even use the shower. Siliconized acrylics are a compromise that usually fails in high moisture environments. I only use neutral cure silicone for stone because acetoxy silicone can stain the edges of marble or granite. The chemistry matters. You need a product that stays flexible for twenty years. If the tube says it is paintable, do not use it in your shower. Silicone is not paintable because nothing sticks to it. That is exactly why it works so well against water. It is a lonely, stubborn material that refuses to let anything penetrate its surface.
The structural movement problem
Structural movement occurs due to seasonal humidity changes and the settling of the home foundation. In my years of experience, I have noticed that houses breathe. They expand in the summer and contract in the winter. If you live in a place with high humidity, your wood framing is constantly growing and shrinking. This movement is concentrated in the corners. If your shower was built with rigid grout in the corners instead of a flexible sealant, it will crack. The TCNA mandates that all changes of plane must be treated as expansion joints. This means you cannot use grout where the wall meets the floor or where two walls meet. You must use a color matched sealant. If your installer grouted those corners, they gave you a ticking time bomb. The grout will crumble, water will enter, and your subfloor will suffer. I have seen entire laminate floors ruined in adjacent rooms because a shower corner leaked for a year without the homeowner noticing. The water traveled under the baseboards and soaked the underlayment. It is a chain reaction of failure.
“The integrity of a waterproof assembly is measured by its weakest transition; corners are the most frequent point of failure.” – TCNA Technical Bulletin
The checklist for a dry bathroom
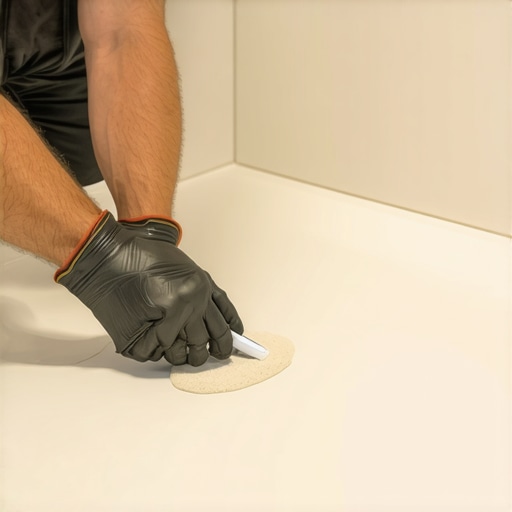
- Remove all old sealant using a plastic scraper and a chemical remover.
- Clean the joint with 91 percent isopropyl alcohol to remove soap scum and body oils.
- Ensure the joint is bone dry by using a heat gun or hair dryer.
- Apply a backer rod if the gap is deeper than 1/2 inch to prevent three-sided bonding.
- Use a high quality 100 percent silicone sealant.
- Tool the joint with a finger dipped in soapy water or a dedicated smoothing tool.
- Allow the sealant to cure for a full 24 hours before exposing it to water.
Following a strict preparation protocol is the only way to ensure the new seal lasts as long as the tile itself. Most people rush the cleaning phase. They think a quick wipe with a damp rag is enough. It is not. You have to get the joint surgically clean. If there is even a hint of mildew left in the crack, it will grow back through the new silicone. I have seen people try to bleach it away, but bleach is mostly water. You are just feeding the mold before you seal it in. Use alcohol. It evaporates and leaves no residue. Also, pay attention to the three-sided bonding rule. If the silicone sticks to the back of the gap as well as the two sides, it cannot stretch. It will tear down the middle. The backer rod prevents this by ensuring the silicone only sticks to the two side walls. It is a small detail that separates a pro job from a weekend warrior mistake.
How shower leaks kill your laminate and carpet
When a shower leaks, the water often travels along the subfloor and destroys the flooring in the hallway or bedroom. I have walked into homes to do a carpet install and found the tack strips rotted to dust near the bathroom door. The homeowner thought they just had a spill. The truth was the shower corner was leaking behind the walls for months. Laminate is even worse. Most laminate has a fiberboard core. If that core gets wet, it swells like a sponge. It will never go back to its original shape. This is what we call telegraphing. The edges of the planks will curl up and the floor will start to peak. If you have a leak, you cannot just fix the caulk and hope for the best. You need to check the moisture levels in the surrounding rooms. If the subfloor is wet, you have to pull up the flooring and dry it out. Otherwise, you are just sealing in a mold factory. While most people want the thickest underlayment, too much cushion actually causes the locking mechanisms on laminate or LVP to snap under pressure. This creates even more gaps for water to enter. It is all connected. The shower, the subfloor, and the finish floor are one single system.
The 1/8 inch that ruins everything
A tiny gap of just 1/8 of an inch is enough to allow gallons of water to bypass your drainage system over time. This is why precision matters. In my shop, we don’t accept close enough. We use lasers to check for level. We use digital meters to check for moisture. If you are re-caulking your shower, you are participating in a high stakes repair. Do not buy the cheap stuff. Do not skip the cleaning. And most importantly, do not ignore what your house is trying to tell you. If the caulk keeps failing, your house is moving too much. You might need to look at the floor leveling or the joist spacing in the crawlspace. Flooring is a science of layers. If the bottom layer is wrong, the top layer is just a lie. I have spent my life uncovering those lies and fixing them. Take the time to do it right. Your subfloor will thank you.
{“@context”:”https://schema.org”,”@type”:”HowTo”,”name”:”How to Properly Seal a Shower Corner”,”step”:[{“@type”:”HowToStep”,”text”:”Remove all existing caulk and residue using a scraper and alcohol.”},{“@type”:”HowToStep”,”text”:”Ensure the joint is completely dry using a heat gun.”},{“@type”:”HowToStep”,”text”:”Insert backer rod if the gap is larger than 1/4 inch.”},{“@type”:”HowToStep”,”text”:”Apply a bead of 100% neutral cure silicone.”},{“@type”:”HowToStep”,”text”:”Tool the bead for a smooth finish and let cure for 24 hours.”}]}