Stop Your 2026 Carpet From Bunching With The 5-Point Tension Test
Most guys skip the leveling compound. They think the underlayment will hide the dip. It won’t. I spent three days grinding concrete on a job last month just so the floor wouldn’t click like a castanet. That experience taught me that even the most expensive textiles fail if the foundation is trash. Carpet bunching is not a product failure. It is a physics failure. When you see those ripples in a living room, you are looking at an installer who didn’t respect the tension requirements of the secondary backing. In 2026, as manufacturing shifts toward thinner, more eco-friendly secondary backings, the old knee-kicker method is a recipe for a callback. You need a power stretcher and a dedicated tension test to ensure the floor stays flat for a decade. This guide breaks down the structural engineering of a carpet install that actually lasts.
The structural lie of the flat subfloor
Floor leveling is the most overlooked phase of a carpet install because people assume the pad absorbs the imperfections. A subfloor must be flat within 3/16 of an inch over 10 feet or the carpet will eventually migrate into the low spots. This movement creates the excess slack that manifests as a ripple. When you have a dip, the carpet pad compresses unevenly. This creates a pocket where the carpet backing is not fully supported. Every time someone walks over that spot, the carpet fibers are pushed down, and the backing shifts slightly. Over three years, that microscopic shift adds up to an inch of extra material. Without proper floor leveling, you are literally building a wave into your floor. I tell every apprentice that if they don’t see the level come out, they aren’t doing the job. You have to identify the high spots and grind them down or fill the low spots with a high-compression portland-based patch. Do not use the cheap gypsum stuff. It crumbles under the weight of furniture, and then you have a carpet bunching over a pile of dust.
“A floor is only as good as the subfloor beneath it; deflection is the enemy of every joint.” – Master Flooring Axiom
Why your 2026 carpet installation depends on the power stretcher
Carpet install quality is measured by the percentage of stretch achieved during the initial hook. A knee-kicker is only meant for positioning, never for final tensioning. To stop bunching, you must achieve a 1 to 1.5 percent stretch in both directions across the room. This requires a power stretcher that uses leverage to pull the entire textile across the subfloor. If you are working with a 20-foot room, you need to pull that carpet at least 3 inches before you hook it onto the tack strips. This creates a permanent state of tension. Think of it like a drumhead. If the drumhead is loose, it vibrates and folds. If it is tight, it stays flat regardless of the impact. Most installers are lazy. They use the kicker because it is faster, but the kicker only moves the top few inches of the carpet. The middle of the room remains loose. By the time the seasons change and the humidity hits, that loose middle expands and creates a hump. In 2026, the industry is seeing more polyester blends that have a higher thermal expansion rate than traditional nylon. This means the tension test is more important than it has ever been.
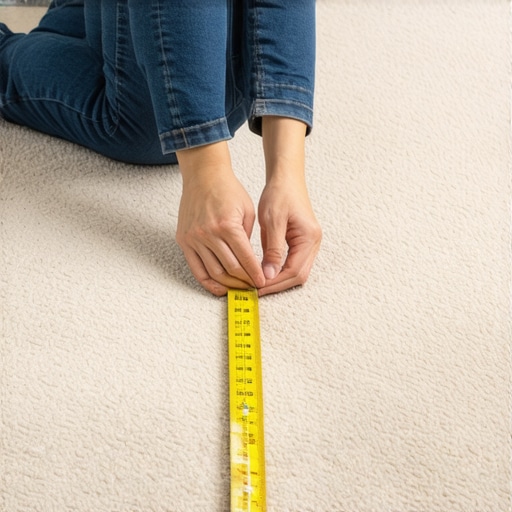
The 5-point tension test explained
Carpet bunching can be prevented by following a specific sequence of tension checks during and after the installation process to verify the grip. This test ensures the backing is under uniform stress from wall to wall. Following these steps eliminates the slack that causes ripples.
- Check the perimeter grip by attempting to lift the carpet edge with a pair of pliers. If it moves more than a fraction of an inch, the tack strip is not seated or the stretch is insufficient.
- Verify the linear expansion by marking a point on the backing and measuring its migration after power stretching. You should see a clear 1 percent increase in length.
- Perform the center-room lift test. Pull up on the carpet in the middle of the room. It should snap back down with an audible thud. If it floats back slowly, it is loose.
- Inspect the transition points. Check where the carpet meets laminate or other hard surfaces. These areas are high-stress zones.
- Analyze the shear force on the tack strip. The nails should be angled toward the wall to counteract the pulling force of the power stretcher.
[image_placeholder]
Comparing backing materials and stretch requirements
The material of the carpet backing determines the amount of physical force required to prevent bunching over time. Each material responds differently to tension and moisture levels. A heavy action-back carpet requires significantly more force from the power stretcher than a felt-back or a soft-back product. Knowing these differences prevents over-stretching which can tear the backing or under-stretching which leads to those ugly ripples.
| Backing Type | Minimum Stretch % | Tool Required | Humidity Sensitivity |
|---|---|---|---|
| Action-Back (Jute/Poly) | 1.5% | Power Stretcher | High |
| Felt Backing | 1.0% | Power Stretcher | Low |
| Soft-Back Polyester | 1.2% | Power Stretcher | Moderate |
| Unitary Backing | 0.5% | Power Stretcher / Direct Glue | Very High |
The chemistry of carpet pads and friction
The relationship between the pad and the carpet backing is a game of friction and resilience. If the pad is too soft, it allows the carpet to move too much. This movement is what leads to bunching. You want a high-density pad, at least 8 pounds, to provide a firm base for the carpet. When the pad is dense, it creates a high-friction environment that helps hold the carpet in place. Cheap, airy pads allow the carpet to slide across the surface. This is why you see ripples in high-traffic hallways. I always recommend a rubber-based pad for high-end installs. It doesn’t break down like the rebound foam and it provides a superior grip. Also, consider the thickness. A pad that is too thick, such as anything over 7/16 of an inch, creates too much vertical play. That vertical movement eventually turns into horizontal slack. It is a simple chain reaction of physics. You want the least amount of movement possible while still providing enough comfort for the foot. Laminate installers understand this too. If the underlayment is too squishy, the locking joints snap. Carpet is the same. If the pad is too squishy, the tension fails.
“Proper stretching is not a suggestion; it is a structural requirement for the longevity of the textile.” – Carpet Installation Standard
Moisture barriers and the concrete slab reality
The moisture in your concrete slab is a silent killer of carpet tension. Concrete is a sponge. It pulls moisture from the earth and releases it into your home. If that moisture gets trapped under the carpet, it weakens the latex bond in the secondary backing. Once that bond softens, the carpet loses its structural integrity and begins to expand. This is why you see so many ripples in basement carpets. You must test the slab for moisture before you even think about an install. Use a calcium chloride test or an in-situ probe to check the relative humidity of the slab. If the RH is over 75 percent, you need a moisture barrier. I have seen guys throw down a cheap plastic sheet, but that just traps the water and causes mold. You need a breathable barrier or a topical sealer that can handle the vapor emission. When we talk about showers, we talk about waterproofing. You should think of your basement slab with the same level of respect. If the water comes up, your carpet is going to move.
The ghost in the expansion gap
Transitions are where most installers fail. When you move from carpet to laminate, you need a transition strip that allows for the independent movement of both materials. Laminate is a floating floor. It expands and contracts with the seasons. If you anchor the carpet too tightly to the laminate transition, the laminate will pull the carpet and create a bunch right at the doorway. You need to leave a proper expansion gap for the hard surface while ensuring the carpet is tucked into a Z-bar or a specialized transition strip. This keeps the carpet under tension without being affected by the movement of the adjacent floor. I often see people try to use a simple T-molding for everything. That is a mistake. A T-molding doesn’t provide the grip required to hold a tensioned carpet. You need a transition that actually bites into the carpet fibers and holds them back. This is especially true near showers or bathrooms where the humidity is constantly fluctuating. The wood or laminate near a bathroom will move more than the floor in a bedroom, so that transition needs to be rock solid.
Why your subfloor is lying to you
A subfloor might look flat to the naked eye, but it is rarely true. Plywood seams can swell. Concrete can have a slight crown. These small variances are the origin of the 2026 bunching crisis. As carpet manufacturers use more recycled content, the backings have become less rigid. This means they are more likely to conform to the shape of the floor. If your floor has a crown, the carpet is stretched over that high point. As people walk over it, they push the carpet down the sides of the crown, effectively lengthening the material. This creates slack at the base of the hump. The only way to fix this is to address the subfloor before the pad goes down. Use a 10-foot straight edge. If you see light under that straight edge, you have work to do. It might take an extra day of prep, but it saves you from coming back in two years to restretch the whole house for free. No one likes the smell of floor wax and concrete dust, but it is the smell of a job done right.
The final verdict on permanent tension
In the end, stopping carpet bunching is about refusing to take shortcuts. It is about understanding that carpet is a structural component of the room, not just a rug you threw on the floor. If you follow the 5-point tension test, if you use a power stretcher, and if you obsess over floor leveling, your carpet will stay as flat as a sheet of glass. Most homeowners don’t understand the chemistry of the adhesives or the physics of the stretch, but they do understand when their floor looks like a mess after three years. Be the installer who understands the science. Respect the NWFA and CRI standards. Do not let a single room go without a power stretch. Your knees might hurt today, but your reputation will stay intact. It is about the long game. It is about building a floor that can handle the weight of life without buckling under the pressure. The 2026 standards are higher, and your installation methods must evolve to meet them. Check your tension. Verify your level. Secure your transitions. That is how you stop the bunching before it ever starts.