I’ll never forget when I first noticed those stubborn cracks appearing in my bathroom’s shower grout. It was early morning, and as I stepped out of the shower, a tiny hairline fracture caught my eye. At first, I brushed it off, thinking it was just a minor issue. But over time, those cracks widened, water started seeping through, and I realized I had to do something—fast. That moment of frustration turned into a lightbulb moment for me, leading to a simple, effective trick that I now swear by. If you’re tired of staring at unsightly grout cracks that just won’t quit—trust me, I’ve been there—I’ve got good news. Today, I’m going to show you how to repair your shower grout in just 10 minutes, saving you time, money, and headaches.
Why You Shouldn’t Ignore Those Cracks
It might seem tempting to just ignore grout cracks, especially if they seem minor. But did you know that small imperfections can quickly escalate into bigger problems? Water can seep behind the tiles, causing mold, mildew, or even damage to the subflooring. According to industry experts, neglecting grout cracks can lead to costly repairs down the road—sometimes costing hundreds or even thousands of dollars. That’s why tackling these cracks early on is crucial. A quick fix today can prevent a major renovation tomorrow. I learned this the hard way early in my DIY journey, when I jumped into re-tiling without addressing the root issue, only to watch cracks reappear within months. To avoid that mistake, I now focus on simple, effective solutions that work in the short term and last long. Curious if your grout cracks are serious enough to warrant immediate action? Let’s find out.
Is Your Shower Grout Cracking Actually Worth the Hype?
If you’re skeptical about quick fixes, I get it. You’ve probably heard that sealing or regrouting takes hours or costs a fortune. But here’s the honest truth: many DIY methods don’t last because they overlook the underlying cause, like movement in the shower floor or improper sealing. A mistake I made early on was simply applying grout sealant without checking if the cracks were due to a structural issue. That was a waste of time. Real solutions require understanding why the cracks happen, and that’s exactly what we’ll cover next. If you’ve been hesitant because you think it’s too complicated or temporary, I promise—what I share is straightforward and designed to give you long-lasting results.
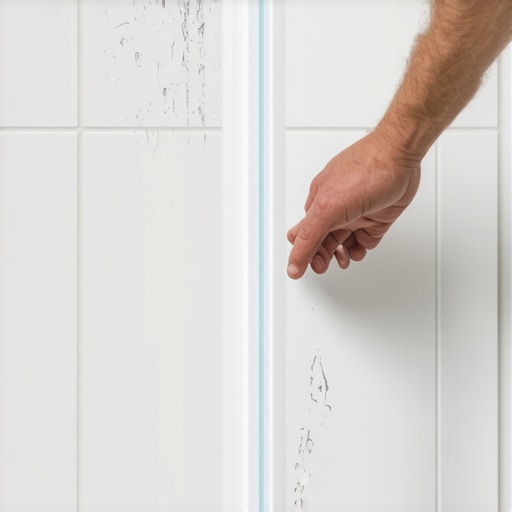
Now that we’ve set the stage, let’s dive into my proven 10-minute trick to fix those pesky grout cracks once and for all. Ready? Let’s go!
,
Prepare Your Workspace and Tools
Start by gathering everything you’ll need: a grout saw or utility knife, a vacuum or brush, polyurethane or epoxy grout sealer, a small putty knife, a sponge, and high-quality waterproof grout. I learned this the hard way when I forgot my grout saw and had to improvise, wasting precious time. Clearing the area and protecting surrounding surfaces with painter’s tape can prevent messes and accidental damage.
Remove the Damaged Grout
Carefully scrape out the cracked or crumbling grout using a grout saw or a utility knife—think of it like peeling away a damaged layer of paint to reveal the clean surface beneath. Apply gentle pressure; rushing can damage adjacent tiles. For stubborn grout, I used a Dremel with a rotary cutter, which sped up the process significantly. Vacuum out dust and debris thoroughly, as leftover particles can compromise the new grout’s adhesion.
Clean and Dry the Joints
Use a brush or damp cloth to remove any residual dust or residue from the joints. Ensure the area is completely dry before proceeding; moisture can weaken the seal and lead to future cracks. Once dry, inspect the joints to confirm they are free of old grout. This step reminded me that even small debris can undermine a repair, leading to re-cracking within weeks.
Apply New Waterproof Grout
Mix your waterproof grout according to the manufacturer’s instructions, aiming for a peanut butter consistency. Load your small putty knife or grout float and press the grout firmly into the cleaned joints at a 45-degree angle—like packing a suitcase tightly to prevent shifting. Work in small sections to prevent the grout from drying too quickly. I found that working methodically ensured a smooth, even surface, avoiding common issues like air pockets or gaps.
Clean Excess Grout and Seal the Surface
After pressing, use a damp sponge to wipe off excess grout, rinsing frequently—imagine polishing a gem to reveal its shine. Wait about 15-20 minutes for the grout to set, then gently buff the tiles with a dry cloth. Once fully cured, apply a high-quality waterproof sealer to the grout lines to prevent future water damage. I sealed my grout twice, which provided extra reassurance against moisture ingress, especially in high-use showers.
Final Tips for Long-Lasting Results
Regular maintenance extends the life of your grout repair. Keep an eye out for early signs of cracking, and reseal as needed—it’s like giving your shower a health check-up. Avoid harsh chemical cleaners, which can erode grout over time. Remember, proper initial application makes all the difference; a well-sealed and properly applied grout can last for years with minimal upkeep.
For a comprehensive approach that prevents future issues, consider inspecting your shower’s drainage and waterproofing. Check out my post on common shower waterproofing mistakes to ensure your entire space remains durable and leak-free.
 Even seasoned DIYers and experienced contractors often fall prey to misconceptions about flooring and bathroom renovations. One common myth is that installing carpet, laminate, or tile is straightforward, but oversimplifying these processes can lead to costly mistakes. A prime example is underestimating the importance of proper floor leveling—a step that many skip or rush. Without a perfectly even subfloor, laminate planks can develop gaps, cracks, or bounce, wasting your time and money. According to industry expert Susan Bower, improper underlayment preparation is “the silent killer” of long-lasting flooring. For showers, many assume applying sealant or waterproofing once is enough, yet neglecting critical nuances—like sealing edges, drain overlaps, and niche corners—often causes leaks and mold. Andrea Evans, a bathroom waterproofing specialist, emphasizes that “a single misstep in shower waterproofing can result in severe water damage within months.” Meanwhile, a frequent mistake in carpet installation is relying solely on tack strip placement without considering seam placement and padding quality, which can lead to fraying or buckling over time. As seen in this comprehensive guide on carpet tack strip errors, these small oversights compound into big headaches. Additionally, many underestimate the importance of precise floor leveling before installing laminate. A slight slope or dip—less than a quarter inch—can cause planking to wobble or click, jeopardizing the entire floor’s durability. Expert tips suggest testing your subfloor with a long straightedge or level and addressing uneven spots with self-leveling compounds from trusted sources like floor levelers. Ultimately, understanding these nuances helps prevent future repairs and ensures a professional-looking result. Have you ever fallen into this trap? Let me know in the comments.Maintaining your flooring and shower installations over time requires more than just quick fixes; it demands precision tools and consistent routines. One of my go-to equipment pieces is a high-quality grout saw featuring tungsten carbide blades, which I personally prefer because of its durability and ability to cleanly remove old grout without damaging surrounding tiles. This tool has saved me countless hours during periodic maintenance, especially when addressing small cracks or resealing corners. For leveling concrete and subfloors, I rely on a laser level such as the DeWalt DW088K, which provides pinpoint accuracy—even in poorly lit spaces—ensuring that laminate or tile floors stay flat and crack-free. Precision matters because uneven subfloors are a common culprit behind future cracks and squeaks, as explained in expert guides like those found on floor leveling tips. I always complement this with a self-leveling compound from a trusted brand, which I pour using a gauge rake to distribute it evenly, preventing dips that could compromise the entire flooring system. For ongoing maintenance of showers with tile or laminate, a handheld steam cleaner such as the Bissell SteamShot can be invaluable for removing mold and mildew buildup without harsh chemicals, prolonging the life of sealants and grout.
Looking ahead, I believe that smart moisture sensors integrated into subfloor layers will become standard practice, enabling real-time monitoring and early detection of leaks or water intrusion. This trend aligns with the increasing need for durable, water-resistant solutions in bathroom renovations.
**How do I keep my installations in top shape over time?** Regularly inspecting grout and sealing it every 1-2 years significantly extends the lifespan of showers and floors. Additionally, using a detailed routine with these specific tools—like the tungsten carbide grout saw and laser level—helps prevent problems before they escalate. For example, addressing small cracks revealed during routine checks with a high-grade epoxy grout sealer can prevent moisture ingress, which otherwise leads to mold or structural damage. If you haven’t already, try applying a professional-grade sealer after your next maintenance session, and watch how it keeps your surfaces flawlessly protected for years.
For deeper insights, check out this comprehensive guide on bathroom renovation tips, which emphasizes tool selection and preventative maintenance as key to long-term durability. Investing in these specific tools and adopting a regular maintenance schedule will save you time, money, and stress in the future. Remember, the right equipment is only part of the equation—consistent checks and proactive upkeep make all the difference.
What I Wish Someone Told Me Before My First Shower Repair
One of the toughest lessons I learned was the importance of patience—not rushing through each step of the grout repair process. Jumping in without thorough preparation usually meant more cracks appearing later. Also, understanding the root cause—like an unstable subfloor—prevents recurring issues. Finally, investing in quality tools from the start saved me money and headaches, emphasizing that good equipment makes all the difference.
My Go-To Arsenal for Bathroom Fixes
Over the years, I’ve curated a set of trusted tools that ensure lasting results. A tungsten carbide grout saw is indispensable for clean removal, while a laser level helps identify uneven surfaces that cause cracks. High-quality waterproof grout and a good grout sealer from brands I trust keep water intrusion at bay. These tools streamline work, reduce flaws, and are worth every penny for a resilient bathroom.
Your Next Steps Toward a Leak-Free Shower
Remember, DIY success lies in proactive maintenance and understanding your space’s unique needs. Regularly inspecting grout lines, resealing as necessary, and correcting minor cracks early can extend your shower’s lifespan. Embrace these habits, and you’ll enjoy peace of mind knowing your bathroom remains dry and cozy for years to come. You’re capable of transforming frustrating repairs into simple, satisfying projects—so don’t hesitate to start today.