I remember the moment clearly—after installing new carpet in my living room, I started hearing those stubborn squeaks every time someone walked across the floor. It was like a secret concert of creaks and groans, and I felt the frustration rising. Turns out, I had overlooked some critical mistakes with the tack strip that would later cause issues well into 2026. That lightbulb moment made me realize how these seemingly small errors can create big problems over time.
Why Your Carpet Tack Strip Could Be the Culprit Behind 2026 Floor Squeaks
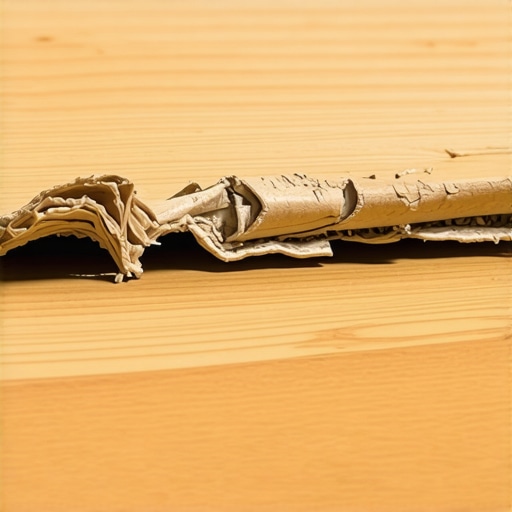
Many homeowners don’t realize that the quality of your tack strip installation plays a vital role in the long-term durability of your flooring. If not done correctly, this tiny strip can become the source of constant squeaks and creaks. These noises aren’t just an annoyance—they can signal underlying issues with subfloor stability or improper fastening methods. In fact, a study from flooring expert sources highlights that improper tack strip installation is one of the leading causes of homeowner complaints about floor noises that persist years after installation.
Personally, I made a classic mistake early on—I didn’t pay enough attention to the angle and fastening technique of the tack strip. That oversight led to a wobbly installation that eventually caused the boards to shift and squeak. I learned the hard way that proper technique and avoiding common pitfalls are essential to preventing 2026 headaches. If you’re wondering whether that squeak coming from your home is a sign of a deeper problem, you’re not alone. Many homeowners face this issue without even realizing how much they might be able to fix it themselves.
But don’t worry, I’ll guide you through the common errors related to carpet tack strips that often lead to floor noise issues. With some simple adjustments, you’ll be able to improve your flooring’s stability and silence those squeaks for good.
Is a Faulty Tack Strip Really Worth the Hype?
If you’ve ever thought that squeaky floors are just an unavoidable part of homeownership or a problem only a professional can solve, think again. Your approach to installing or fixing tack strips can make all the difference. It’s easy to underestimate how much these tiny strips impact the overall comfort and quietness of your space. I initially thought I could get away with shortcuts, but then I discovered that preparing the subfloor and carefully selecting and securing the tack strip are critical steps. If you’re curious about how to avoid these mistakes, check out our [floor leveling tips for a lasting home comfort](https://floorcraftstore.com/carpet-install-floor-leveling-tips-for-lasting-home-comfort-3).
Now that I’ve shared my experience, it’s time to dive into the specific errors that might be causing your 2026 floor squeaks and how to fix them.
Prep Your Subfloor Like a Pro
Before installing your carpet or laminate, ensure the subfloor is perfectly level. I once skipped this step and ended up with a floor that squeaked loudly within months. Use a laser level or long straightedge to identify dips and humps. For uneven patches, apply a self-leveling compound—think of it as pouring pancake batter to smooth out the surface. Follow the manufacturer’s instructions meticulously, as proper mixing and curing are crucial. If you’re unsure about the subfloor condition, check out our [3 self-leveling hacks](https://floorcraftstore.com/4-self-leveling-hacks-to-prevent-2026-floor-cracking) that can save you time and money.While many believe that proper installation techniques are straightforward, the reality is far more nuanced, especially when it comes to laminate flooring, floor leveling, carpet installation, and showers. A common myth is that using generic materials or skipping detailed steps won’t impact longevity. However, in my experience, these overlooked details can lead to costly repairs, like cracked laminate or persistent water damage, years down the line. One trap to avoid is assuming all subfloors are equal—uneven surfaces require tailored fixes. Many installers make the mistake of not thoroughly testing subfloor flatness, risking future squeaks and cracks. For advanced DIY enthusiasts, understanding how to effectively level uneven concrete using targeted techniques can prevent issues like delaminations or uneven wear—check out our comprehensive [concrete leveling strategies](https://floorcraftstore.com/3-tactics-to-level-concrete-floors-before-your-2026-install). When it comes to showers, a common misconception is that sealing the visible tiles is enough, but expert advice highlights the importance of addressing hidden leak zones behind the walls and beneath flooring—read our [waterproofing hacks](https://floorcraftstore.com/5-hidden-shower-leak-zones-most-2026-installers-miss-checklist) for a lasting solution. Why do so many get these details wrong? It often comes down to a lack of understanding of underlying structural and moisture management nuances. For example, insufficient attention to expansion gaps in laminate or gaps in sealing can result in future buckling or mold growth. Studies indicate that neglecting comprehensive prep work significantly increases the likelihood of failures—learn more in our [laminate installation pitfalls](https://floorcraftstore.com/stop-laminate-floor-peaking-4-installation-fixes-2026). So, what steps can you take to elevate your project from average to expert? Meticulous testing, choosing premium materials, and paying close attention to hidden zones are crucial. Don’t let overlooked nuances undermine your home improvement efforts. Have you ever fallen into this trap? Let me know in the comments.Maintaining your flooring, showers, and carpets over time requires the right tools and consistent upkeep to ensure lasting performance. One of my go-to items is a high-quality moisture meter, which I use to regularly check the moisture levels beneath floors and behind shower walls. This simple device can alert you to hidden leaks or excess dampness that, if ignored, could lead to costly repairs down the line. For example, monitoring moisture in areas prone to water exposure helps prevent mold growth and structural damage, ensuring your investment remains durable over the years. I personally rely on the Protimeter SurveyMaster because of its accuracy and ease of use, especially when diagnosing hidden issues that aren’t visible to the naked eye.
When it comes to floor leveling, a self-leveling compound is indispensable. I prefer Quikrete’s Self-Leveling Floor Screed because it provides a smooth, stable surface that minimizes future squeaks or cracks. Applying this correctly involves precise mixing and ensuring the subfloor is dust-free and primed—details that can make or break the outcome. Regular maintenance also involves tools like a microfiber mop and a good vacuum with a HEPA filter to keep surfaces dust and debris-free, reducing wear and tear over time.
For shower maintenance, a silicone caulking removal tool and a handheld steamer are underrated but highly effective. I use these to thoroughly clean and reseal shower joints, preventing water infiltration that can cause rot and mold. To extend the lifespan of your shower, it’s also wise to periodically inspect waterproofing membranes—especially in curbless designs where leaks can be subtle and hard to detect without proper tools. For expert advice on maintaining shower waterproofing, check out our [waterproofing hacks](https://floorcraftstore.com/5-critical-shower-sealing-spots-most-2026-installers-miss).
Looking ahead, I predict that advances in smart home sensors will revolutionize long-term maintenance. Imagine moisture detectors integrated with home automation that alert you immediately about leaks or humidity spikes, potentially saving thousands in repairs. Until then, regular manual inspections coupled with reliable tools are your best defense.
**How do I maintain my floors and showers to keep them in top shape over time?** Start with routine checks using a moisture meter for hidden problems, and ensure your subfloor is level with premium self-leveling compounds. These proactive steps can prevent a cascade of issues, from squeaks to water damage, that might otherwise go unnoticed until they become major repairs. Try incorporating a moisture monitor into your regular home checkup—it’s a game changer for early detection and long-term durability.
The Hardest Lesson I Learned About laminate,floor leveling,carpet install,showers
Over the years, I realized that overlooking the details of subfloor prep, like ensuring perfect flatness, can haunt you long after the initial install—leading to squeaks and costly repairs. The minute mistakes, such as rushing the leveling process, can set the stage for problems that only surface years later, reminding me that patience and precision are my best tools.
3 Myths About laminate,floor leveling,carpet install,showers That Held Me Back
One false belief was that a quick DIY fix could replace professional-grade prep work; I learned that shortcuts in waterproofing or subfloor preparation often cause surface failures down the line. Furthermore, I used to think all moisture meters were the same—until I found that choosing a reliable, accurate device like the Protimeter SurveyMaster greatly impacted my ability to catch hidden leaks early. Recognizing these misconceptions boosted my confidence and saved me time and money.
What Experts Won’t Tell You About laminate,floor leveling,carpet install,showers
One insider tip is that addressing hidden areas—like behind shower walls or beneath the carpet—can prevent hefty future repairs. For example, my discovery of overlooked waterproofing spots in the shower made all the difference in avoiding water damage and mold. Another lesson is the significance of monitoring moisture levels regularly, which empowered me to act swiftly if problems arose, emphasizing that proactive maintenance is key to longevity.
My Essential Toolkit for carpet,floor leveling,showers
Using a high-quality moisture meter like the Protimeter SurveyMaster has been a game-changer for early detection of hidden issues, saving countless headaches. For leveling uneven concrete or subfloors, Quikrete’s Self-Leveling Floor Screed provides a reliable, smooth surface—ensuring durability and reducing squeaks. When it comes to shower waterproofing, I trust a good silicone caulking removal tool and a handheld steamer for thorough sealing, preventing leaks before they start. These tools, backed by my personal experience, are invaluable for lasting results.
Transform Your Home Later
The journey of flooring and shower upgrades isn’t just about fixing problems—it’s about embracing a mindset of continuous learning and proactive care. By focusing on meticulous prep, smart tool use, and understanding subtle nuances, you can elevate your home’s durability and comfort. Remember, small, consistent actions today will pay dividends in peace of mind tomorrow. If you’re eager to refine your skills further, exploring detailed guides on [subfloor leveling](https://floorcraftstore.com/3-subfloor-leveling-fixes-to-stop-laminate-flooring-bounce-in-2026) or [shower waterproofing](https://floorcraftstore.com/5-critical-shower-sealing-spots-most-2026-installers-miss) can provide more tailored insights. Keep pushing forward—your future self will thank you.